


❤️ Would you like to save this?
By saving, we'll email this post to you for later. Unsubscribe anytime.
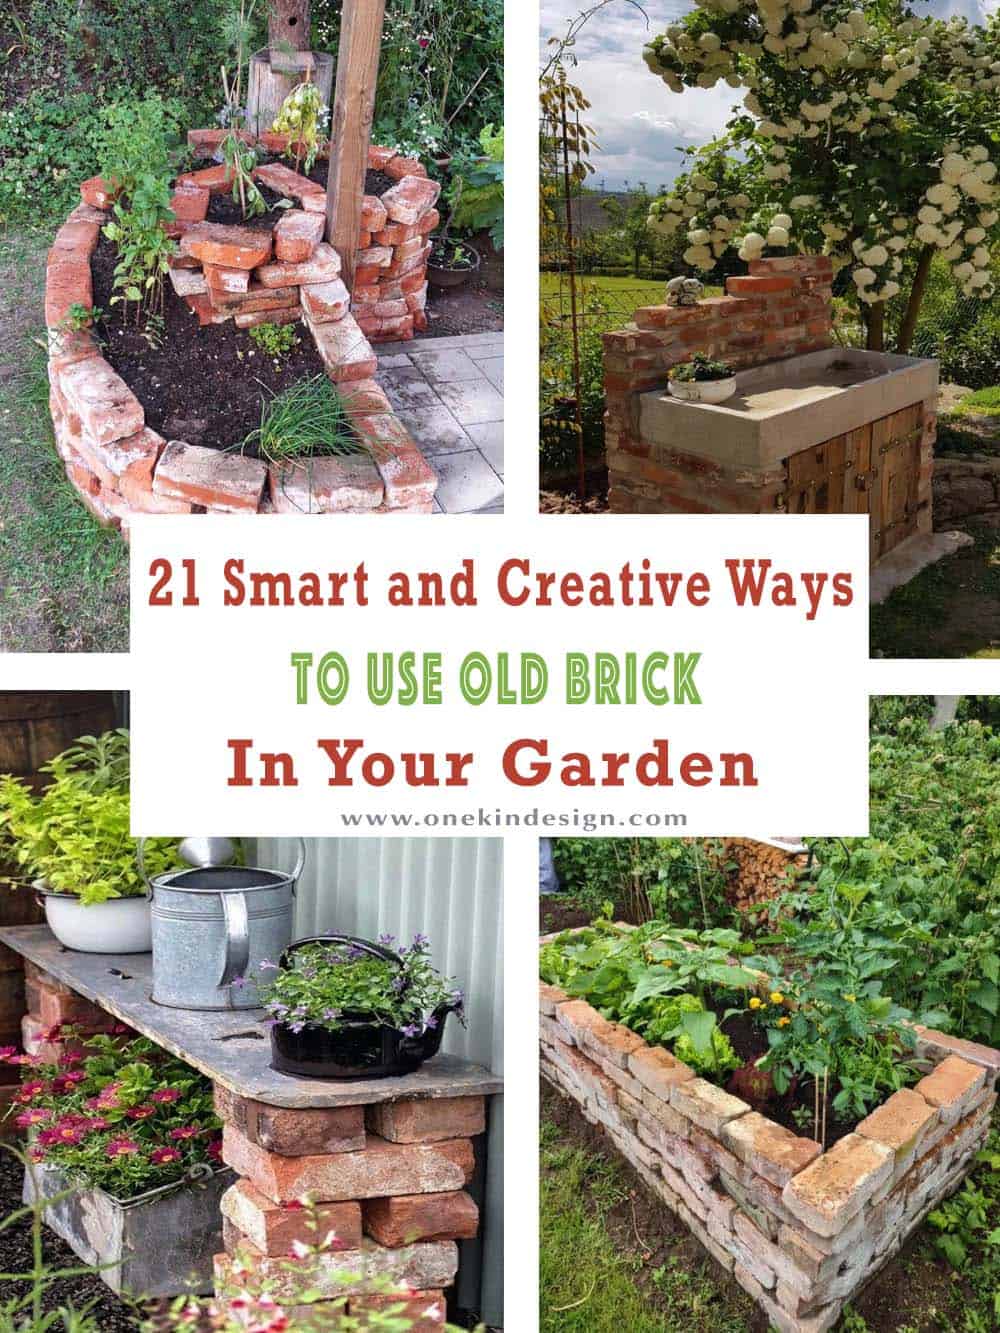
There are many ways to repurpose old bricks in your garden, from making garden borders to meandering garden pathways, raised planting beds, and even outdoor fire pits. Whether you have a stack of leftover bricks from a renovation project or picked some up secondhand (Craigslist, Facebook Marketplace, or use the Nextdoor app to ask your neighbors for any old bricks they may have lying around), these building blocks can add character to any outdoor space while giving them a second life!
Bricks are also an easy way to separate your garden from surrounding grass or lawn, giving beds a clean, defined edge. A great tip: lay bricks at a slight downward angle facing outward so a lawnmower wheel can glide right along the edge, creating a mowing strip so you never have to hand-trim along the border again.
For something different, stack bricks into a spiraling herb garden that uses vertical space while keeping different herbs separated. You can also use them to build a large planter or several smaller ones, filled with flowers that spill over the edges, or arrange them into mini decorative wells that add a nice touch to any corner of the garden.
If you have a pile of reclaimed bricks lying around somewhere, don’t get rid of them. There is so much you can do with them to incorporate them into your garden scheme. They can make your garden feel more intentional, more finished, and give it a little extra personality… and maybe a little more wild!
Continue below for some creative ideas on how to incorporate old bricks into your garden. Underneath each image, you will find links to all of the resources with further details to help with your garden planning.
Tell Us: Which one of these old brick garden ideas is your favorite, and why? Let us know in the Comments below!
1. A Meandering Herringbone Brick Pathway
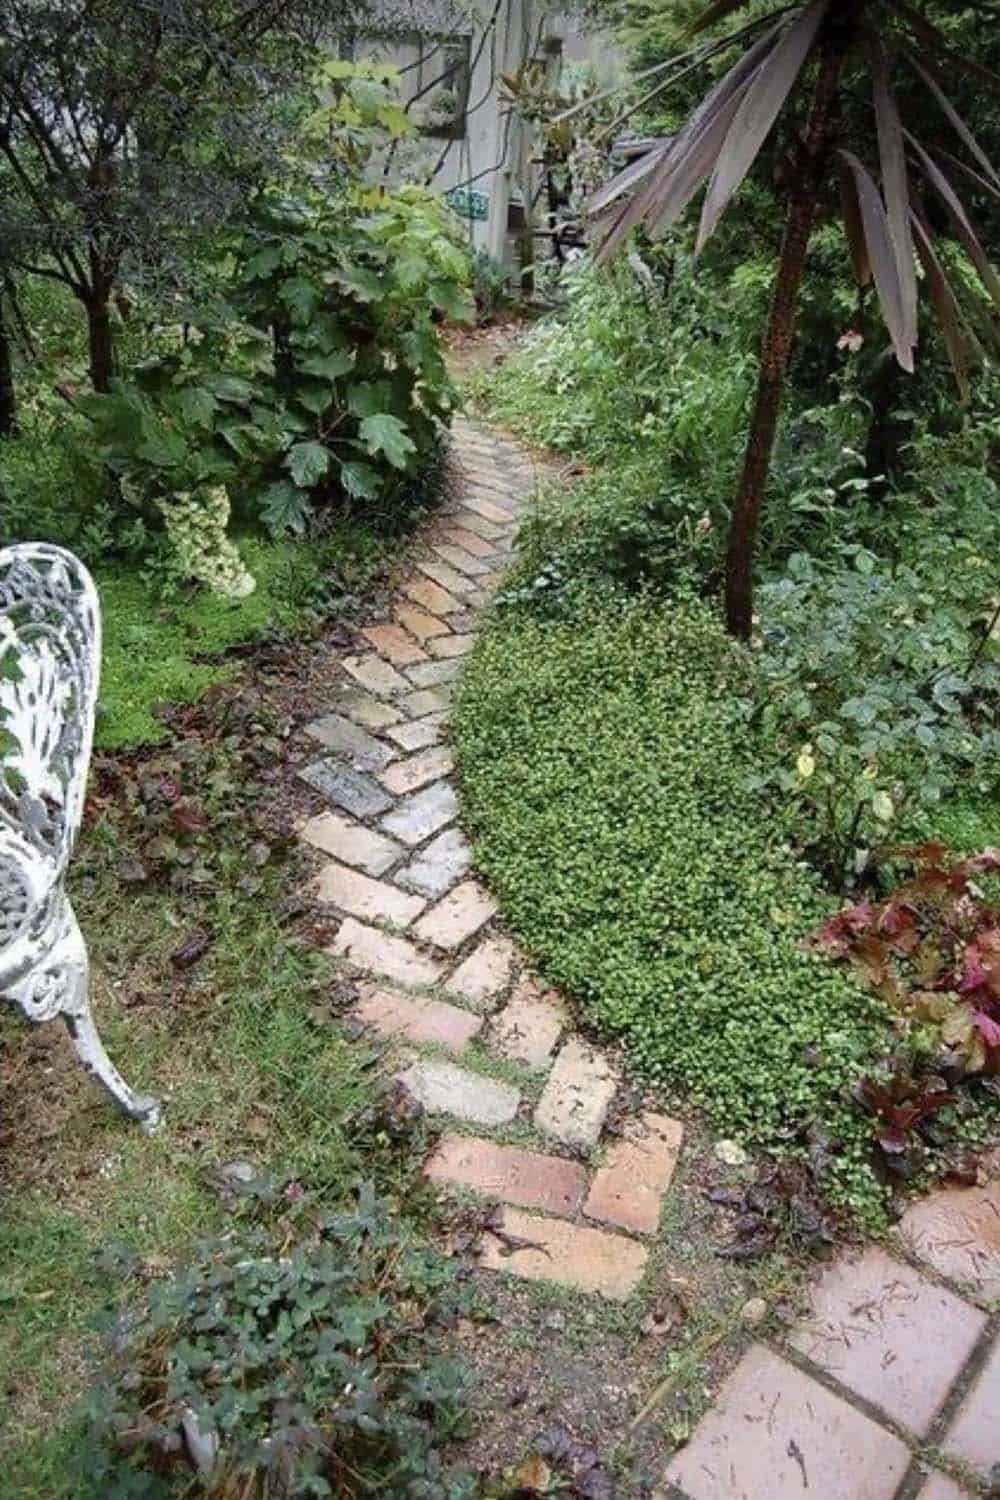
Mismatched reclaimed bricks form a curving herringbone path through the garden, softened by overhanging foliage and groundcover along the edges. Tip: To keep the bricks from sinking, lay the bricks on compacted sand or fine gravel so they stay stable while letting rainwater drain through the joints. (Photo Credit: Jenni Baker / Pinterest)
2. Quaint Basketweave Pattern Pathway
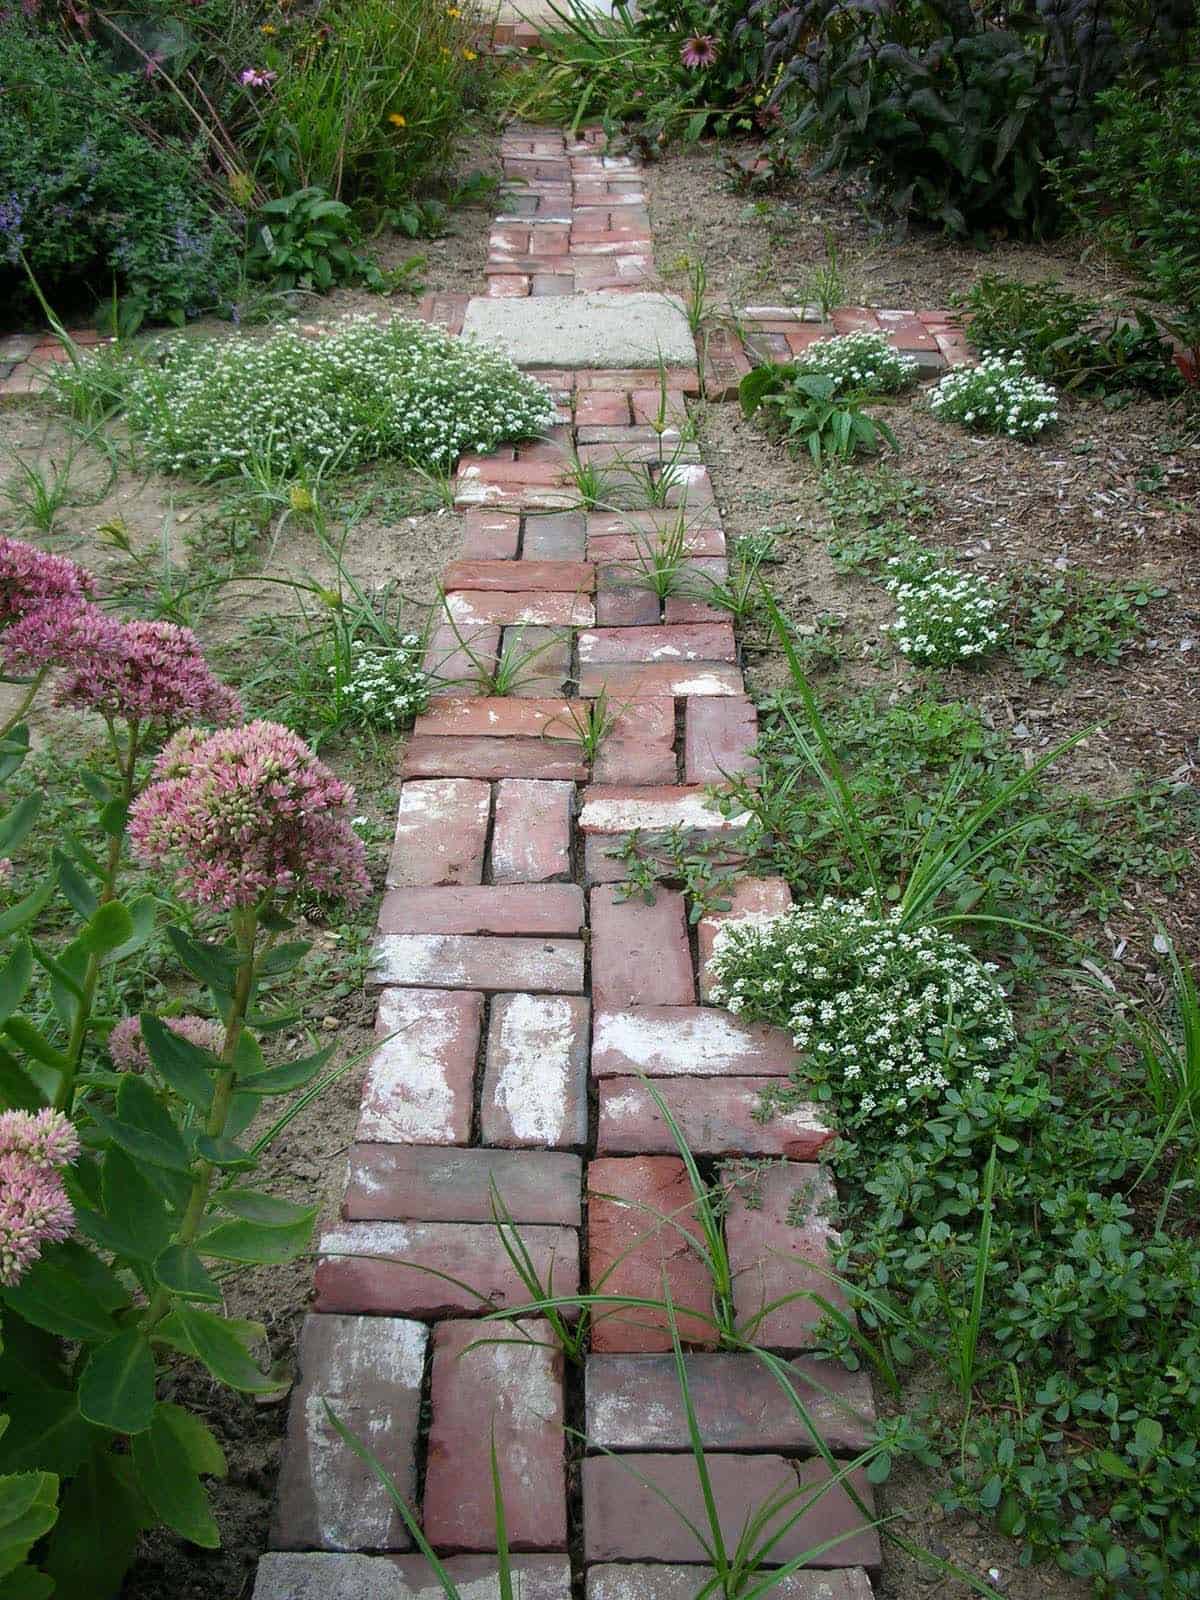
These bricks are from a chimney that was knocked down when the homeowner renovated the kitchen. The stone in the center was found under her old front porch, keeping a connection with her house. This pathway bisects the 19′ x 15′ front garden plot. The brick pathway was laid out in a basketweave pattern and leads to the front porch. Tip: To let plants grow naturally in the gaps, lay bricks with slightly wider joints and skip the mortar, using loose sand instead so roots can fill in. (Photo Credit: Rose Brier Studio)
3. Brick “Steppingstones” Set into White Gravel
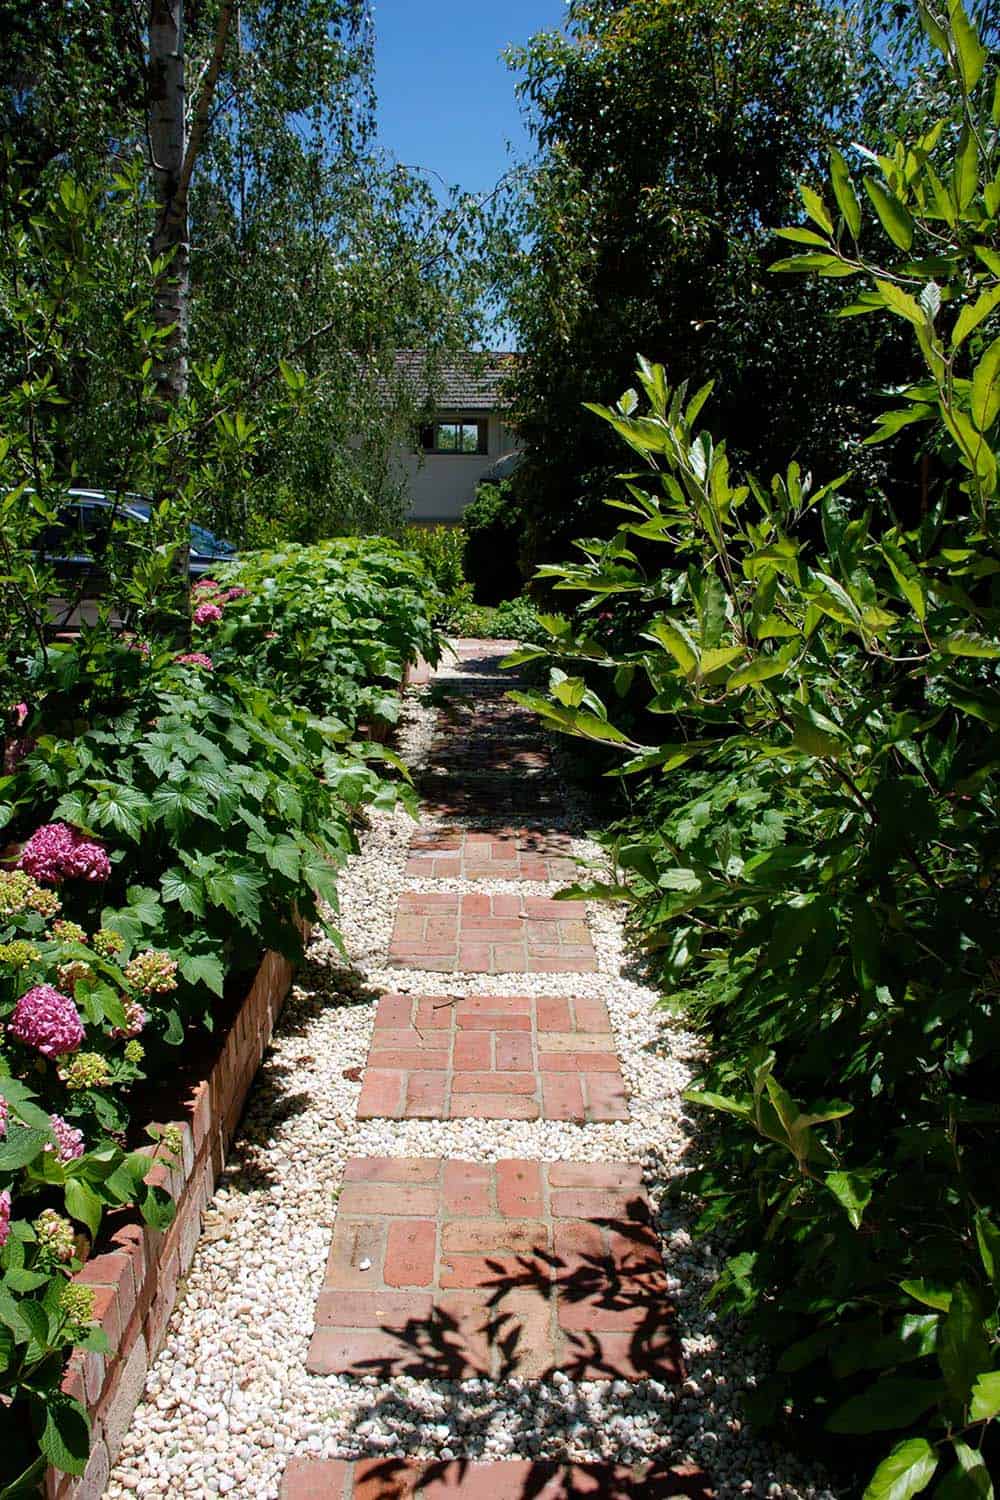
This brick pathway has a more informal style, using brick “steppingstones” surrounded by gravel. This makes the path feel lighter and more open than a solid brick walkway. A low brick edging defines the border of various plants, including hydrangeas. Tip: To keep gravel from migrating into planting beds, install a metal or brick edging restraint along both sides of the path before spreading the stone. (Photo Credit: Andrew Renn Design)
4. Brick Path to a Garden Sitting Area
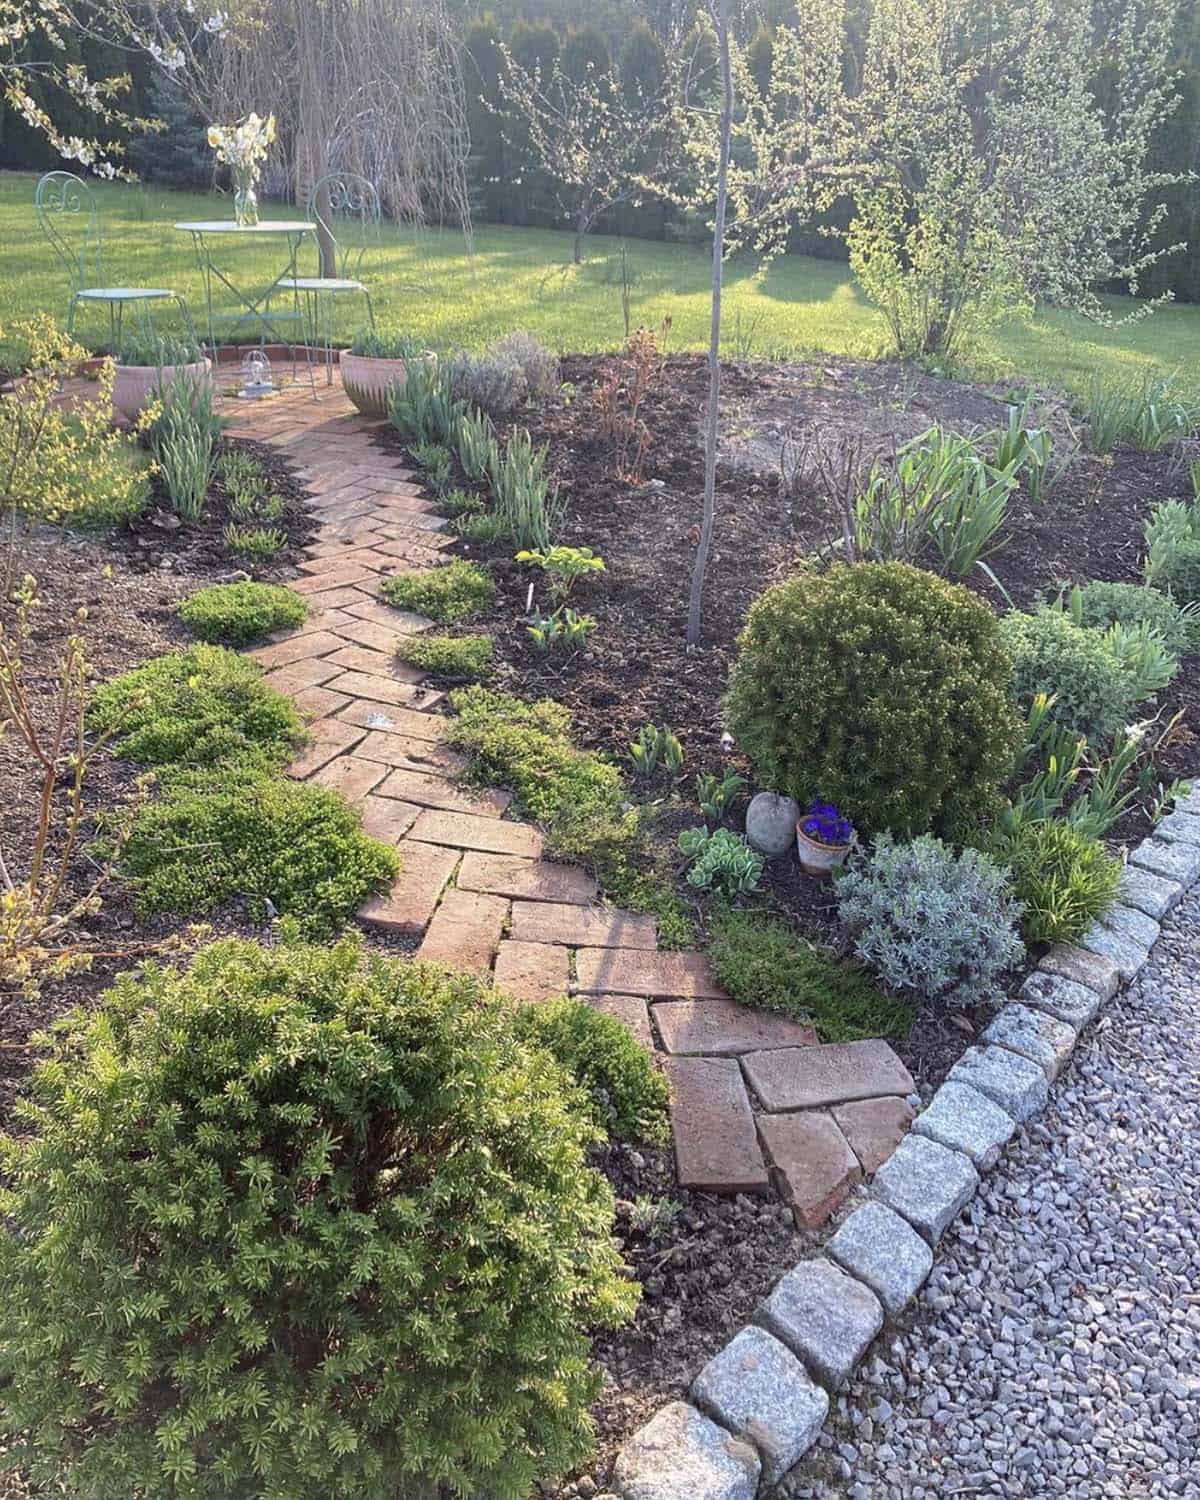
This brick path curves through an orchard filled with a densely planted bed of shrubs and perennials, leading up to a cozy bistro table and chairs tucked into the corner of the garden. A stone edging separates the bed from a gravel pathway on the right, keeping the two materials distinct. Tip: To help a curved path feel natural rather than forced, let the plants along the edges spill slightly over the bricks instead of trimming them back. (Photo Credit: @garden.goodies.parade / Instagram)
5. Brick Patio with Fire Pit

This small patio was fashioned with salvaged bricks that were found on-site. The simple design is enhanced by the varying colors and textures of the brick. A properly prepared sub base is the key to a successful brick or paver patio. To create the circle, start with the fire pit and then lay each circle outside of the last. It’s not difficult, but the important part is preparing the base of gravel and sand correctly. Without a proper bed, the finished surface will not stay even. No saw is required, at least with this rustic style and reclaimed brick.
Tip: The depth of gravel will depend on your climate and the load. If you experience a lot of freeze/thaw cycles and you want it to withstand a heavy load (like vehicles, etc.), then you will want a deep base of compacted gravel. Maybe 12+ inches. If not, you could get away with less. Here, the designer used roughly 10″ of gravel and 1-2″ of sand, plus the sand to sweep into the joints. (Photo Credit: Kingbird Design)
6. Brick Path Edged with Succulents
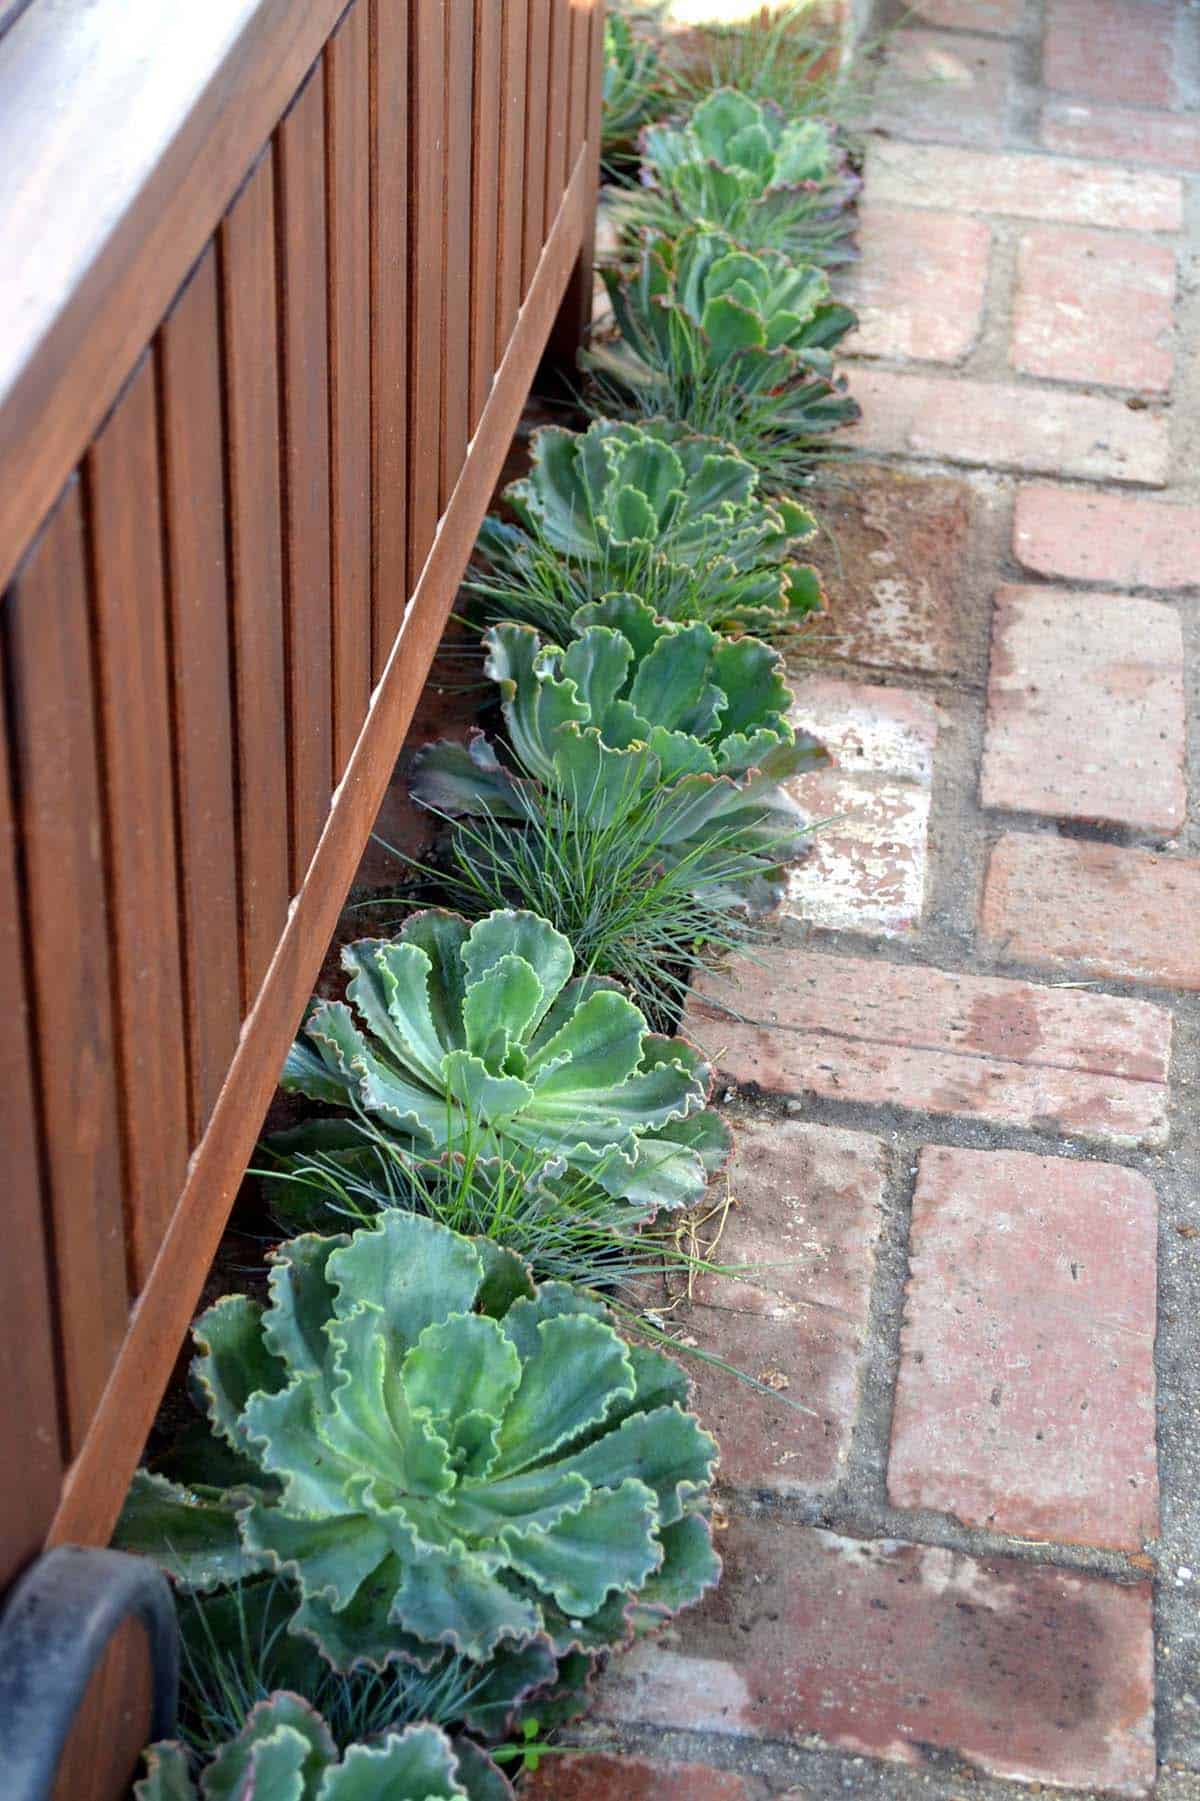
In this “Beach Contemporary” landscape project in Orange County, California, a row of Echeveria ‘Blue Curls’ succulents and blue fescue grass fills the narrow gap between a wood fence and reclaimed brick pathway, softening the transition and adding texture. Tip: To keep a tight planting strip like this thriving, choose drought-tolerant plants such as echeveria and blue fescue that can handle limited space and moisture. (Photo Credit: Living Gardens Landscape Design)
7. Red Brick Border Edging
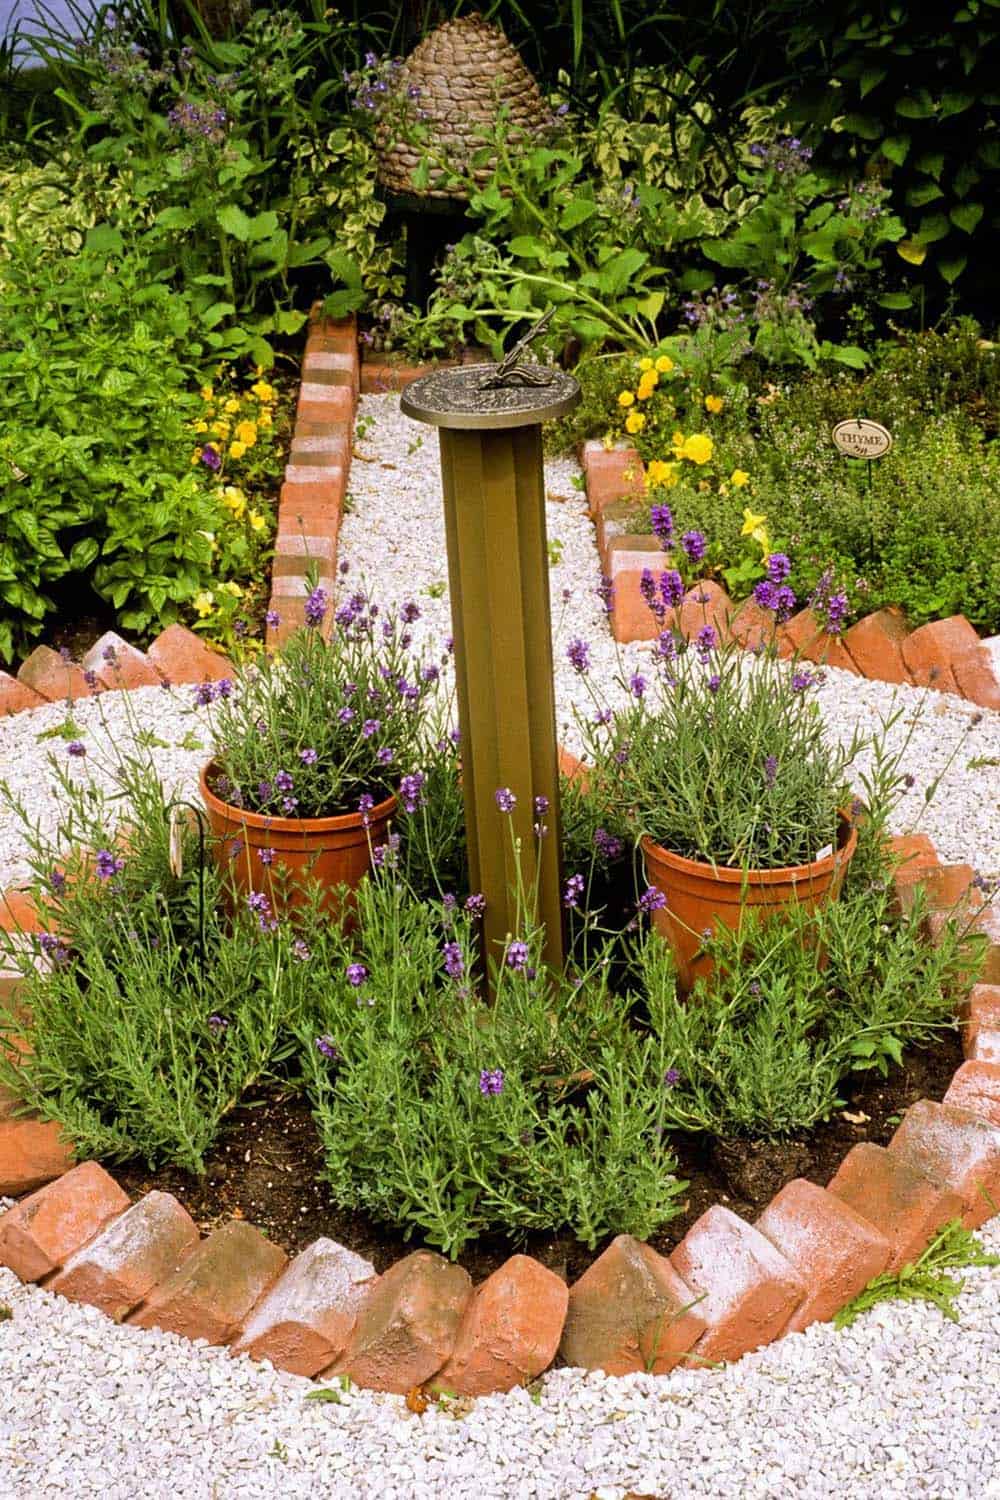
Bricks set on edge in a zigzag, sawtooth pattern outline this circular garden bed, adding a decorative border around lavender, potted plants, and a central sundial. White gravel pathways surrounding the bed continue the same brick edging, tying the whole design together. Tip: To create this sawtooth look, angle each brick at roughly 45 degrees and press it firmly into the soil so about half its height shows above ground. (Photo Credit: Lonny)
8. Higgledy-Piggledy Retaining Wall
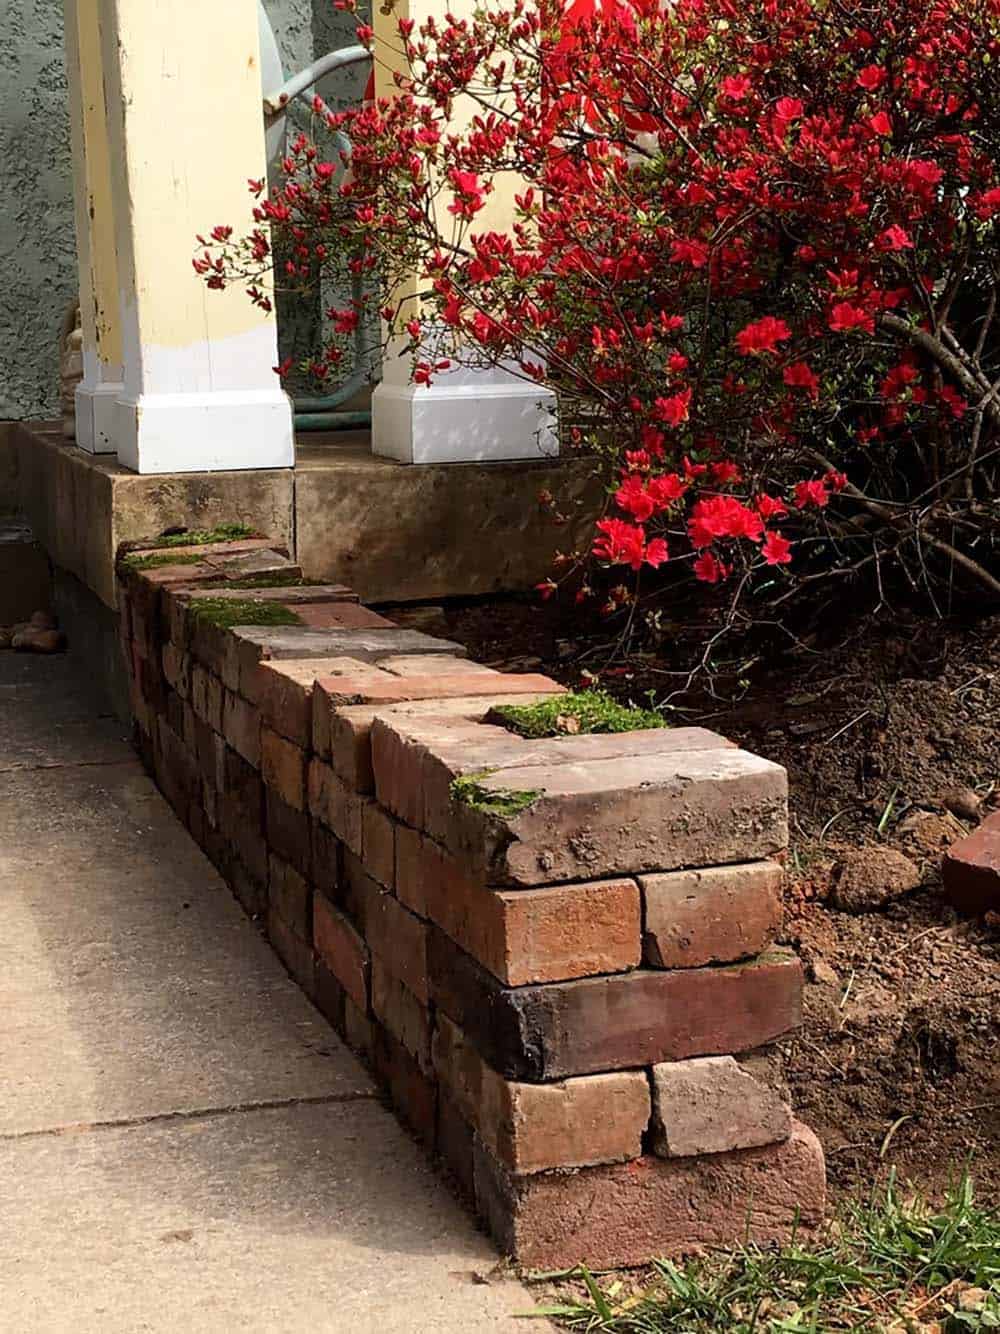
This low retaining wall embraces a “higgledy-piggledy” stacking style, with reclaimed bricks of different sizes and colors layered in an irregular pattern that pairs well with the blooming red azalea nearby. To create this wall, gather bricks and level the ground as best you can. Stack two bricks one way, then two more going the other way (just like Jenga), and repeat with your 3rd, 4th, and 5th stacks. Use a 2′ level to keep the wall even, filling in or removing dirt as needed to keep things tidy. Be sure you have plenty of extra bricks lying around to get the look you desire. Tip: To get this stacked look without mortar, choose bricks with flat, even faces so they sit securely even when laid at slightly different heights. (Photo Credit: Modern June Blog)
9. An Irregular Brick Garden Border
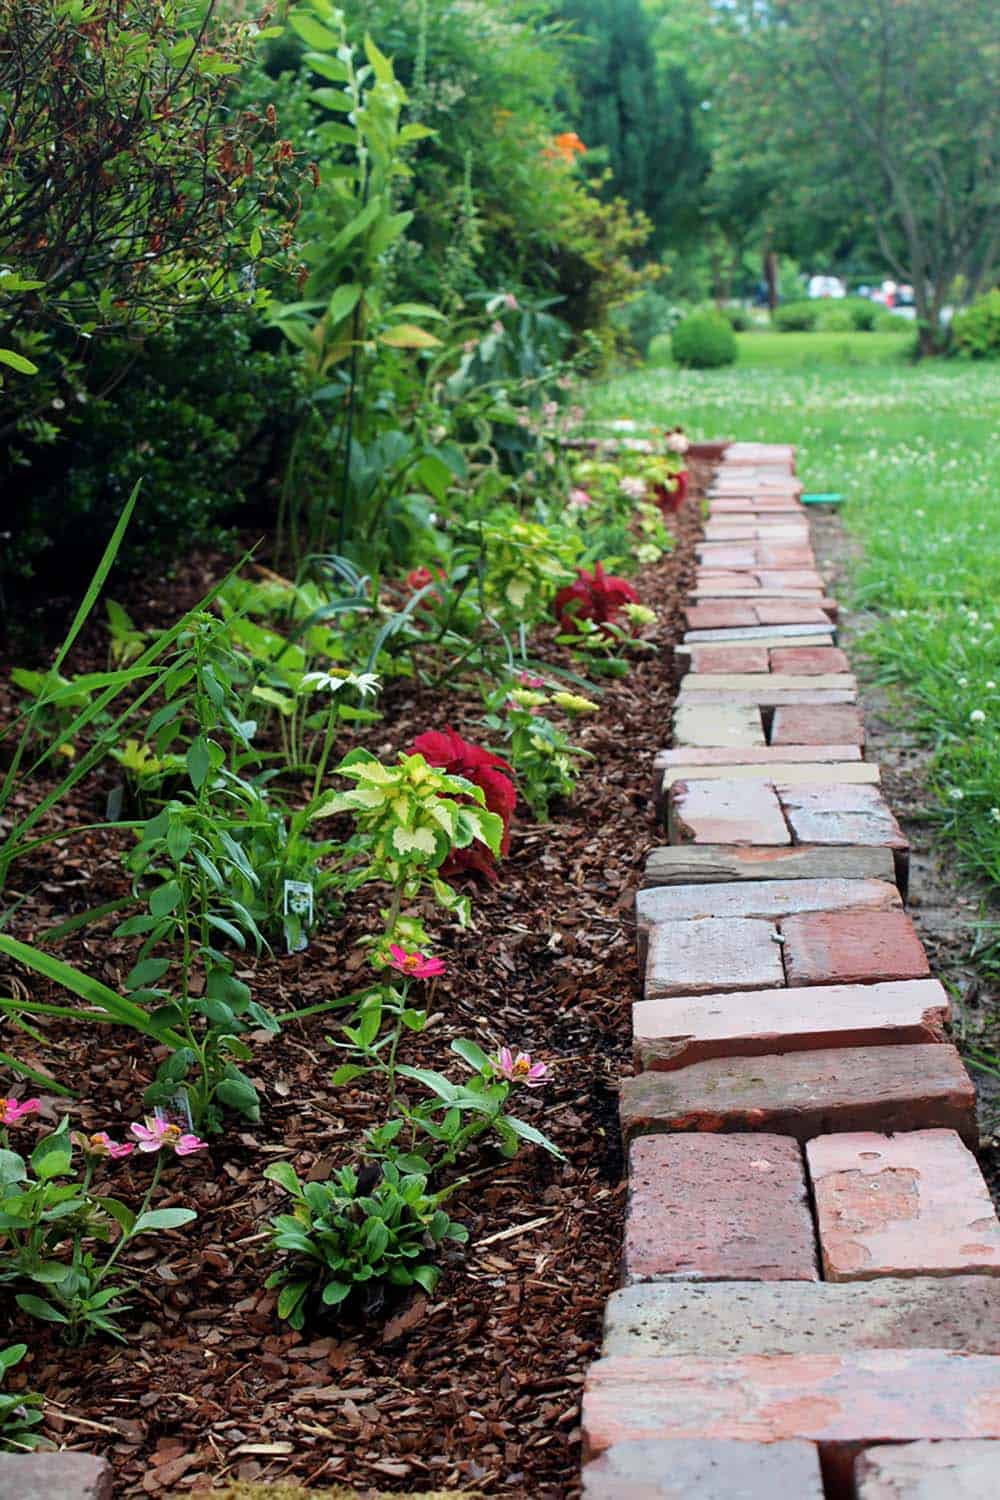
The bricks are laid flat, end-to-end, to create a clean, low-profile border between the mulched flower bed and lawn. The mismatched colors and slightly uneven placement give it a relaxed, handmade character, complementing the mix of coleus, zinnias, and daisies planted along the bed. Tip: To create a more stable, easy-to-maintain border, dig a shallow trench and set the bricks a couple of inches into the ground before backfilling. (Photo Credit: Modern June Blog)
10. Wide Brick Pathway Around a Garden Bed
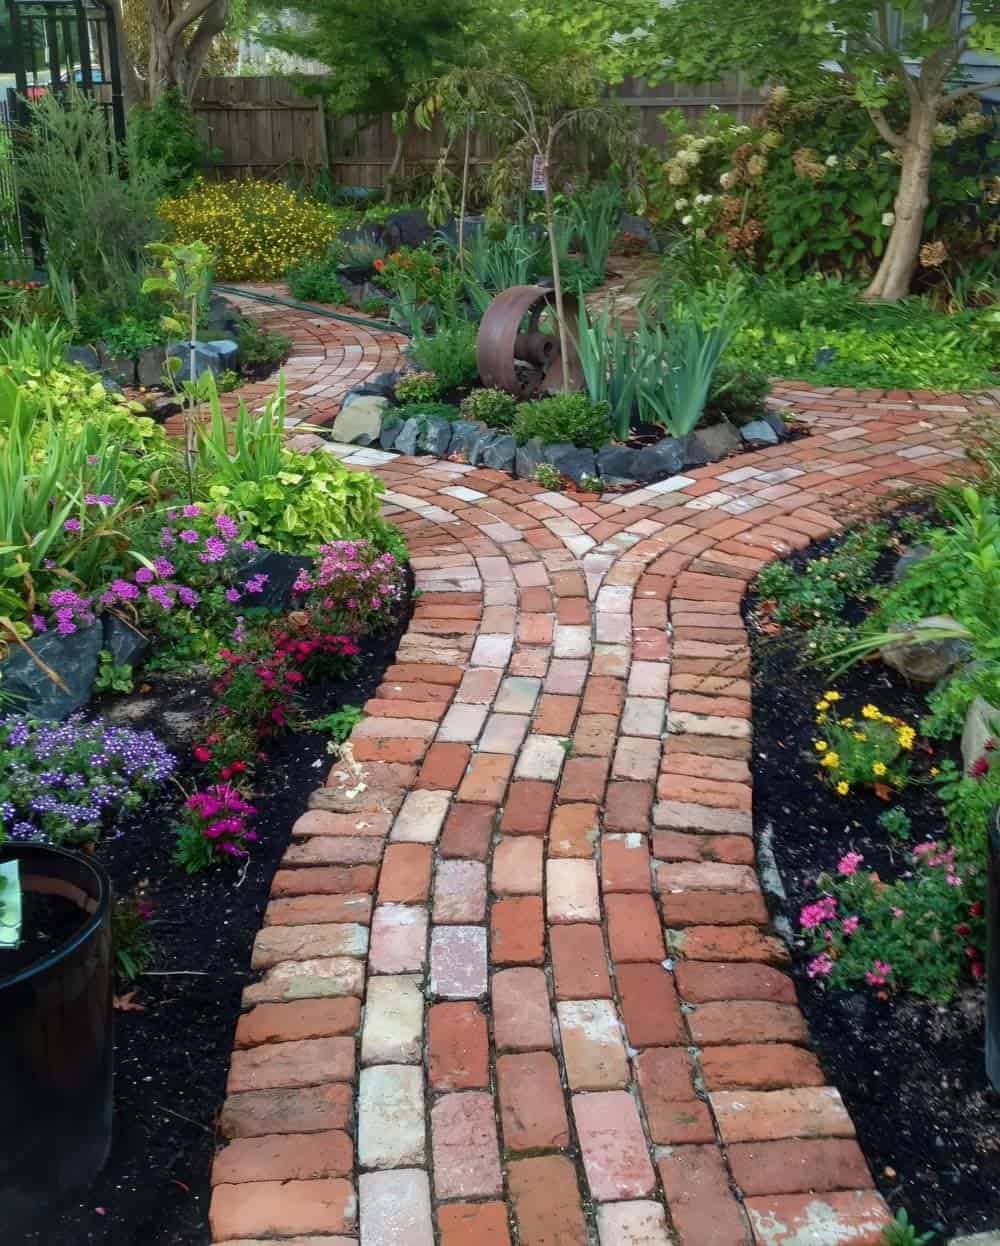
This wide brick path wraps around a raised, rock-edged planting bed, creating a natural focal point in the middle of the garden. The bricks are laid in a running bond pattern with mismatched tones, giving the path a soft, aged aesthetic that fits right in with the surrounding flowers and greenery. Takeaway: Plan a pathway split around a fixed garden feature, such as a raised bed, so the division feels intentional rather than arbitrary. (Photo Credit: Beth Weber / Pinterest)
11. Raised Brick Planting Bed
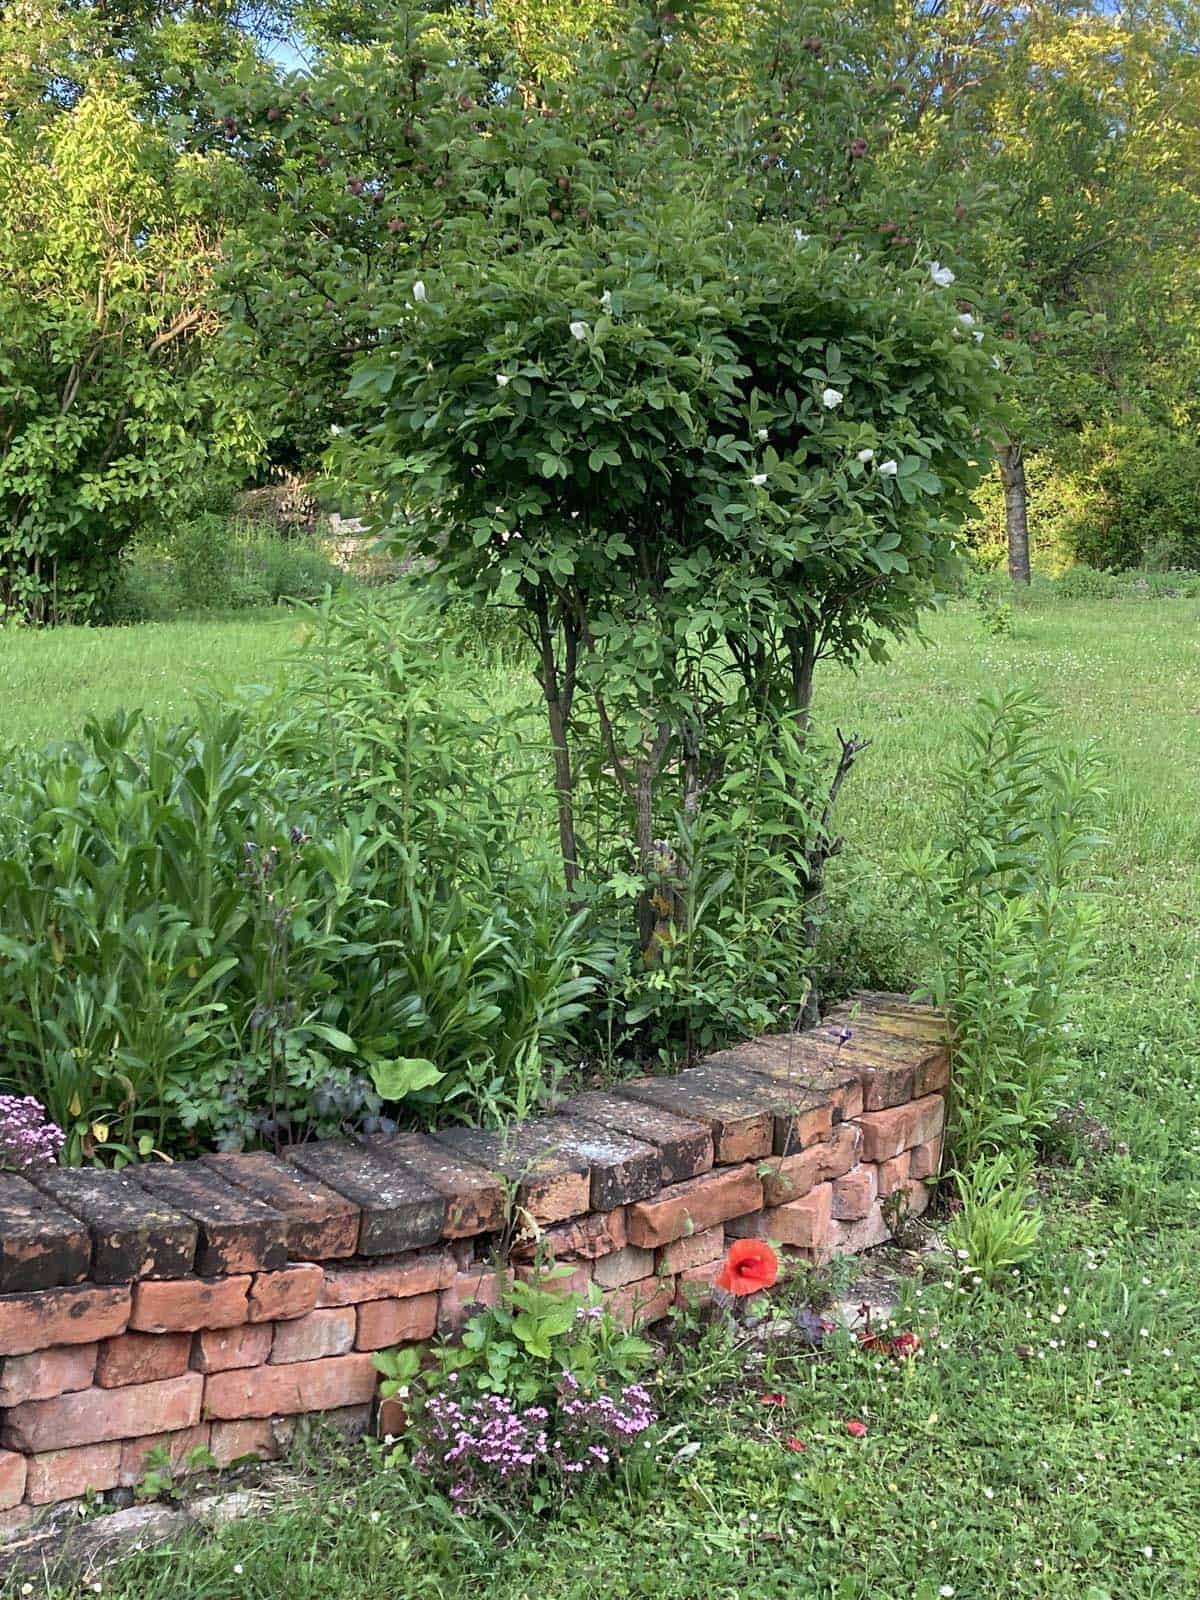
Stacked without mortar, this brick wall forms a raised planting bed with a curved corner, holding soil in place for a mix of perennials and flowering shrubs while blending naturally into the surrounding lawn. Moss and lichen growing on the bricks add to their aged, reclaimed character. Tip: To build a raised bed like this, stack bricks at least two or three high and stagger the joints between rows for added stability. (Photo Credit: Hilda / Pinterest)
12. Narrow Brick Pathway Through a Cottage Garden
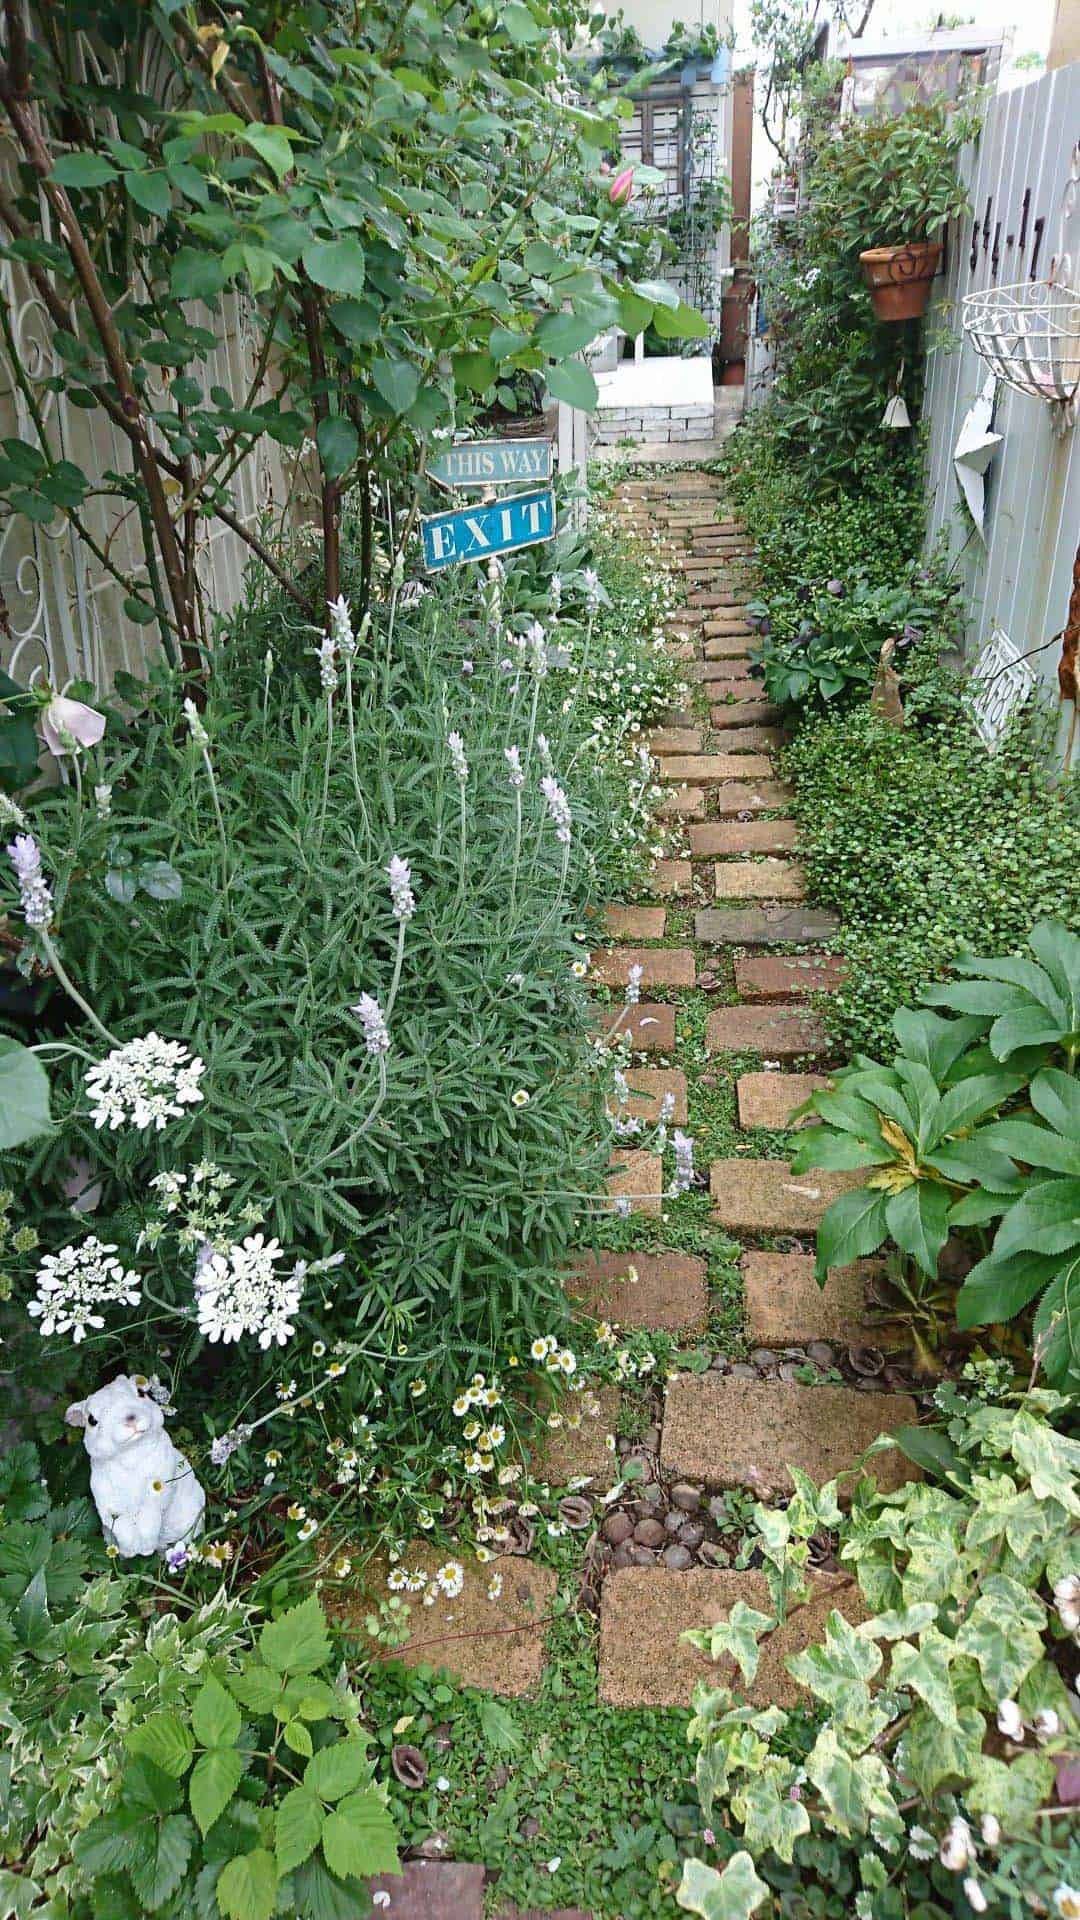
Bricks laid as informal stepping stones guide the way through this narrow, overflowing side garden, planted with lavender, daisies, and Queen Anne’s lace spilling in from both sides. Fun touches such as the “This Way / Exit” sign and a small rabbit statue add a whimsical feel to the space. Tip: In a narrow side yard, keep the path compact and let plants encroach slightly. It makes even a small space feel lush rather than cramped. (Photo Credit: MEGUMI / Pinterest)
13. Diagonal Brick Path, Before and After
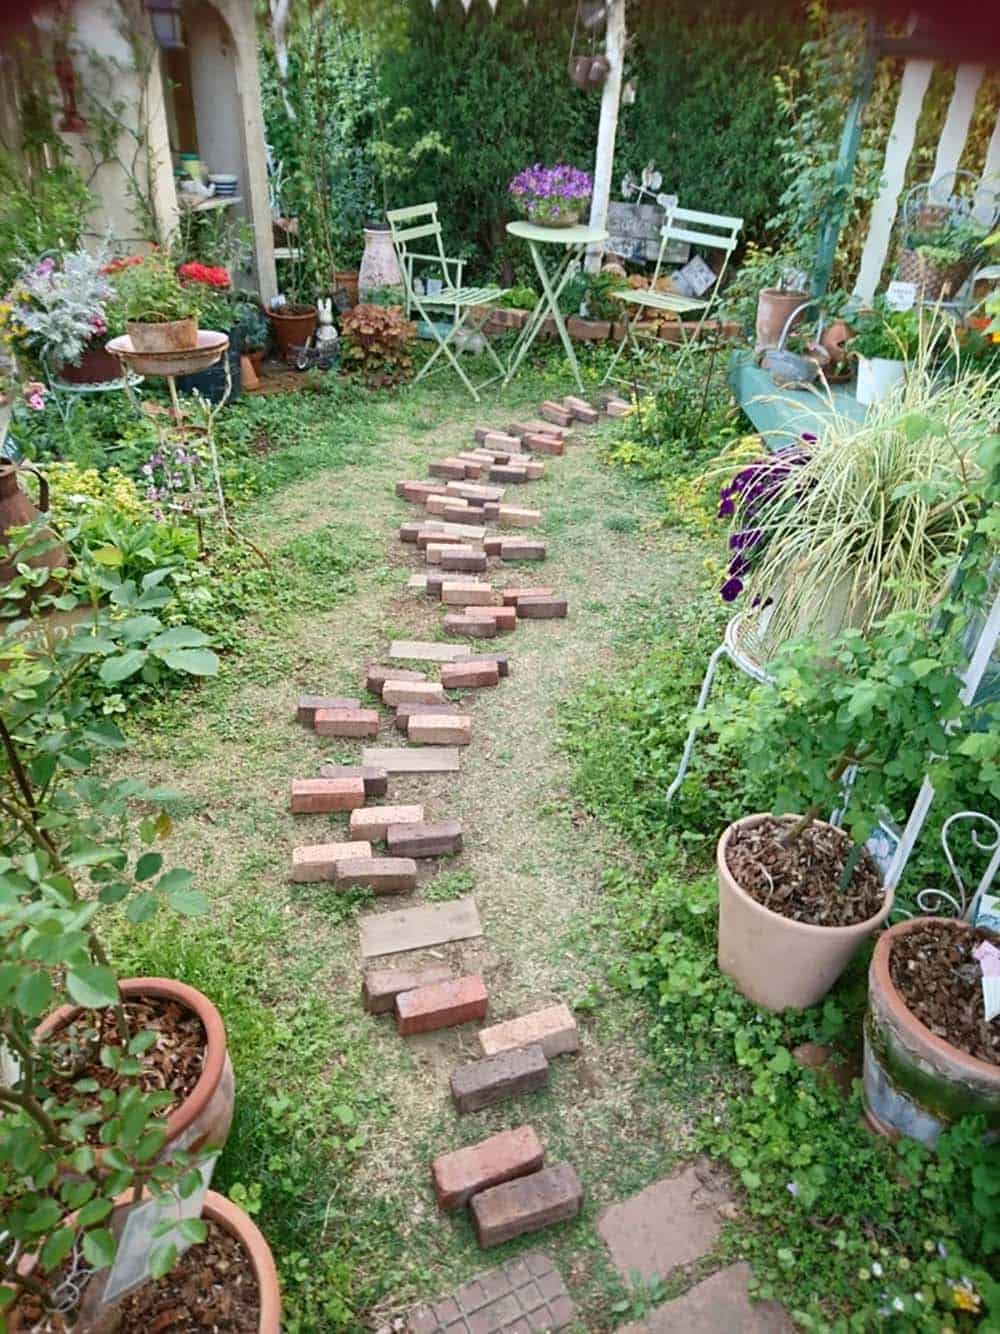
Above: Before the bricks are set permanently, pairs are laid out on the grass to help map out where the path will be.
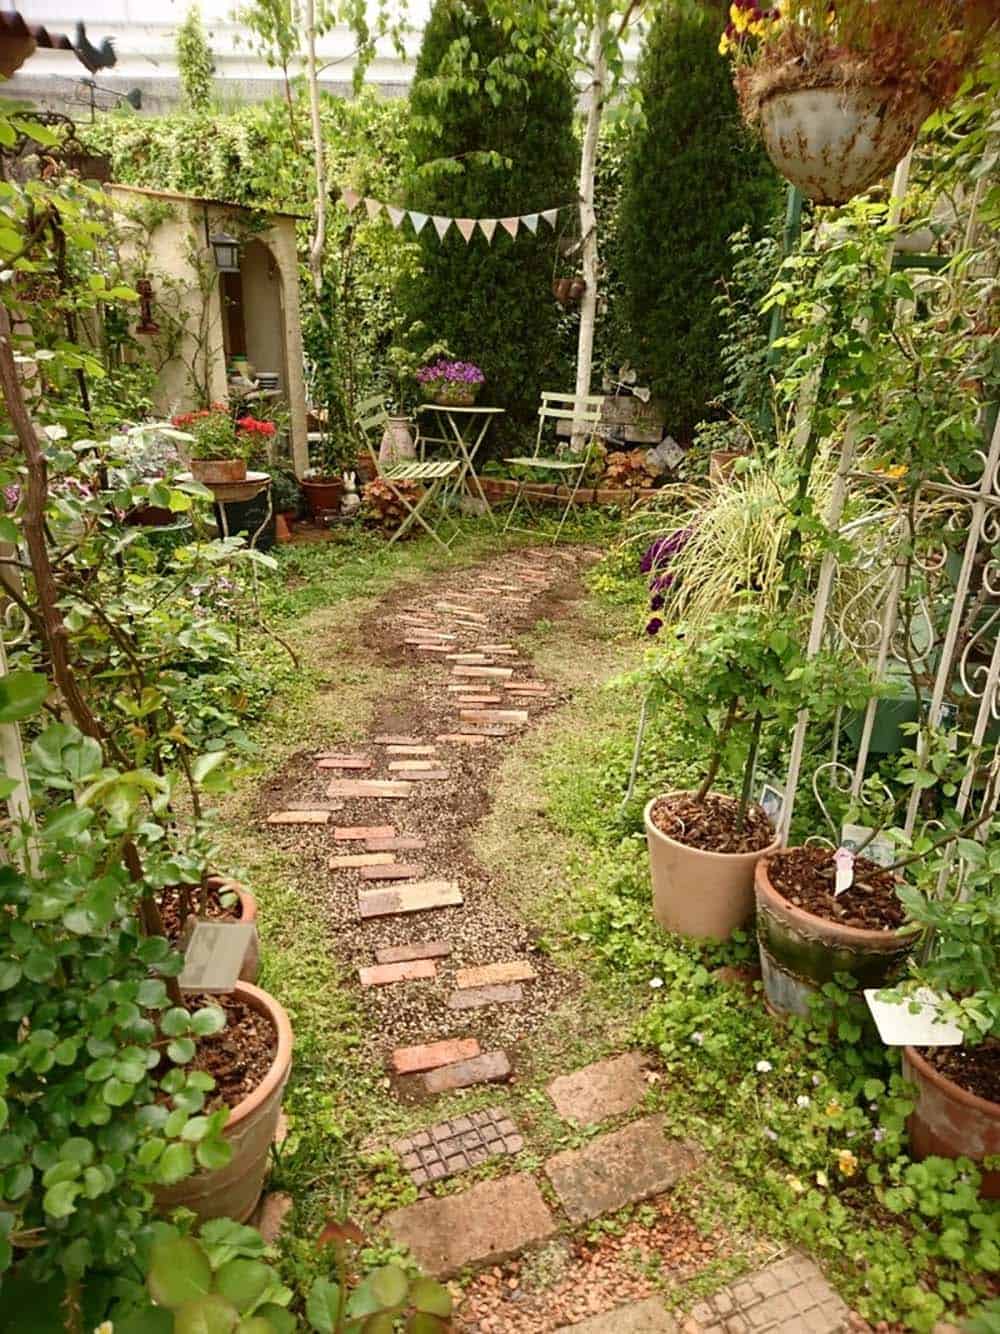
Bricks are laid flat and angled diagonally, creating a staggered pattern as the path curves through a courtyard filled with potted plants, a small bistro set, and string bunting overhead. The gaps between bricks are left open, letting grass and gravel show through for a worn-in look. Tip: To achieve this diagonal look, angle each brick roughly 45 degrees to the path’s direction and let the ends stagger naturally. (Photo Credit: Sweet House)
14. DIY No-Cost Brick Path
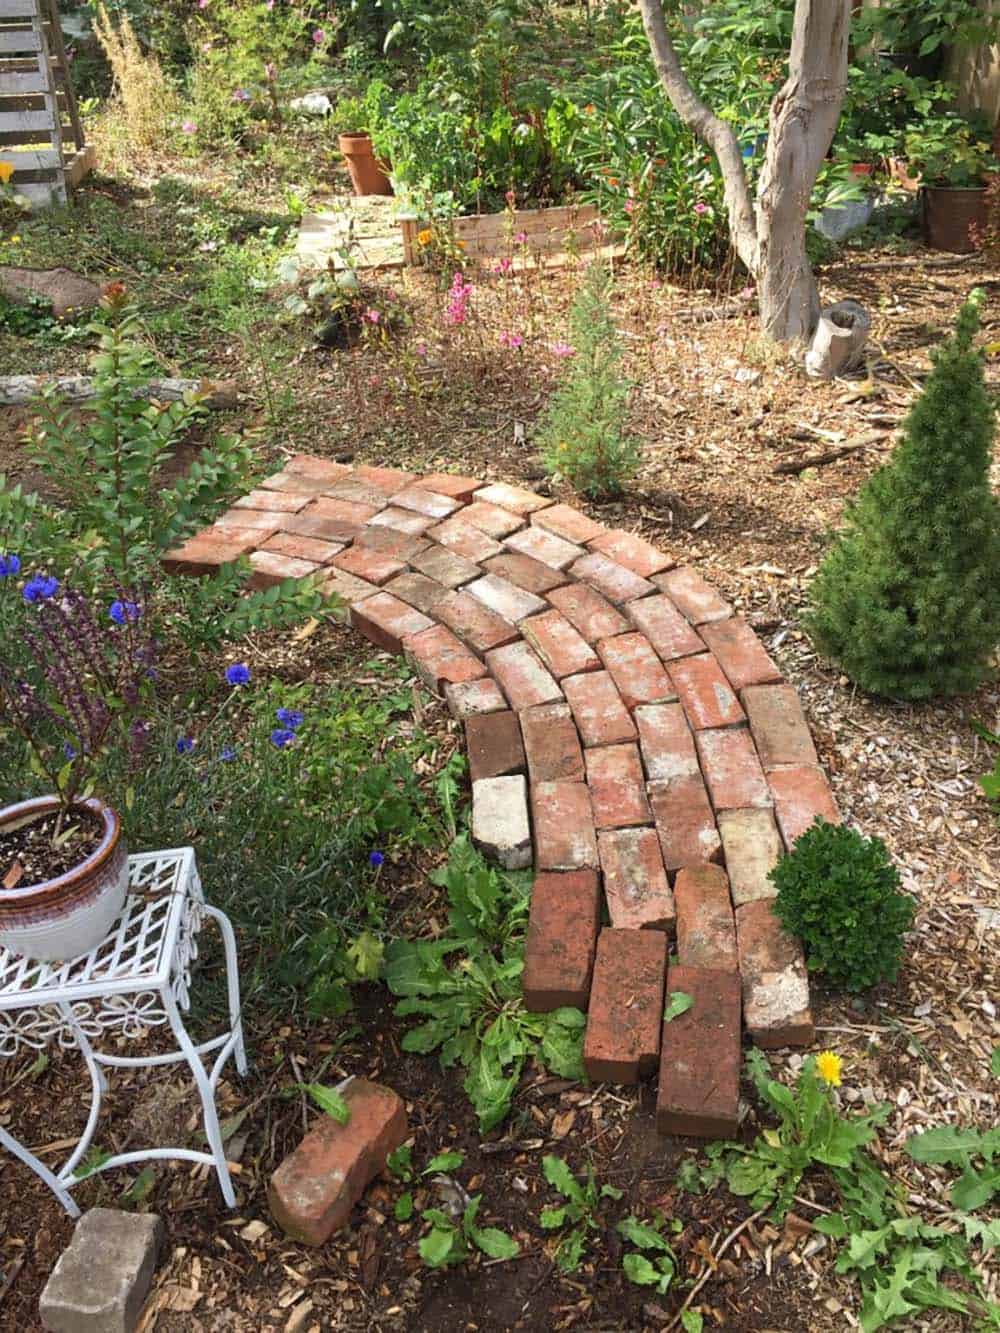
For this brick pathway, the homeowner sourced bricks from Craigslist and Facebook Marketplace. Once she had a sufficient pile of bricks at her disposal, she mapped out where the pathway was going to be. Since the plan was a small pathway, she did not care about making it perfect. With this in mind, she did not dig everything out and make it perfectly level. Just a little raking and some bags of sand helped with laying the bricks down on a more level surface. Then some reworking to get the bricks staggered just right. This imperfection adds a touch of whimsy to the garden. Takeaway: A salvaged brick path like this is an easy, low-cost way to help a new yard feel more established. (Photo Credit: Suburban Farmer Mom)
15. Spiraling Brick Herb Garden
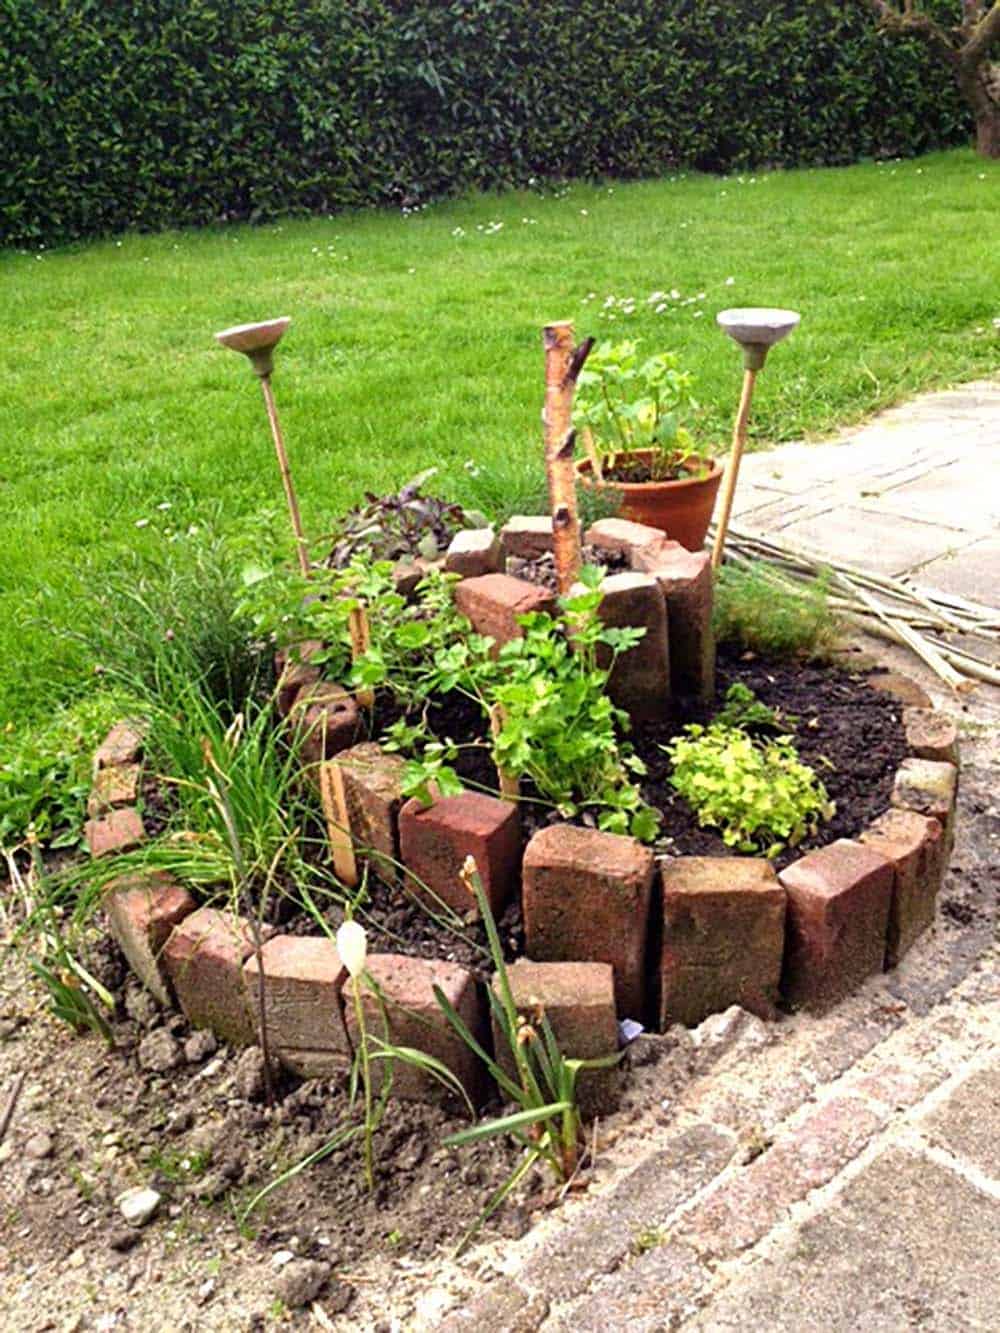
This spice spiral is filled with different plants, including sage, thyme, oregano, chives, rosemary, parsley, and dill. Bricks are stacked on end and coiled upward into a spiral shape, creating small tiered pockets that give each herb its own space while keeping the whole planting compact. Tip: Position taller herbs such as rosemary near the top of the spiral where drainage is best, and save the lower, moister levels for herbs like parsley and chives that prefer more consistent moisture. (Photo Credit: Lemon & Rosemary)
16. Reclaimed Brick Path Through a Wooded Backyard
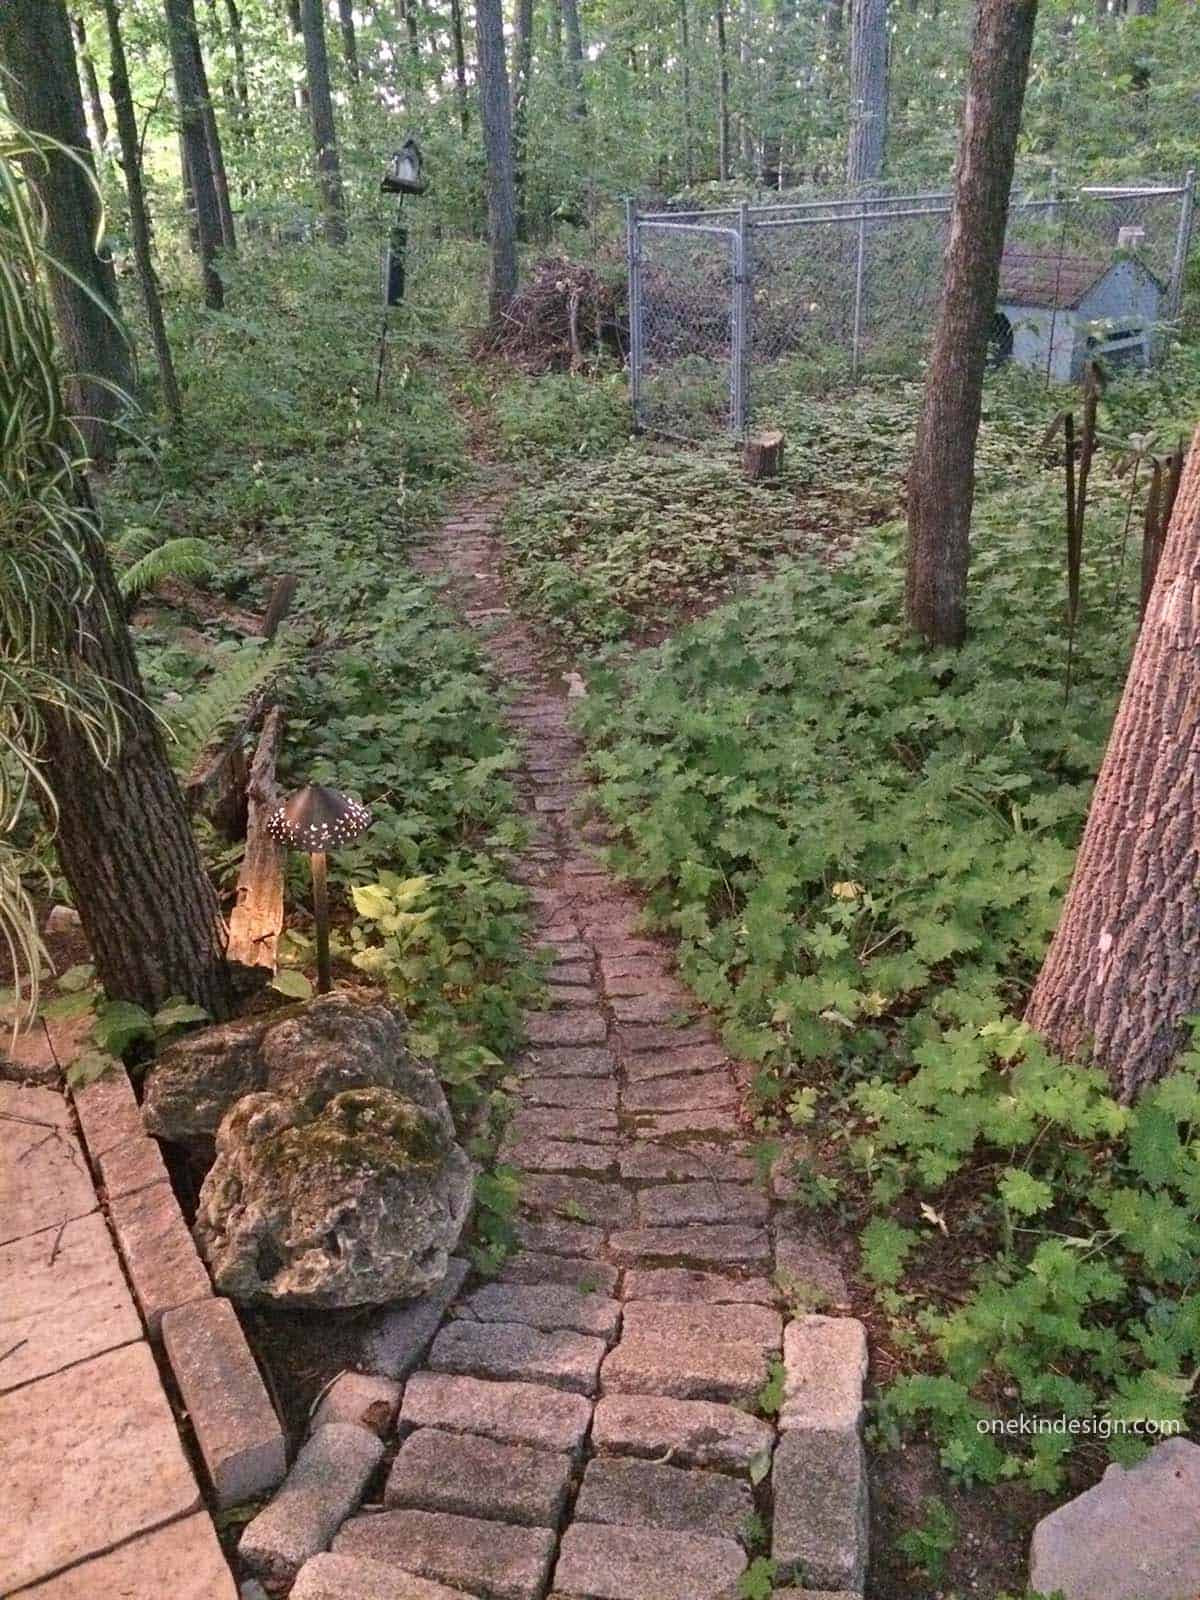
Leftover bricks from landscaping projects were repurposed into this narrow path, leading through a heavily shaded, forested backyard in Ontario, Canada. The pathway takes you to a fenced dog run. The surrounding groundcover (mostly weeds mixed with ferns) has been left to grow in naturally, giving the path a wild feel rather than a manicured one. Takeaway: In a heavily shaded area, leaving the joints between bricks open can improve drainage and allow the path to feel more natural and integrated with its woodland surroundings. (Photo Credit: onekindesign.com)
17. DIY Brick Pedestal Birdbath
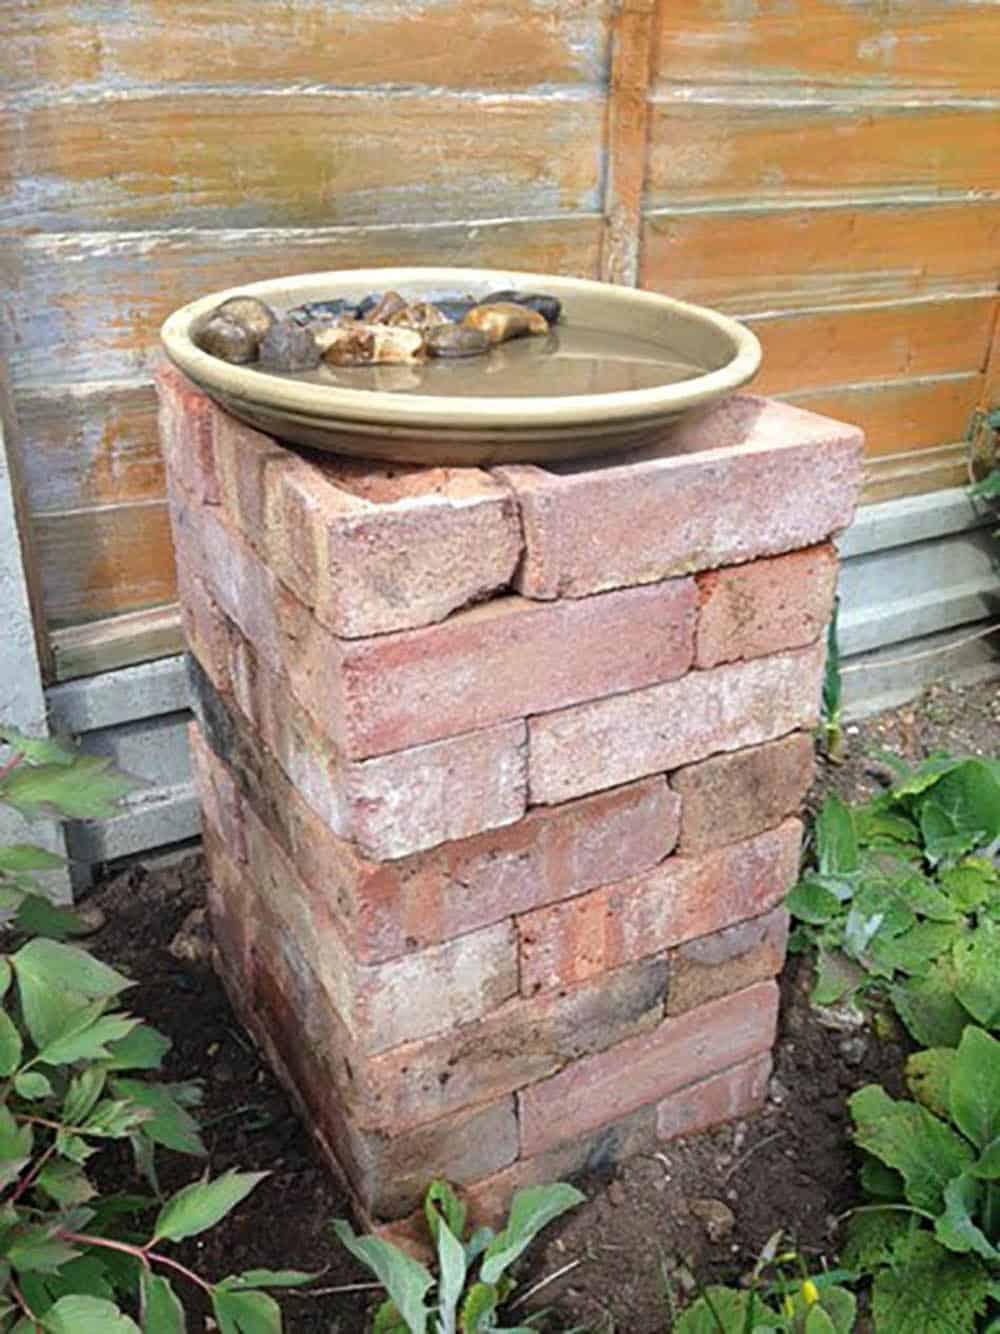
This bird bath was part of a weekend warrior project to bring wildlife into the garden. To create the DIY bird bath, the homeowner dug a small trench where the first layer of bricks would go. Hand-selecting bricks and giving them a quick brush-off, eight layers were stacked to form the pedestal. The bird bath was added to the top along with some pebbles inside the bath for the bees to land on. Takeaway: This project took about a half hour to create and is the perfect project to do with children. (Photo Credit: Thompson & Morgan)
18. Brick Potting Station with Outdoor Sink
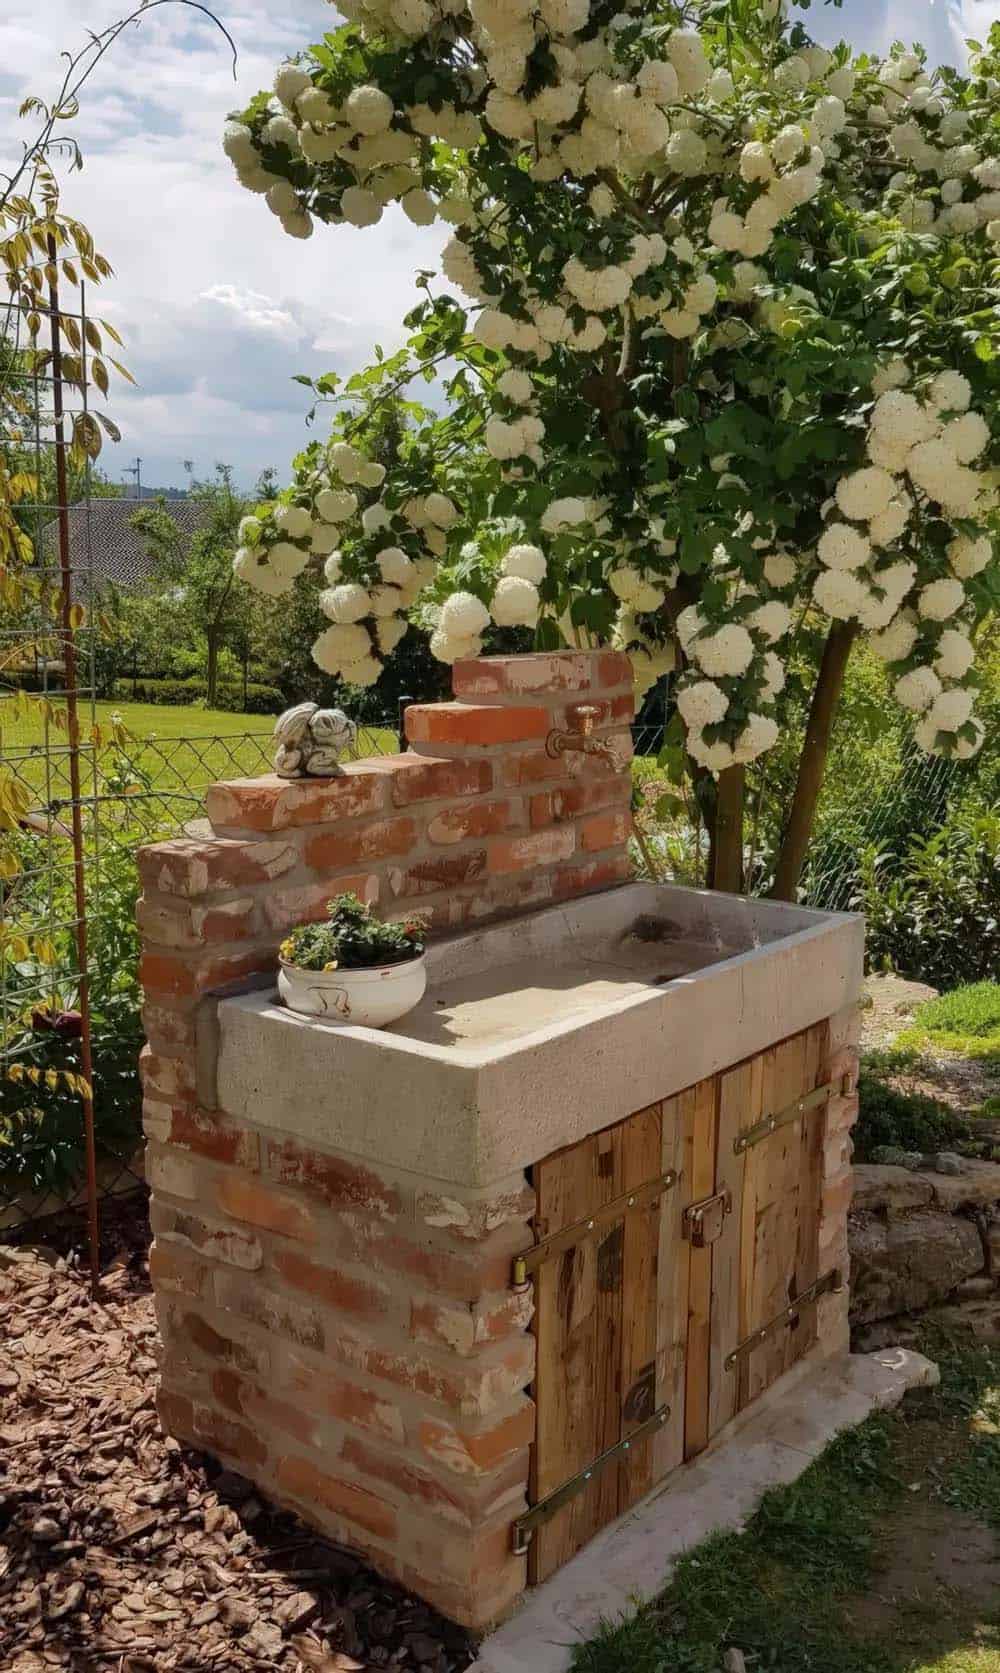
This potting station combines reclaimed brick with a stone sink basin and an outdoor tap, giving gardeners a dedicated spot to wash tools, pot plants, or rinse produce right in the garden. Wood cabinet doors below the basin add concealed storage for gardening supplies. Tip: If plumbing in an outdoor tap isn’t practical, a large basin or trough set on a brick base still gives you a sturdy, attractive potting surface without the extra installation. (Photo Credit: @dachnyi_otvet / Instagram)
19. Stacked Brick Bench Plant Stand
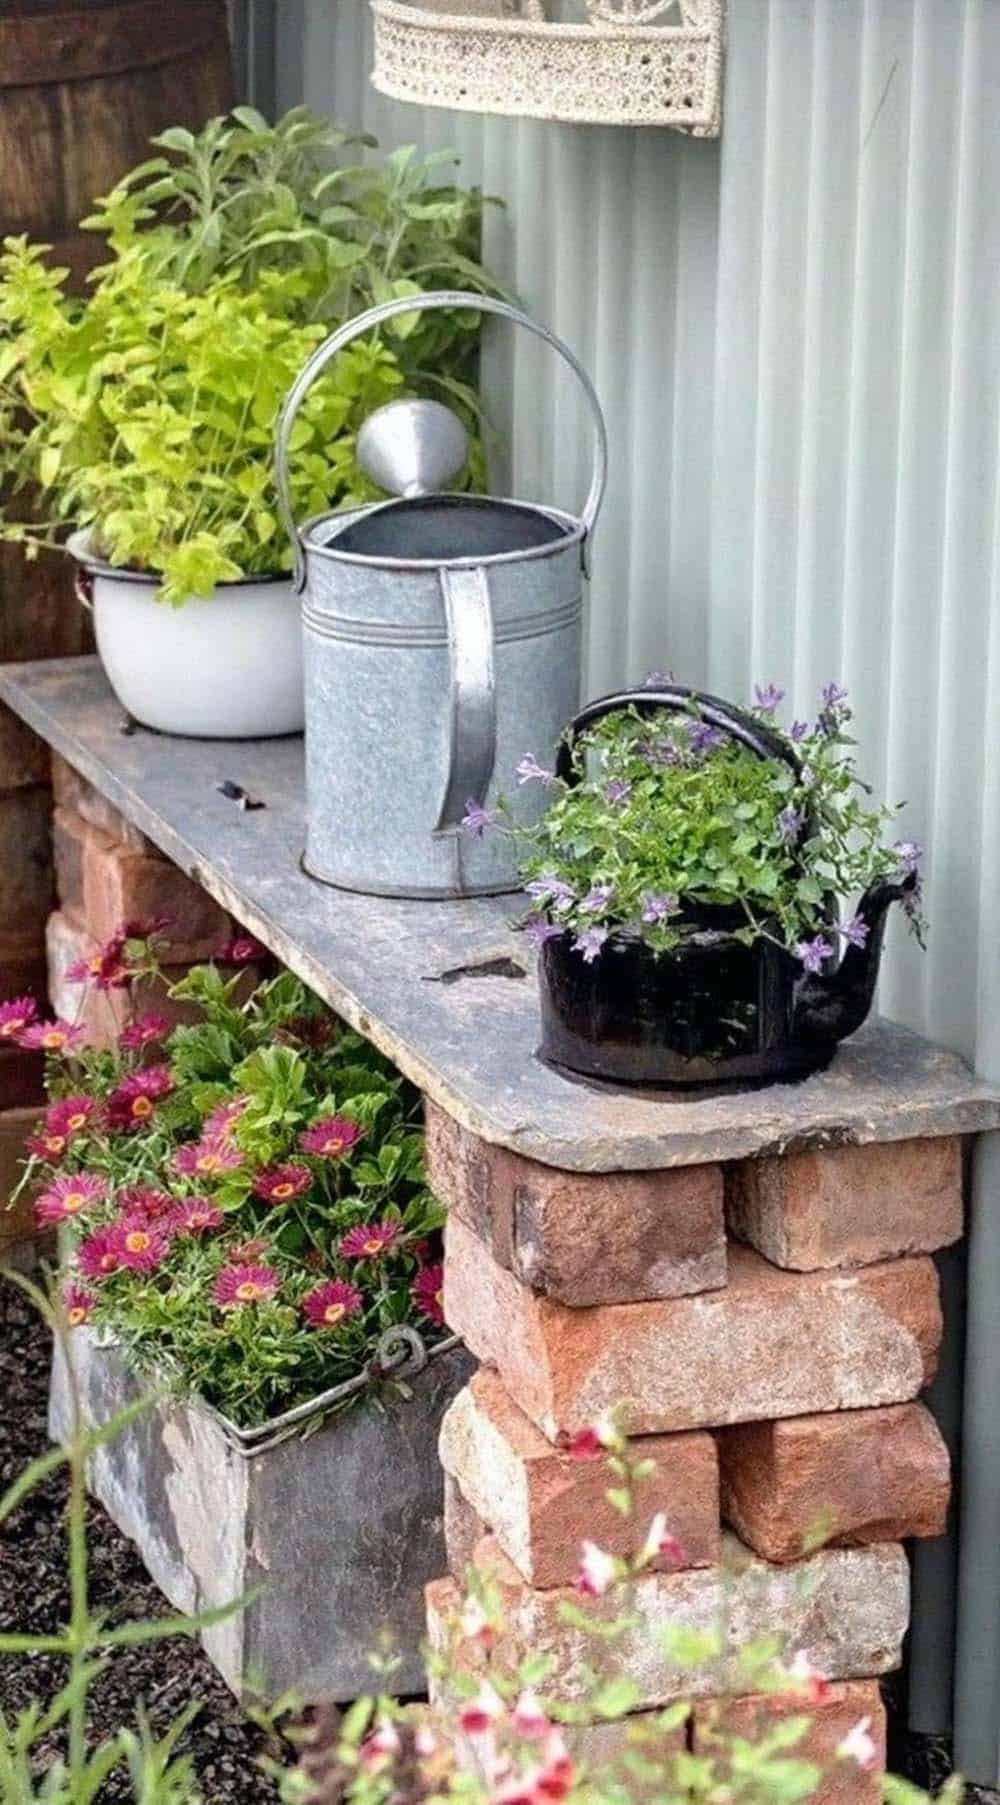
Instead of a traditional bracket, a stack of loose bricks acts as the support base for this bench-style plant stand, holding up a charming display of potted herbs, a galvanized watering can, and a vintage kettle repurposed as a planter. It’s a clever, no-tools way to add functional garden storage using materials you may already have on hand. Tip: For a stable, stacked-brick support such as this, use a level surface underneath and select bricks with flat, even faces so the stack won’t wobble under weight. (Photo Credit: May / Pinterest)
20. Circular Raised Brick Garden Bed
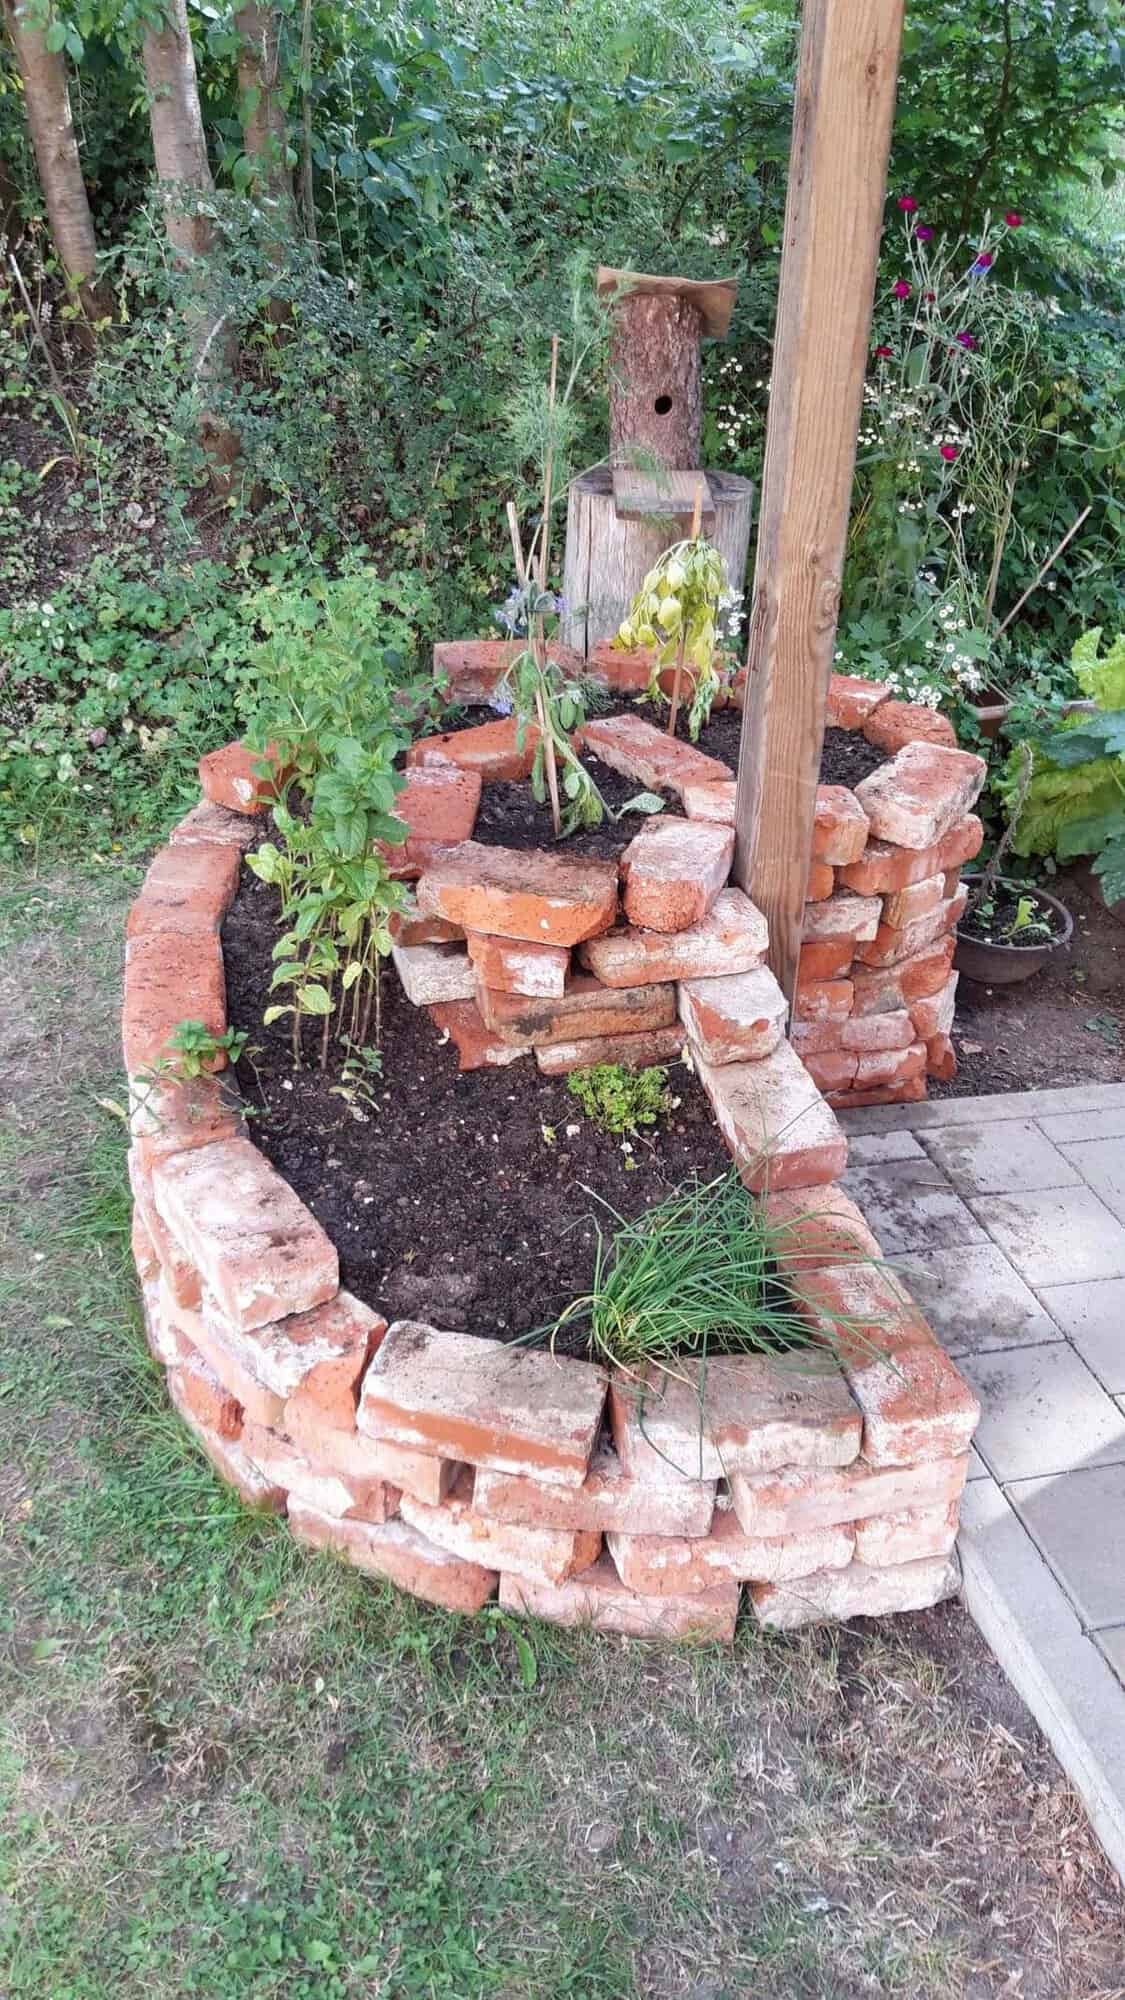
This raised bed is built from reclaimed brick stacked into a circular shape, with an internal brick partition creating a smaller planting pocket within the larger ring. It’s a flexible way to organize different plants, including mint, chives, and flowering perennials, all of which get their own space without needing separate structures. Tip: When building a raised bed with an internal divider like this, leave gaps between the bricks so excess water can drain between sections. (Photo Credit: Petra Hertel / Pinterest)
21. Raised Brick Vegetable Garden
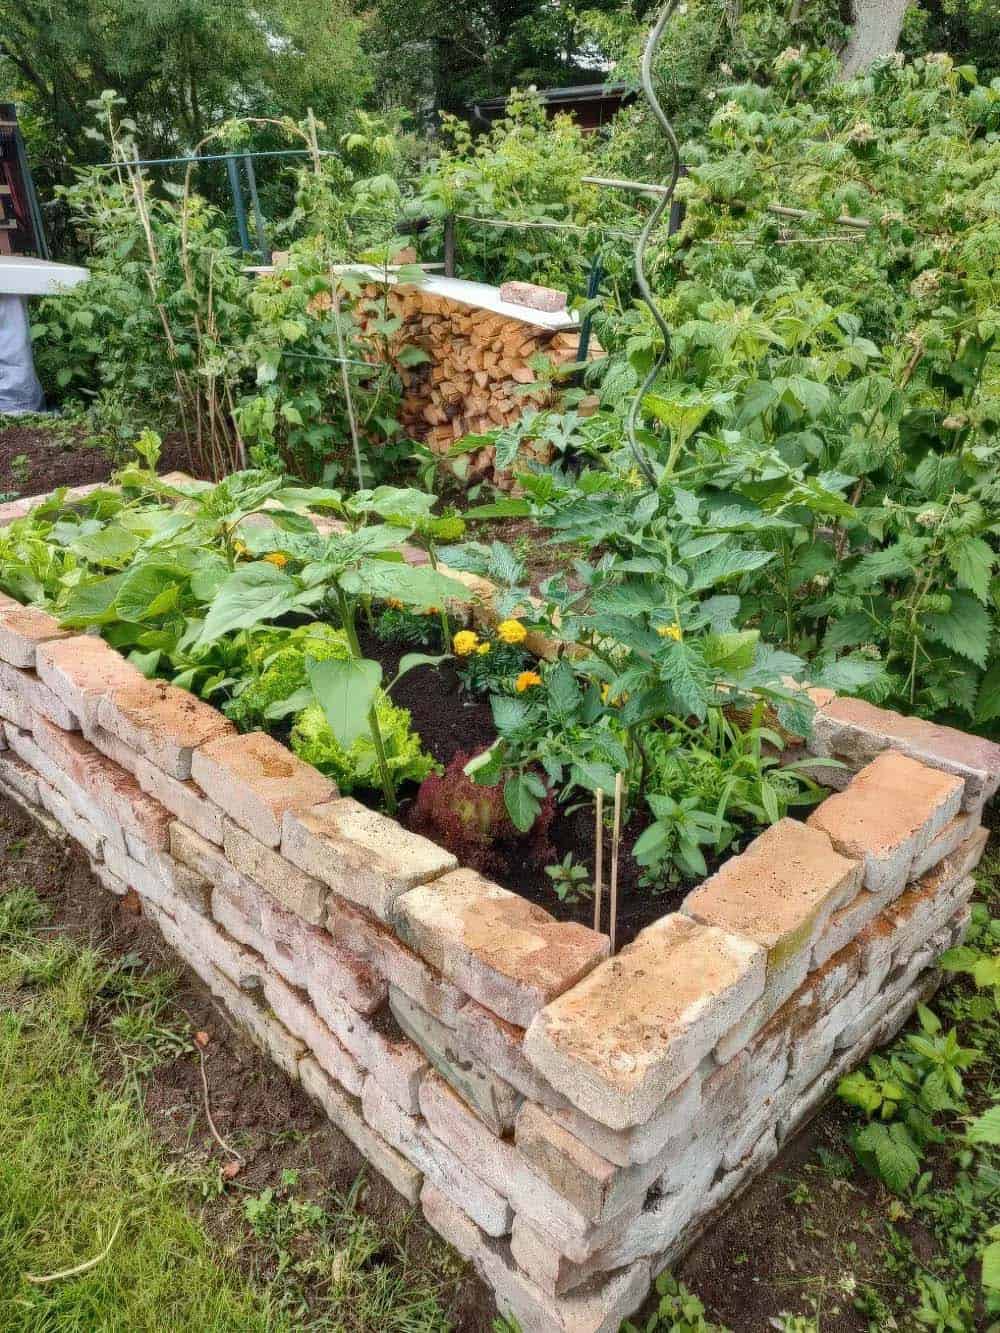
This brick-walled raised garden bed gives vegetables and companion flowers, such as lettuce, marigolds, and tomatoes, plenty of depth for healthy root growth. The taller walls also make it easier to tend the bed without bending as far. Tip: Line the inside of your raised bed with landscape fabric before filling it with soil to help keep soil from washing out through the joints. (via Eri Schroeter / Pinterest)







0 comments