


❤️ Would you like to save this?
By saving, we'll email this post to you for later. Unsubscribe anytime.
Halloween is rapidly approaching, and it is time to get creative and fun with your pumpkin carving ideas. The only limit is your imagination. A carved pumpkin or jack-o’-lantern can be placed anywhere; in front of your door, on your porch, on your lawn, the possibilities are limitless (and they make the best Halloween decorations). Be sure they are visible to greet your trick-or-treaters! Pumpkin carving is a great way to get the whole family involved in the creativity process.
You could even host a pumpkin carving Halloween party and get a small pumpkin for each guest to carve! Hosting a contest to see who creates their own perfect pumpkin creation and witnessing the unique ideas that come up is a fun way to get kids and adults involved in pumpkin carving this Halloween season.
If you have a local pumpkin patch close by, head on over there to get your pumpkins and make some beautiful family memories along the way! The kids will love going out to experience the “farm life” for a bit and enjoy other fall activities such as hay rides, petting animals, and even picking out their own mini pumpkins to decorate.
We have curated a diverse selection of ideas to inspire you to create your own unique design. If you do copy any of these looks, be sure to take a picture and tag us on Instagram or Pinterest with #onekindesign. We would love to see your cool pumpkins!
Take a look below at some of the best and easiest pumpkin carving ideas, ranging from scary to fun; there is a little something for everyone. If you need a little creativity to help you along, here is a link to a collection of Free Pumpkin Carving Stencils. Be sure to let us know which one most inspired you and why in the Comments below!
Note: If you would like to try adding some no-carve pumpkins to your Halloween display this year, have a look at this featured article: 23 Most Creative No Carve Pumpkin Ideas To Try This Halloween, or for a mess-free option, try these creative pumpkin painting ideas.
Be sure to also check out: 37 Super Creative Pumpkin Carving Ideas and Tips for Halloween
1. DIY Cinderella Carriage Pumpkin.
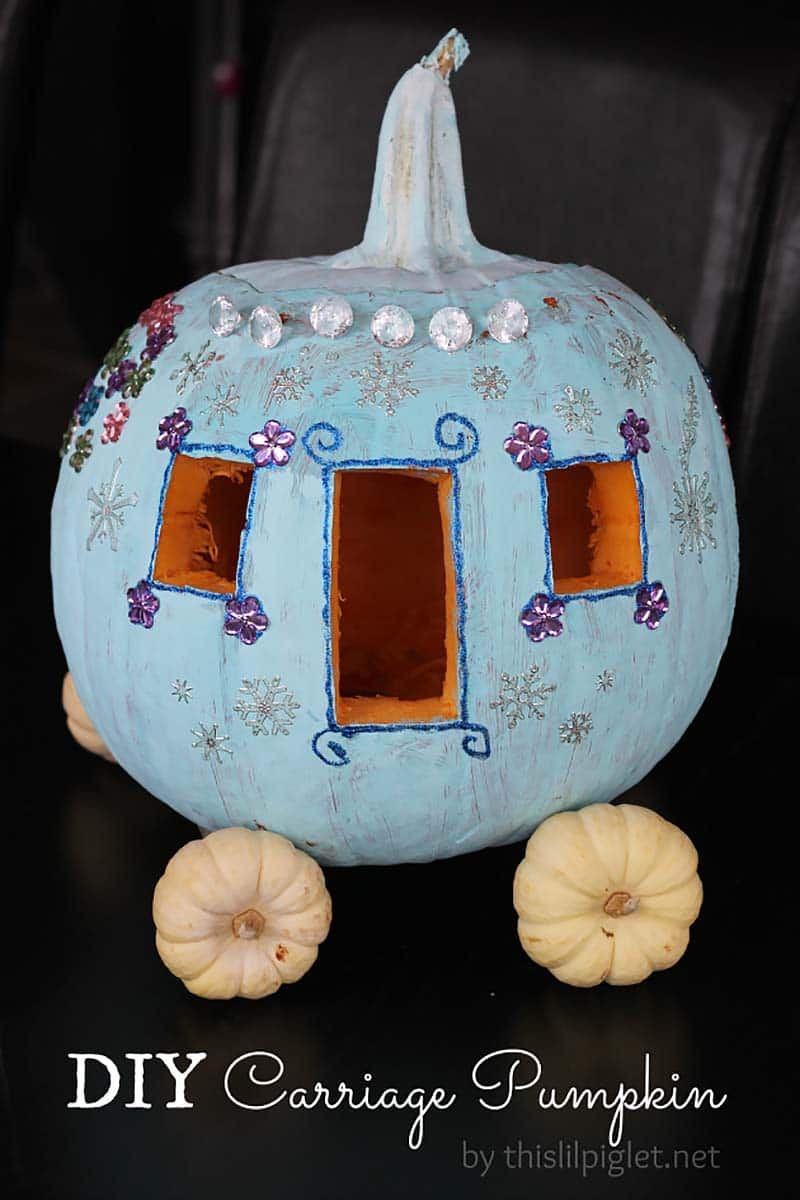
To recreate this charming pumpkin, you will need one large pumpkin, four mini gourds, glue, glitter glue, blue craft paint, a paintbrush, jewels, snowflake stickers, wood dowels for the gourd wheels, and an LED candle to illuminate the pumpkin. You can find most of these materials at your local craft store (Michaels, Hobby Lobby). Get the full tutorial at the provided link. (via This Lil Piglet)
2. Stacked-Pumpkin Statue.
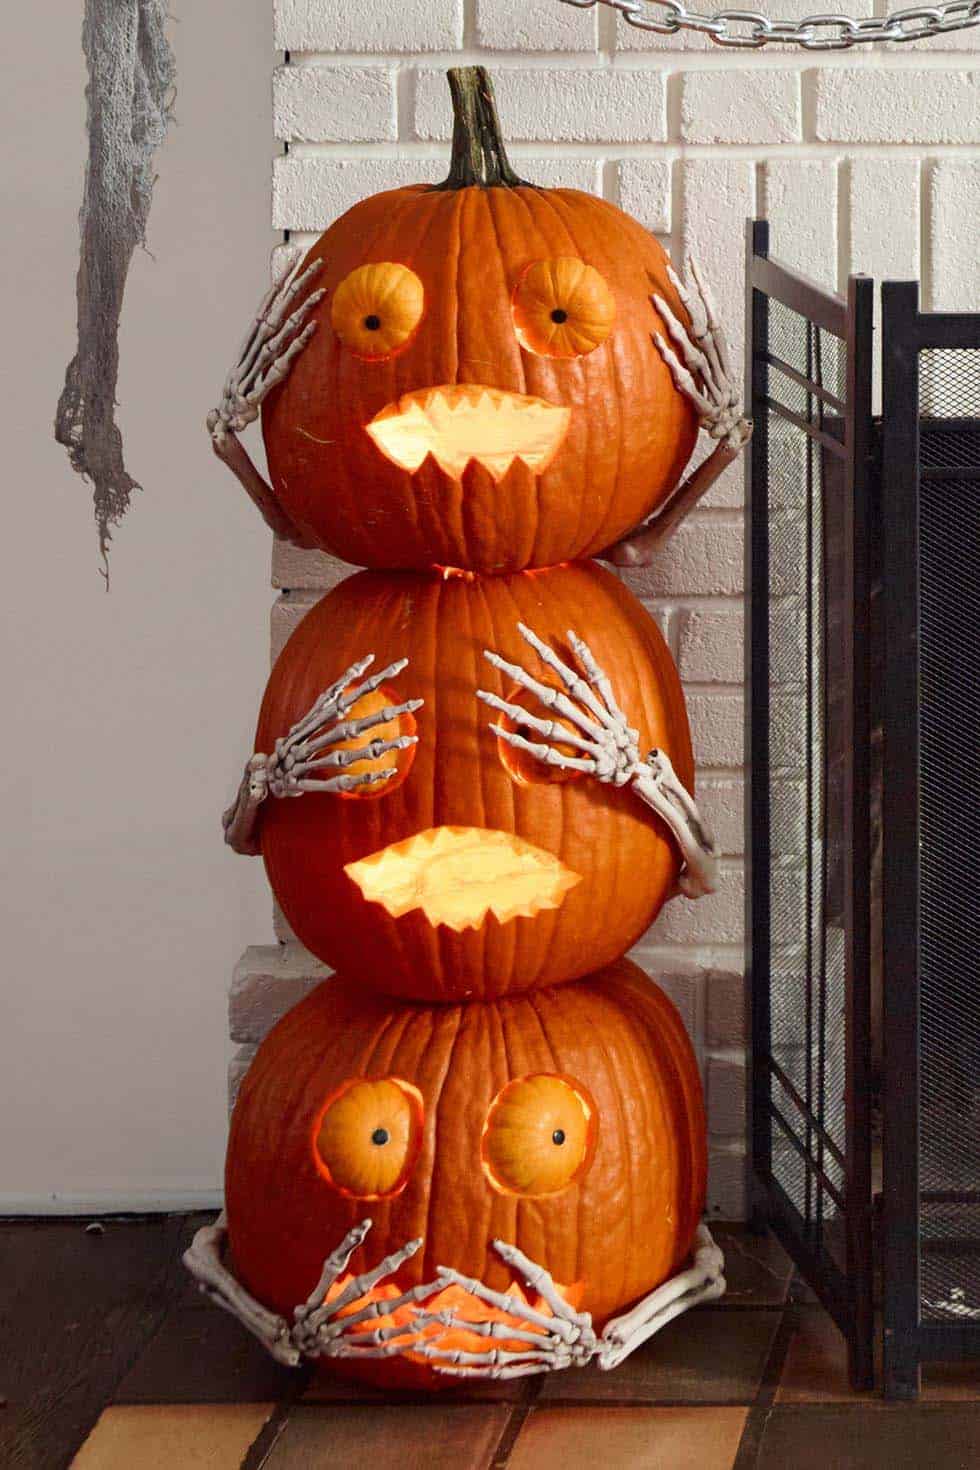
Cut out circles for the eyes and insert more miniature pumpkins in (with bottoms facing out). Use black thumbtacks for the eyes. Carve out the mouths. Stack the pumpkins and secure with skewers. Use T-pins to attach skeleton arms to each pumpkin. (via Woman’s Day)
3. Tinker Bell Pixie Dust Pumpkin.

Begin with a faux pumpkin and a template of Tinker Bell (link below). Affix the template on the pumpkin and use a pushpin to trace out the image. For carving, you will need: a Hot knife, a cordless power drill, 1/16 and 1/8 drills, and artificial carving saws. A small light bulb will provide the most illumination. You can use the faux pumpkin year after year, but you can also achieve a similar look with a real pumpkin. More detailed instructions are at the provided link. (via Instructables)
4. Angler Pumpkin.
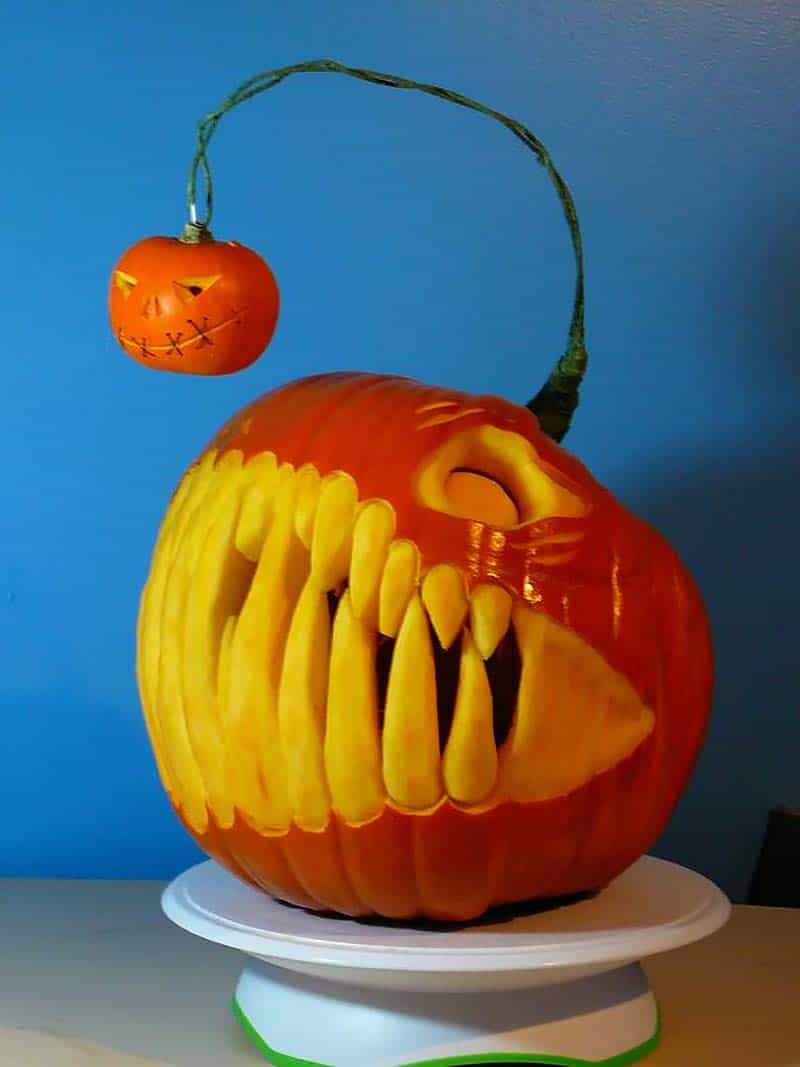
The Angler Fish inspired the creation of this cool and unique pumpkin carving design. (via Deviant Art)
5. Face Off.

Carve out the front of the pumpkin and add a face. Gut the pumpkin and carve out some teeth. Add creepy eyeballs to the interior of the pumpkin (from a local Halloween or party store), and add a skeleton hand. (via Pinterest)
6. Pesky Puny Pumpkins Attack!

Carved by Betty Shaw, small white pumpkins are attached to a large orange pumpkin with a scared look carved on its face. (via Pinterest)
7. Pumpkin Skull With A Squash Brain.

You will need a pumpkin within a pumpkin to recreate this look — one orange and one white. (via ManMade)
8. Skeleton Hands.

Create a graveyard site in your front yard with illuminated skeleton hands carved into stacked pumpkins. Get the tutorial at the provided link. (via Country Living)
9. “Sick” Pumpkin Display.

Two pumpkins and a pumpkin carving set are all you need to re-create this fun scene. (via Pinterest)
10. BOO! Pumpkin.
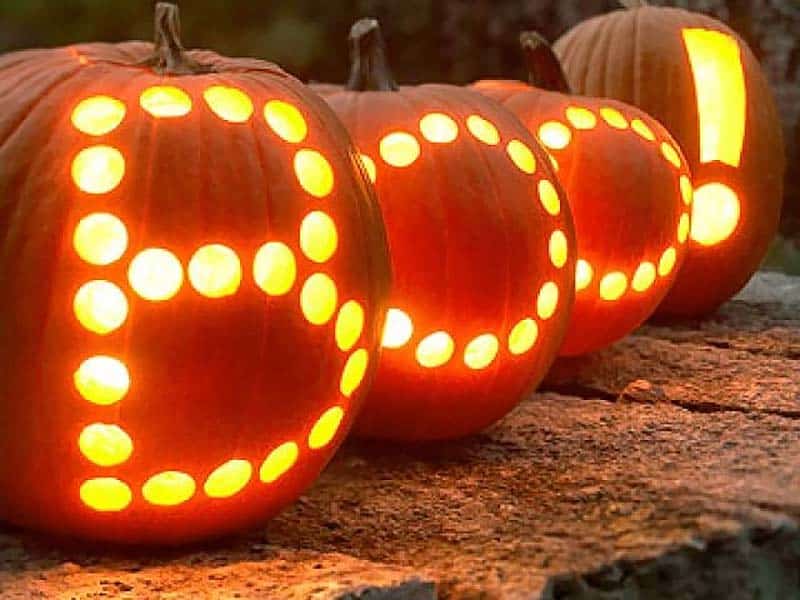
You will need four individual pumpkins to make this charming pumpkin display, perfect for your front porch! Use an apple corer to punch holes in the pumpkin, then light it with LED tealights. (via Kensington)
11. Hungry Pumpkin.
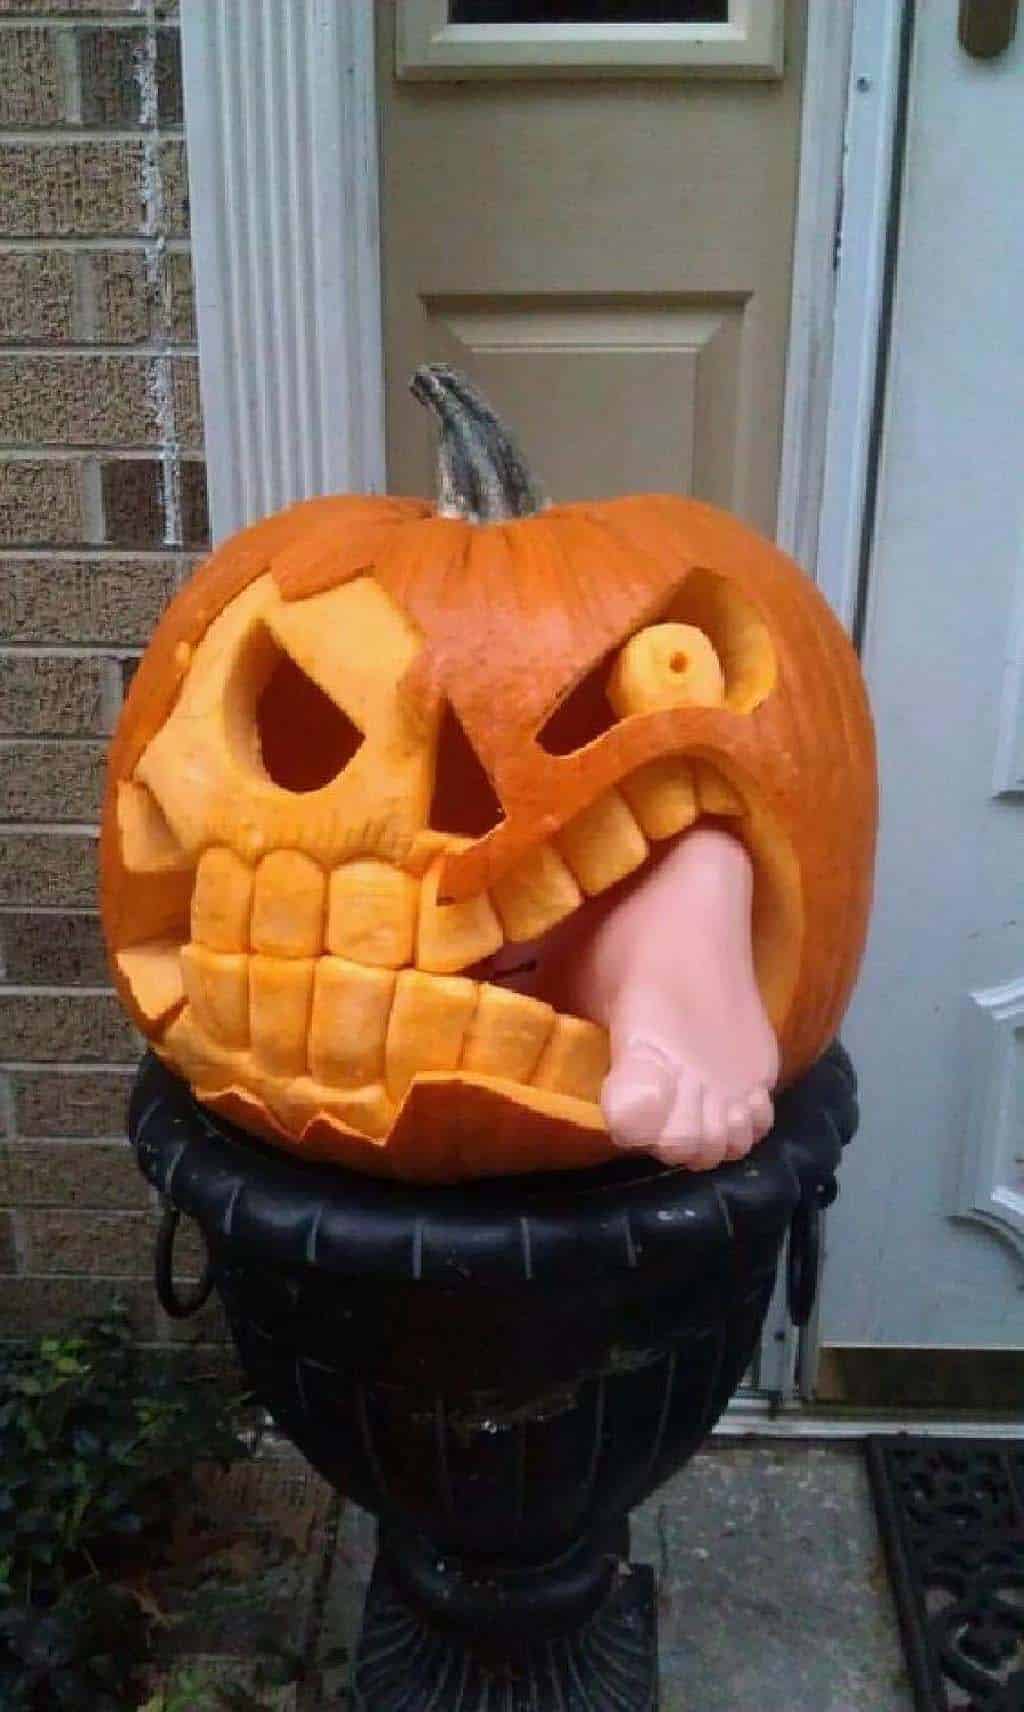
Wood carving tools were used to create a pumpkin that eats naughty trick-or-treaters! (via This Old House)
12. Stitched Jack ‘O Lantern Idea.
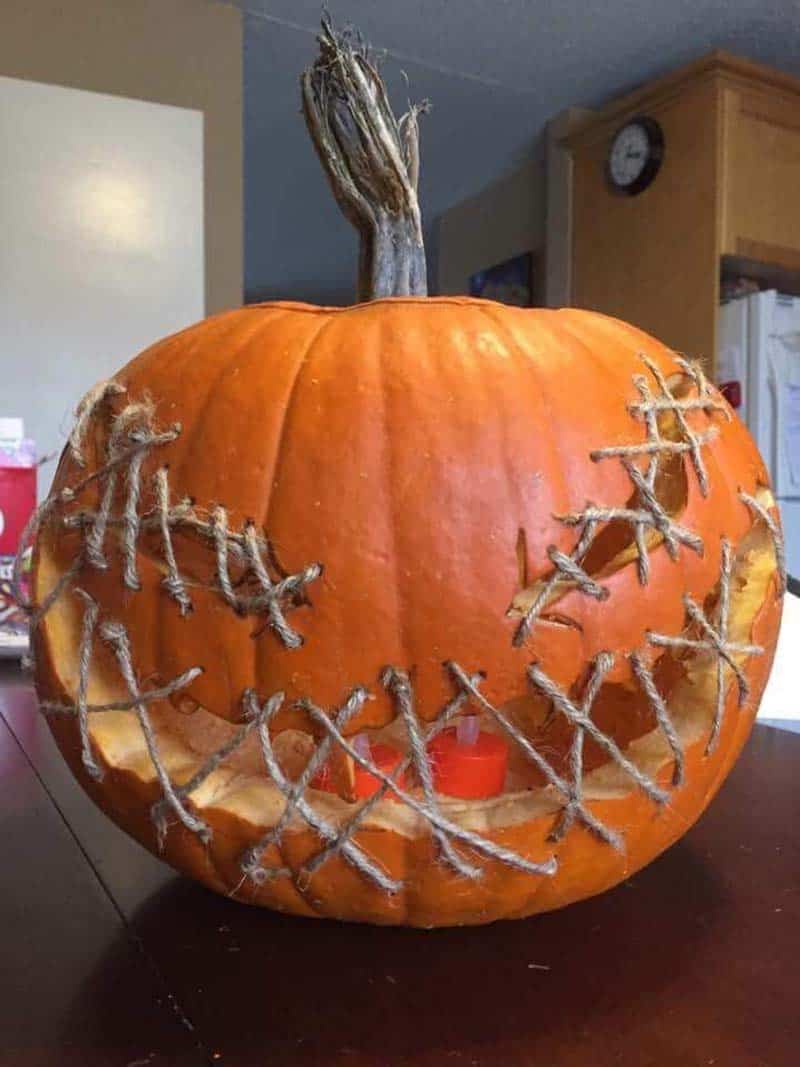
All you need for this pumpkin carving project is a knife or a pumpkin carving kit for the face. Use twine to stitch over the eyes and mouth. You can find twine at the Dollar Store or Target. Don’t forget the LED candles to illuminate your pumpkin! (via Pinterest)
13. Zipper Pumpkin.
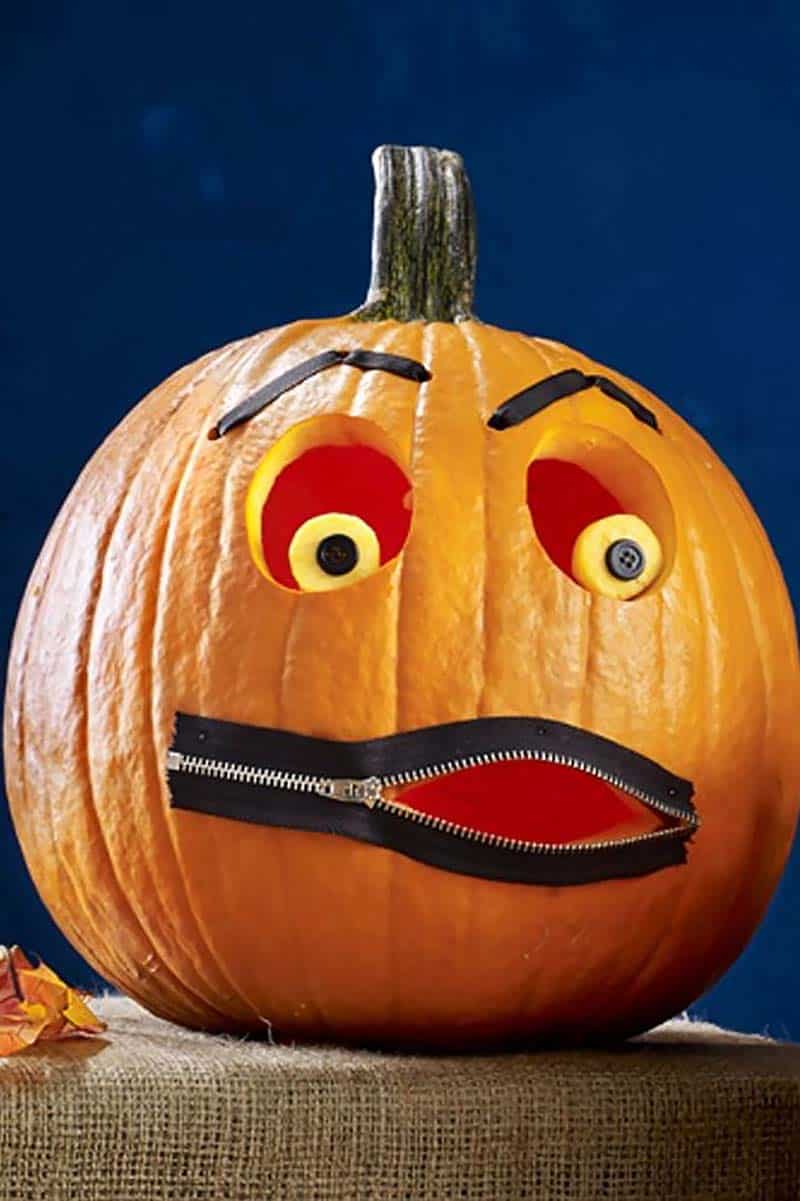
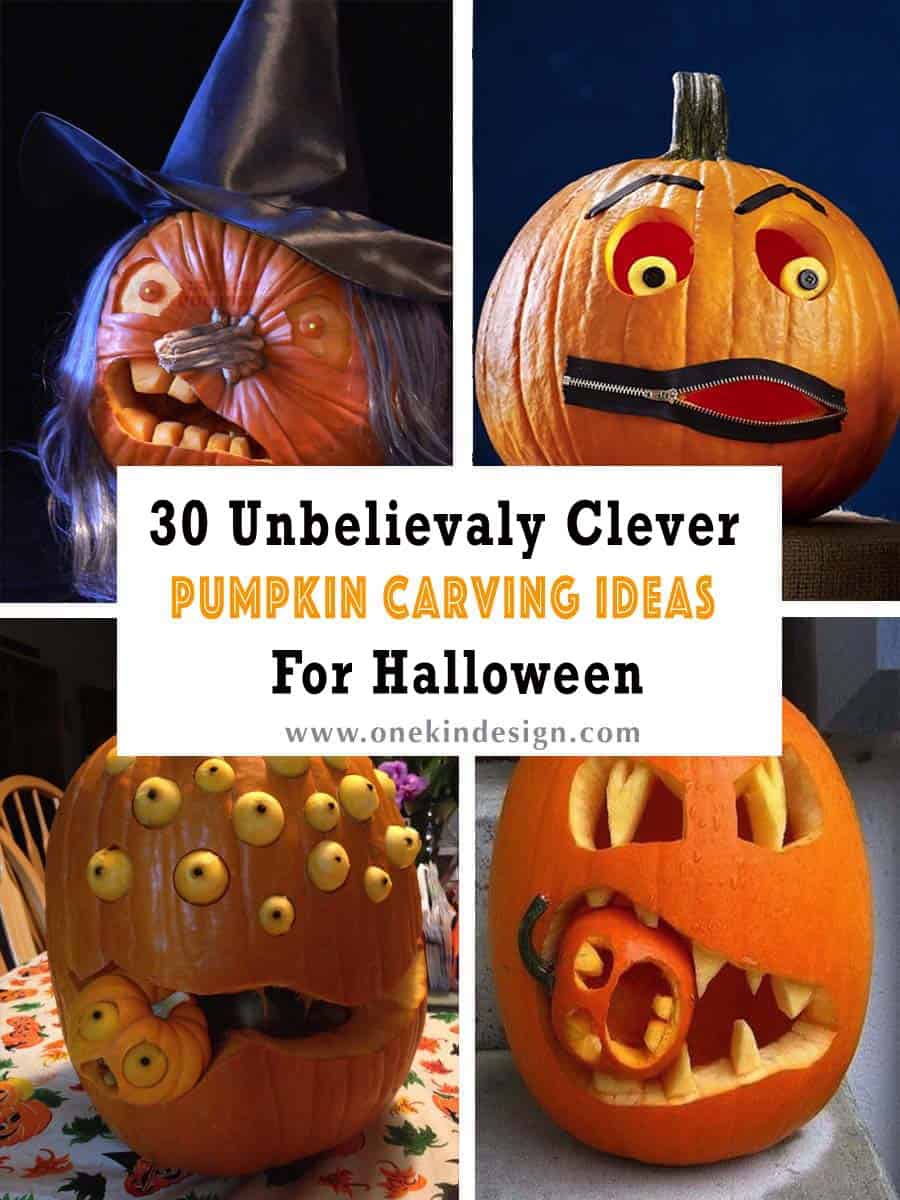
Hollow out a medium round pumpkin from the bottom and gut it. Carve out two oval eyes, then cut smaller circles from the skin. Use black buttons for pupils (held with a pin) and attach eyes with toothpicks. Use 1/4-inch-wide black ribbon for the eyebrows, threaded through the pumpkin (make small holes and knot on the inside). Carve a mouth and affix a half-zipped zipper with pushpins. Full instructions by clicking the link. (via Woman’s Day)
14. Drilled Pumpkin Light.
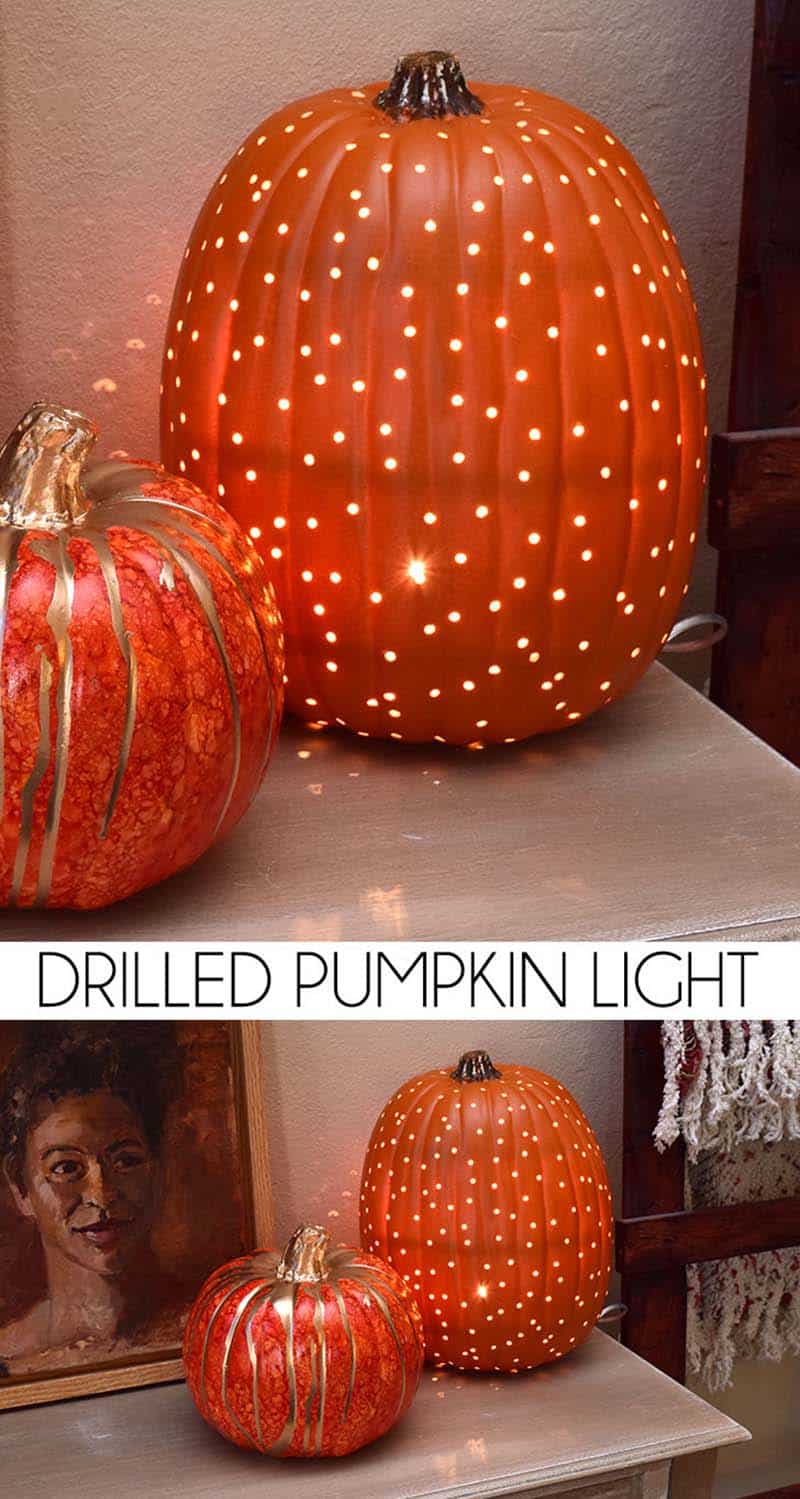
Using a faux pumpkin (or a real one), drill holes in it. Cut a hole in the bottom with a craft knife, then insert a low-wattage candelabra bulb or an LED tealight. (via Dream A Little Bigger)
15. Pumpkin Monster.
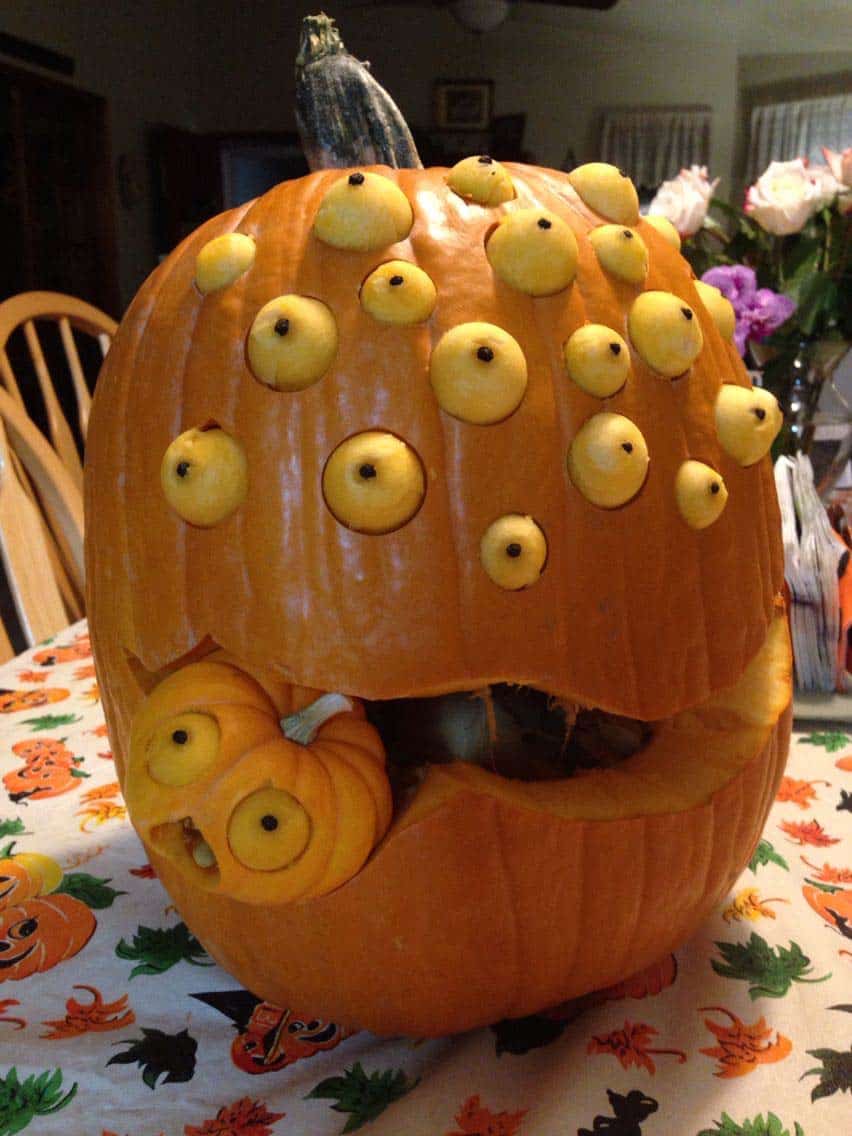
For this pumpkin carving idea, you will need one large pumpkin, a smallish pumpkin, and several baby pumpkins for the eyes. Use a peeler to peel off the skin to create the eyes. Use cloves for the pupils. Add several holes large enough to fit the eyes in the front of the pumpkin. Carve out the smallish pumpkin to add to the larger pumpkin’s mouth. (via Pinterest)
16. Clown Pumpkin.
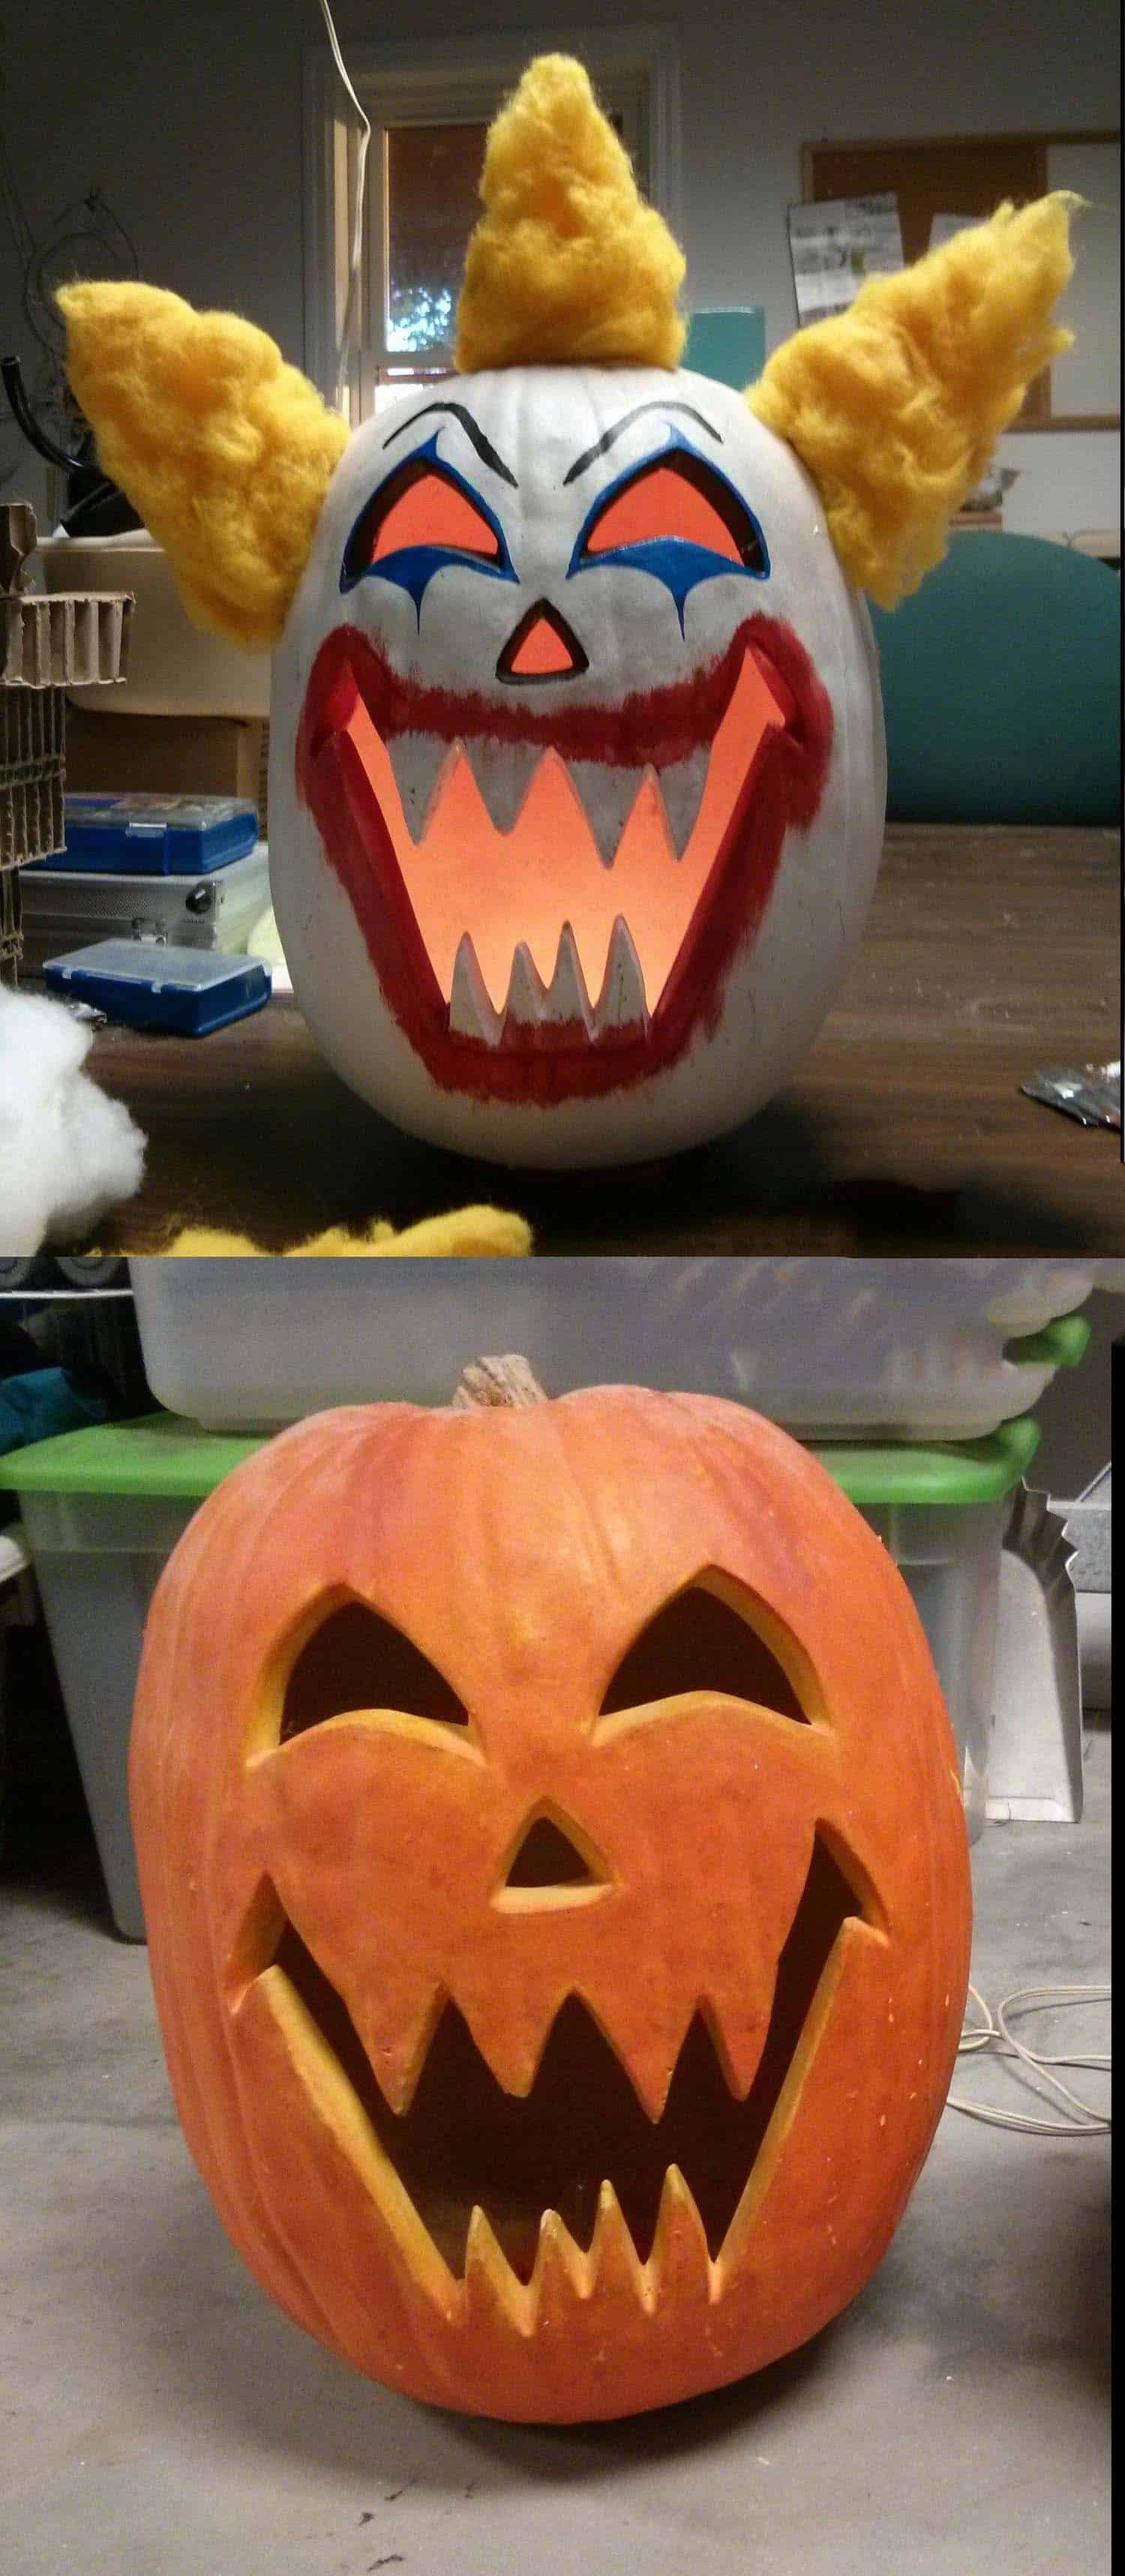
A $1 yard-sale find was transformed into a themed pumpkin (try the dollar store). All you need is some white paint, fake hair, and an LED tealight to transform a faux pumpkin with a pre-carved face. With a bit of creativity, you could copy this same look with a real pumpkin! (via Pinterest)
17. Pumpkin Eyes.
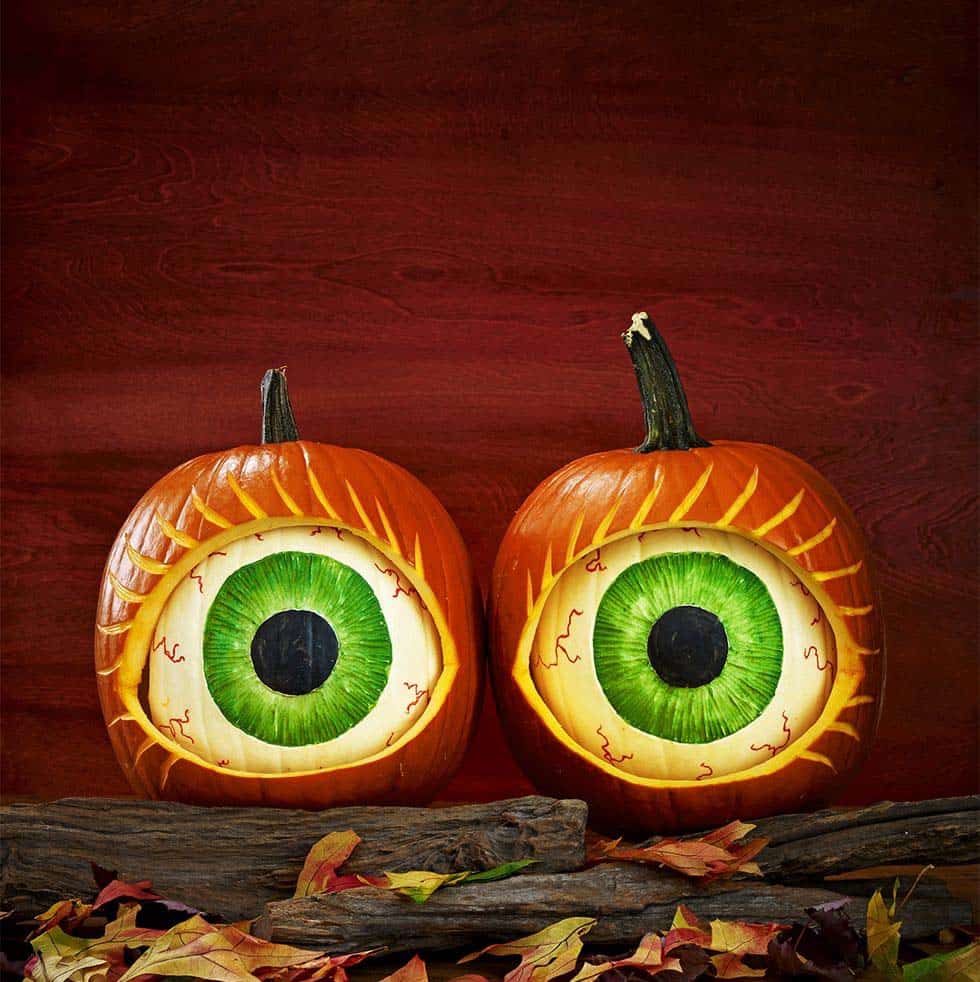
You will need two white pumpkins (with the stems removed) and two larger orange pumpkins. Cut a hole in the orange pumpkins to fit the white pumpkins and gut. Draw the iris and pupils on the white pumpkins, using diluted green acrylic paint for the iris and black for the pupil. Use a red permanent marker for the blood vessels. Full tutorial at the provided link. (via Woman’s Day)
18. Expressive Pumpkin.
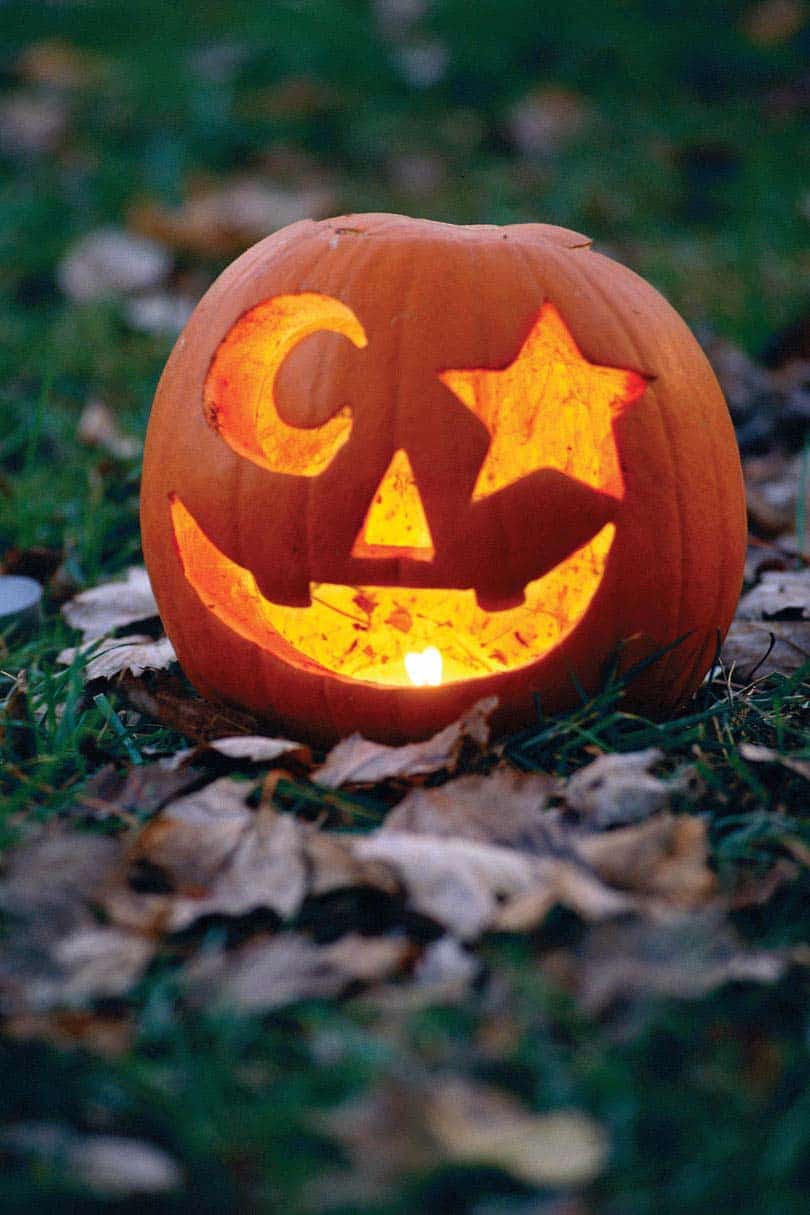
In this simple pumpkin carving idea, a crescent moon and star make expressive eye shapes. A classic triangle nose and toothy grin complete the look. Either freehand the shapes to cut out or use online templates to trace. TIP: Cut the lid at a 45-degree angle to gut the pumpkin, then use a timer-controlled LED tealight to illuminate. (via Southern Living)
19. The Witch Pumpkin.
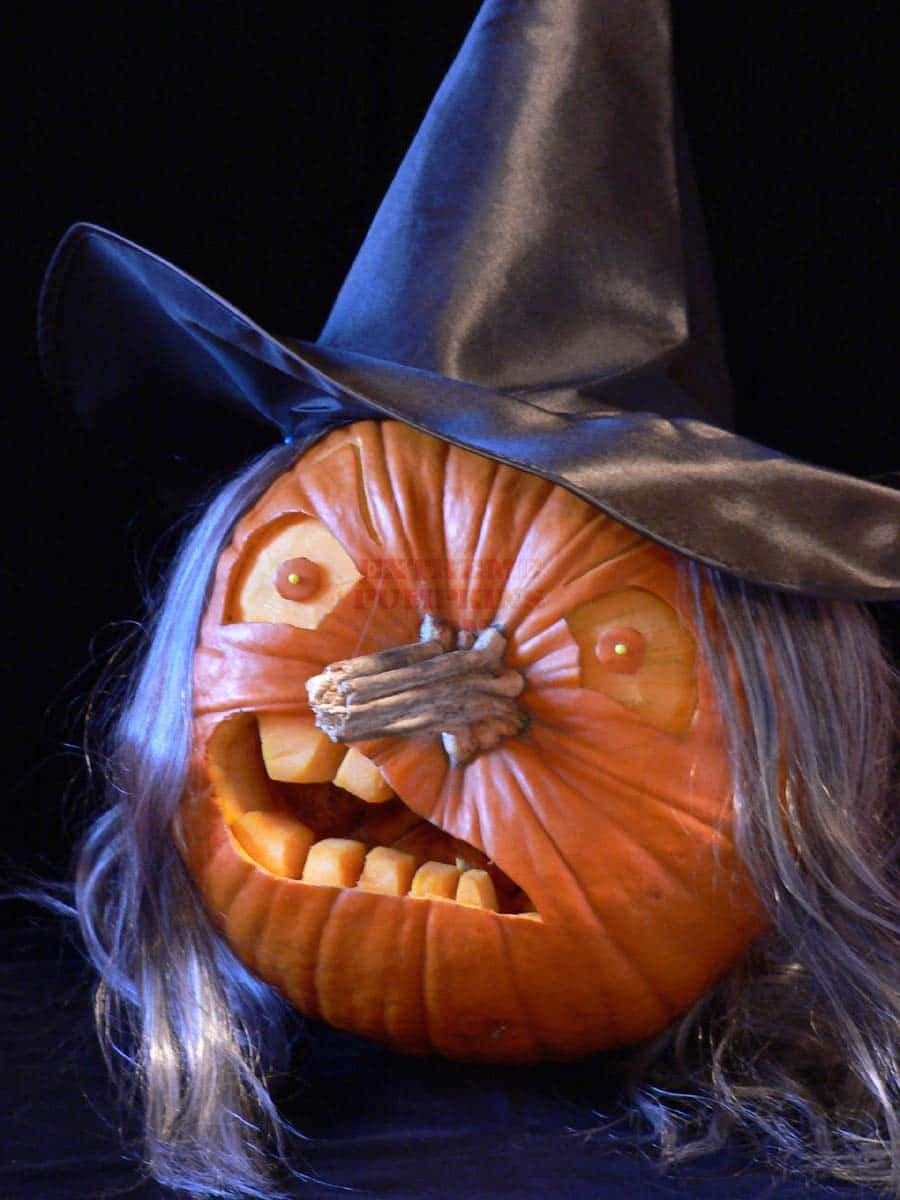
For this pumpkin carving, you will need a witch’s hat, a gray wig, and an orange pumpkin. Use the stem for the nose; cut out eyes, mouth, and teeth. Use a template or sketch the shapes freehand. (via Extreme Pumpkins)
20. Cannibal Pumpkin.
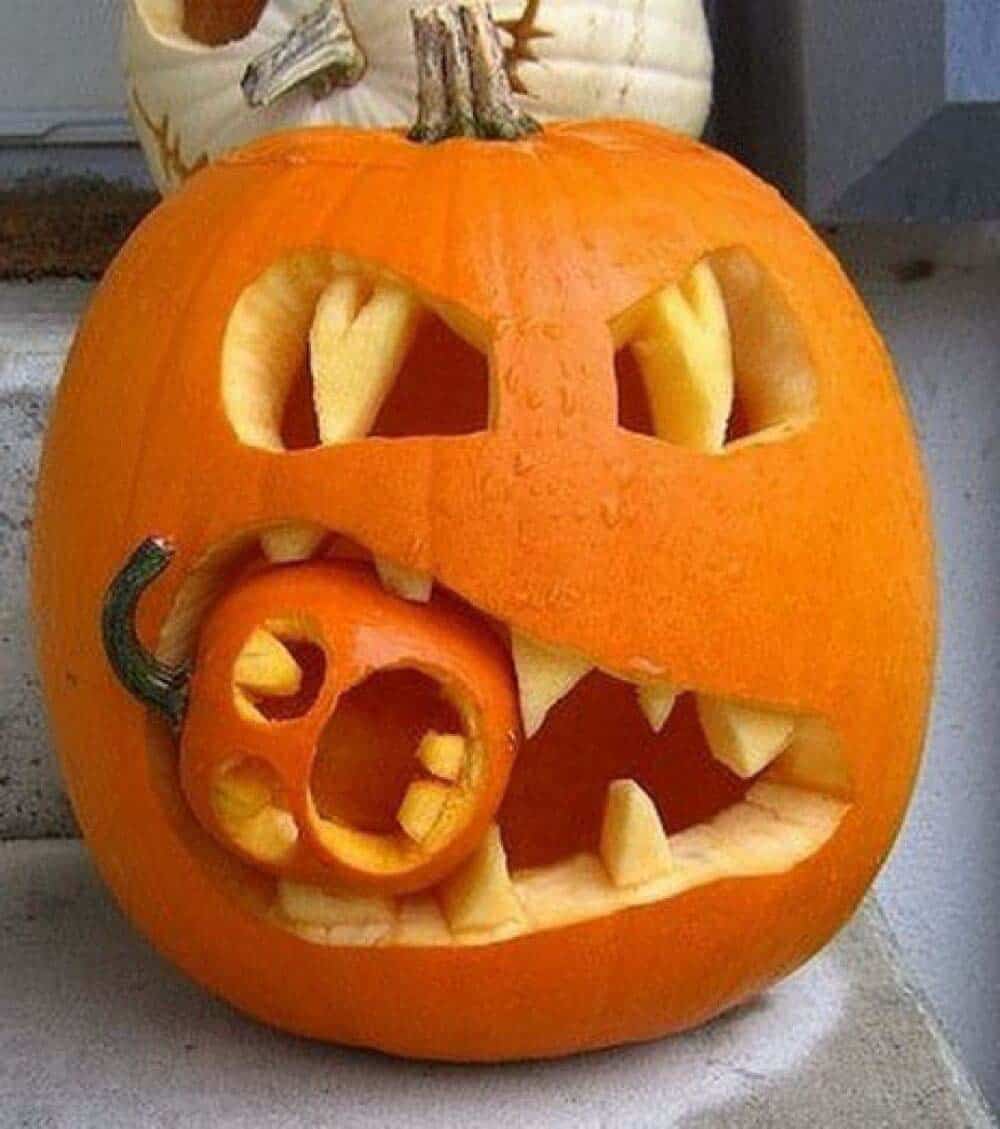
You will need two pumpkins for this project, one large and one small. Cut open the lid at a 45-degree angle and scoop out the pumpkin’s contents. Trace out the eyes and mouth before cutting. Make one end of the mouth larger to fit the smaller pumpkin, which should have a scared face! (via flair.be)
21. Lollipop Pumpkin.
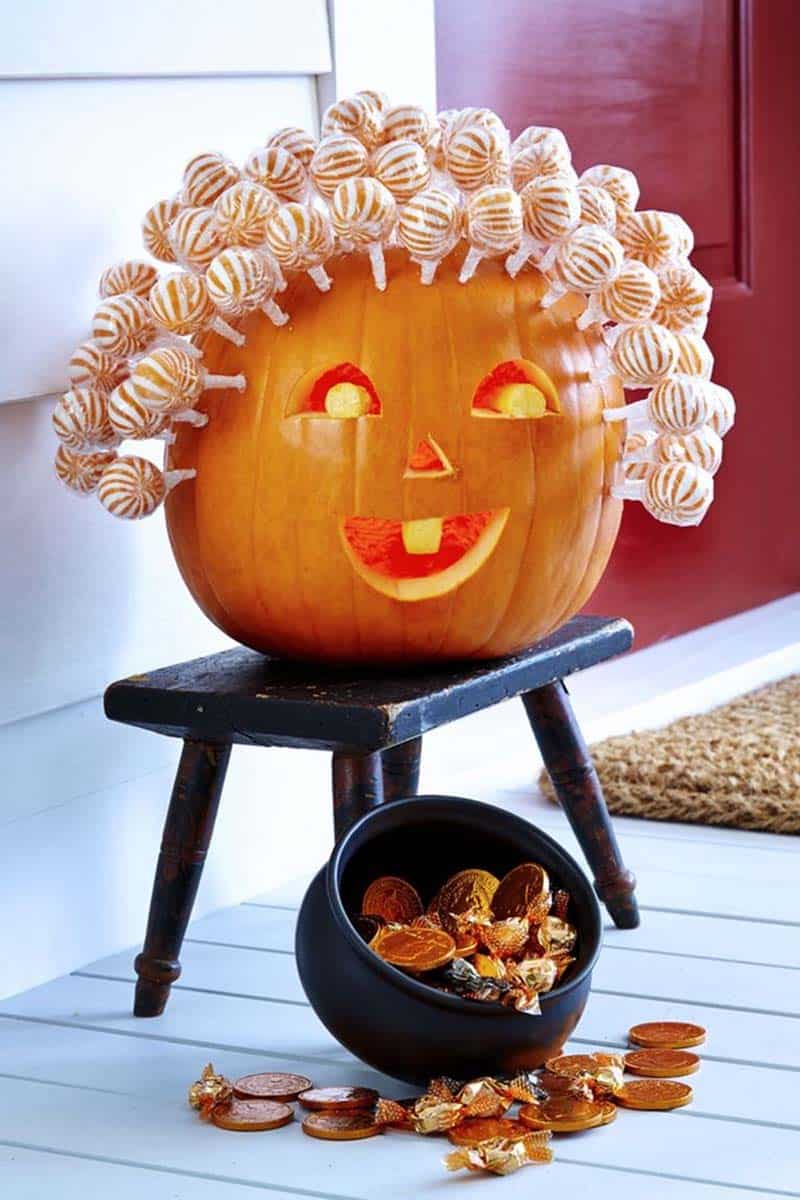
This pumpkin is a unique way to serve your trick-or-treaters’ candy! Hollow out the bottom of your pumpkin. Draw out the shapes before cutting. Push lollipops into the top of the pumpkin for hair. For further instructions, head to the provided link. (via Woman’s Day)
22. Black Pumpkin.
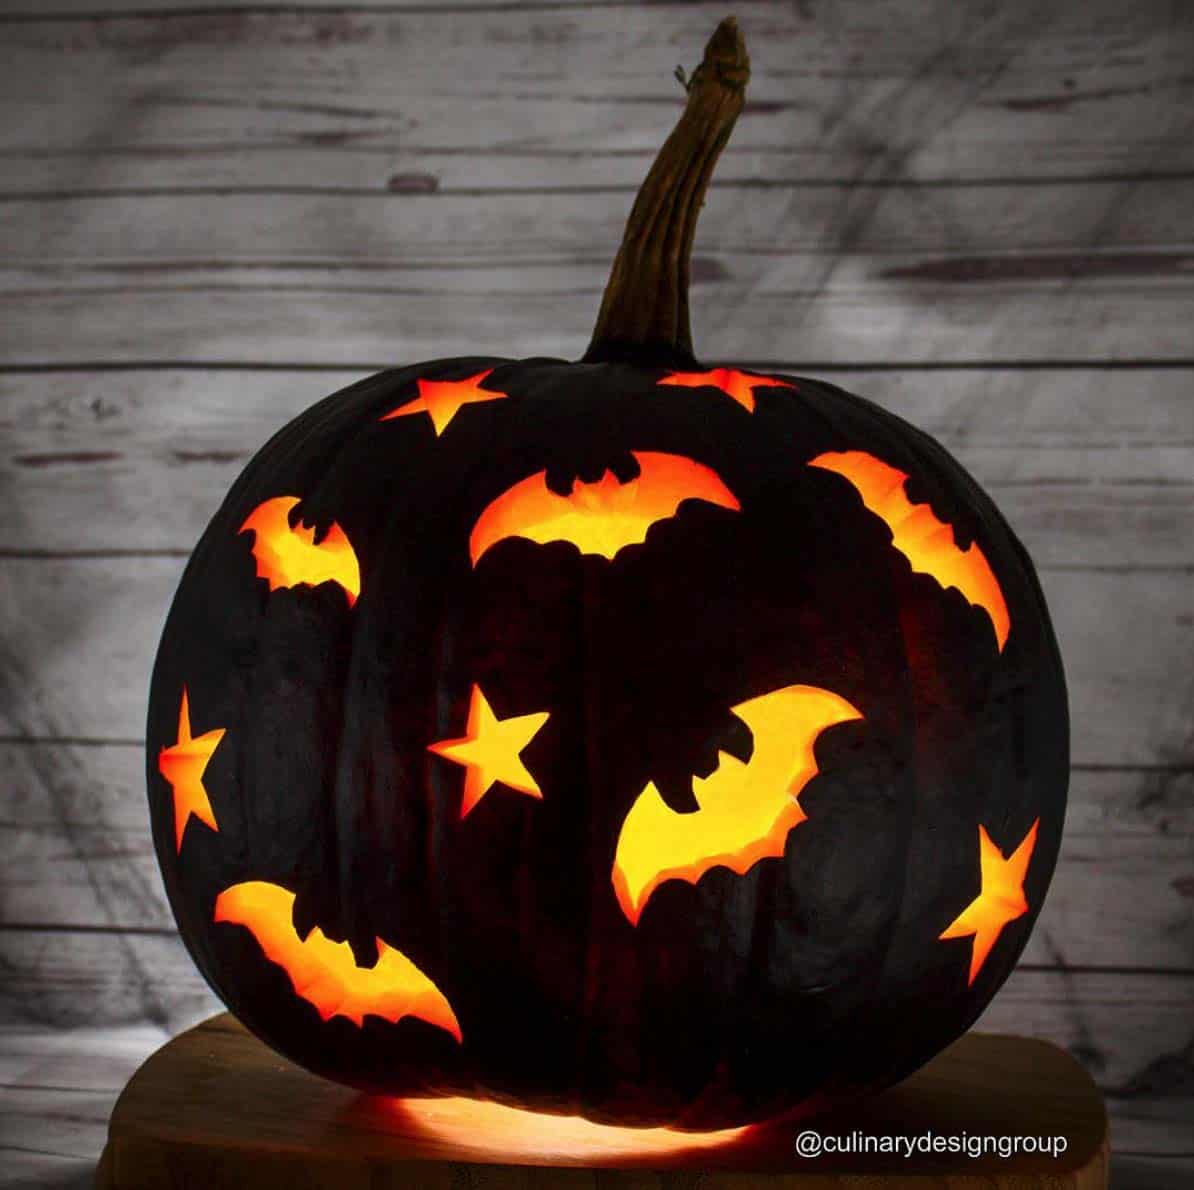
Gut a pumpkin, then spray paint it black. Cut out bat and star shapes using cookie cutters. (via @culinarydesigngroup)
23. Monster Pumpkins.
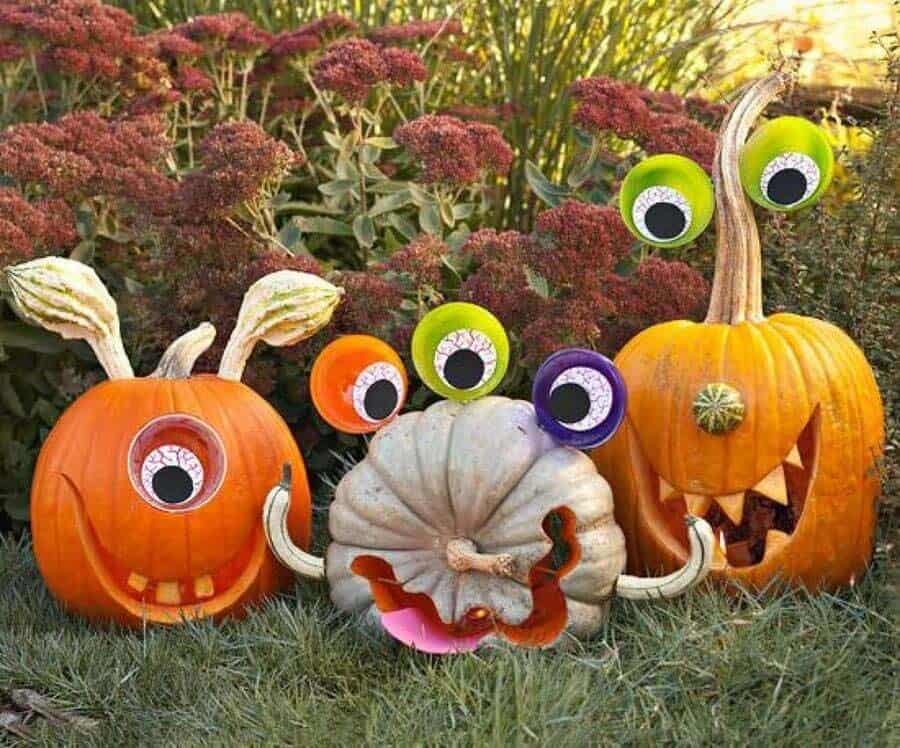
For this pumpkin carving project, you will need three pumpkins. Use smaller gourds for arms, noses, and antennae. Use craft foam for the eyes, and secure them with hot glue. Full tutorial at the provided link. (Better Homes & Gardens)
24. Corny Jack O’ Lantern.
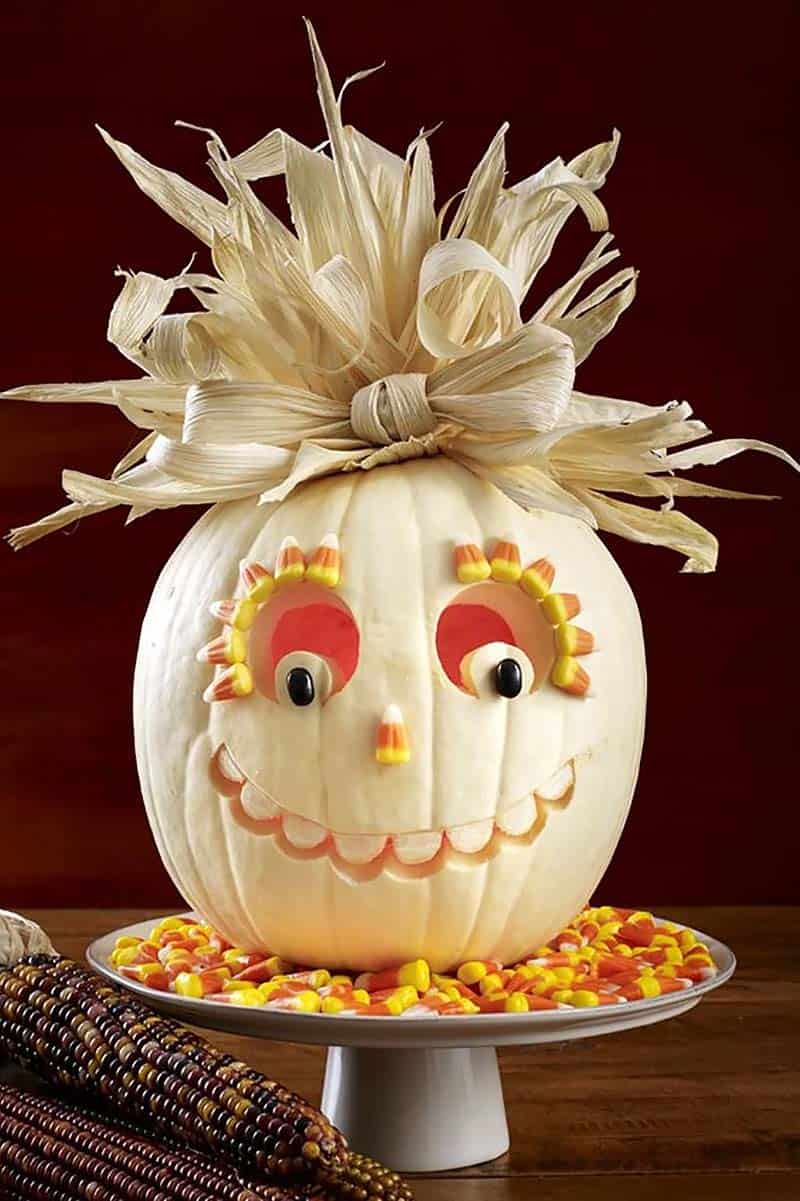
For this project, you will need a large white pumpkin, candy corn, two black jelly beans (pupils), and corn husks. You’ll need hot glue and straight pins to secure the corn husk hair in place. Get the full tutorial at the provided link. (via Woman’s Day)
25. Whiskers Pumpkin.
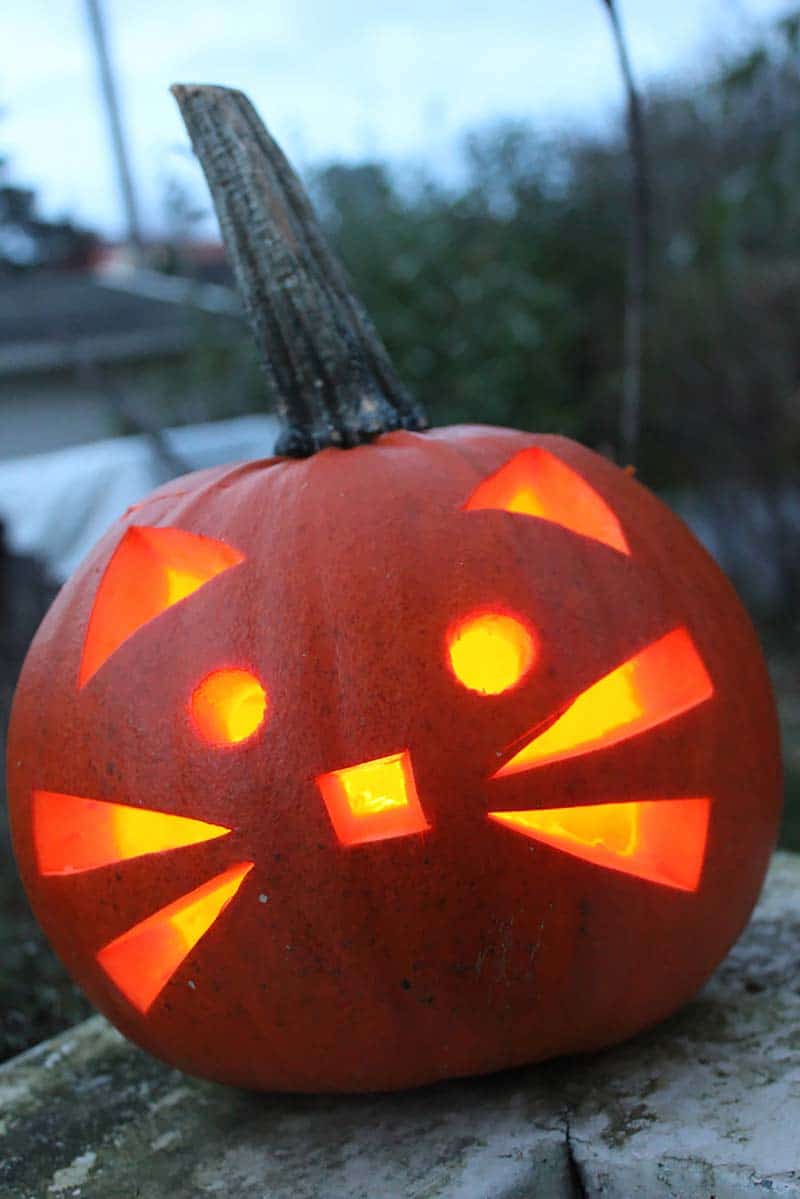
A pumpkin for cat lovers! Select a design with chunky features to simplify the carving process. (via Stardust & Sequins)
26. Bejeweled Spider Pumpkin.
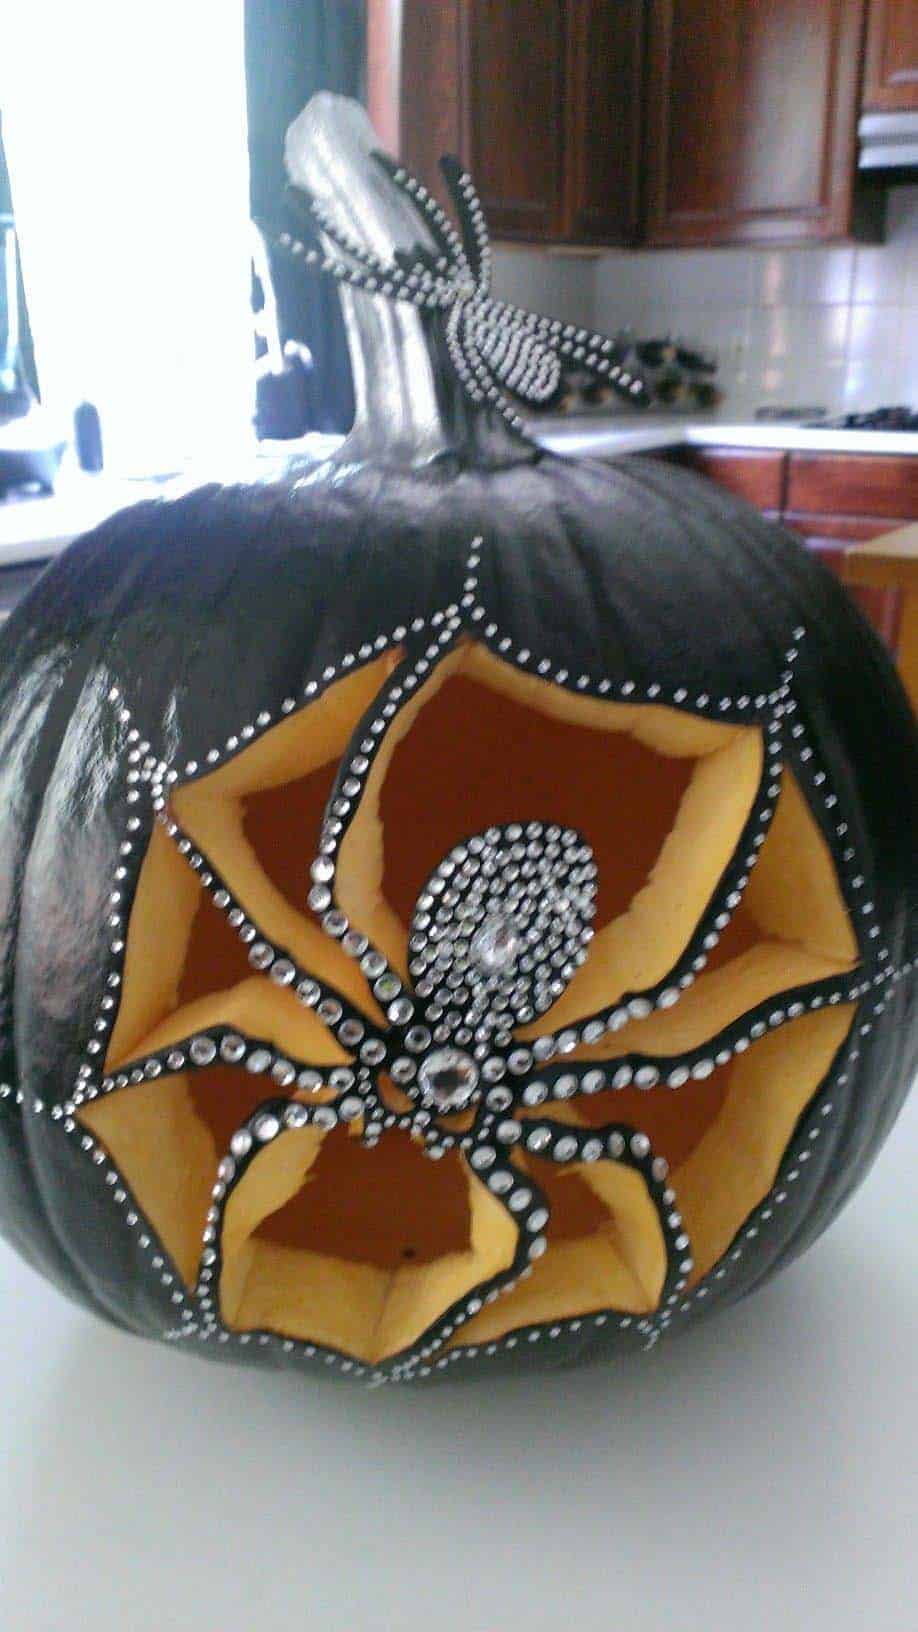
Spray-paint an orange pumpkin black, then add a silver stem. Sketch out a shape for a spider, or find an online template for your space. Use clear adhesive-backed craft jewels (available at Michaels) to affix them to your spider shape. (via Pinterest)
27. Scary Pumpkin.
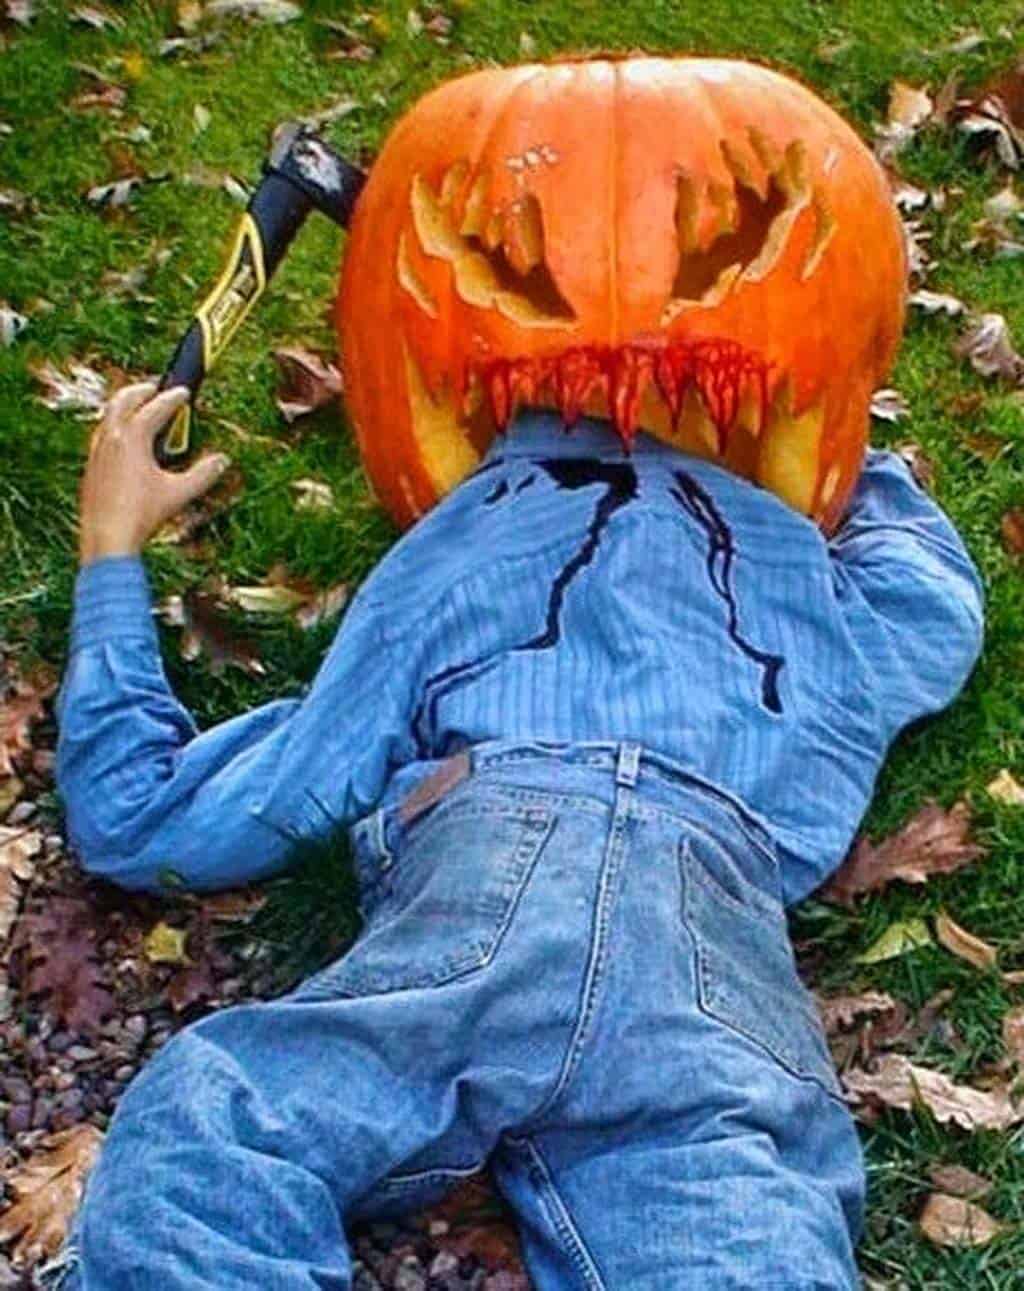
Carve out a scary pumpkin face with sharp teeth, painted to look like blood. Use old clothes or source materials from Goodwill to create the person, and stuff the body with items such as straw, hay, leaves, grass clippings, wood chips, and rags. (via Extreme Pumpkins)
28. Screaming Pumpkin Face.
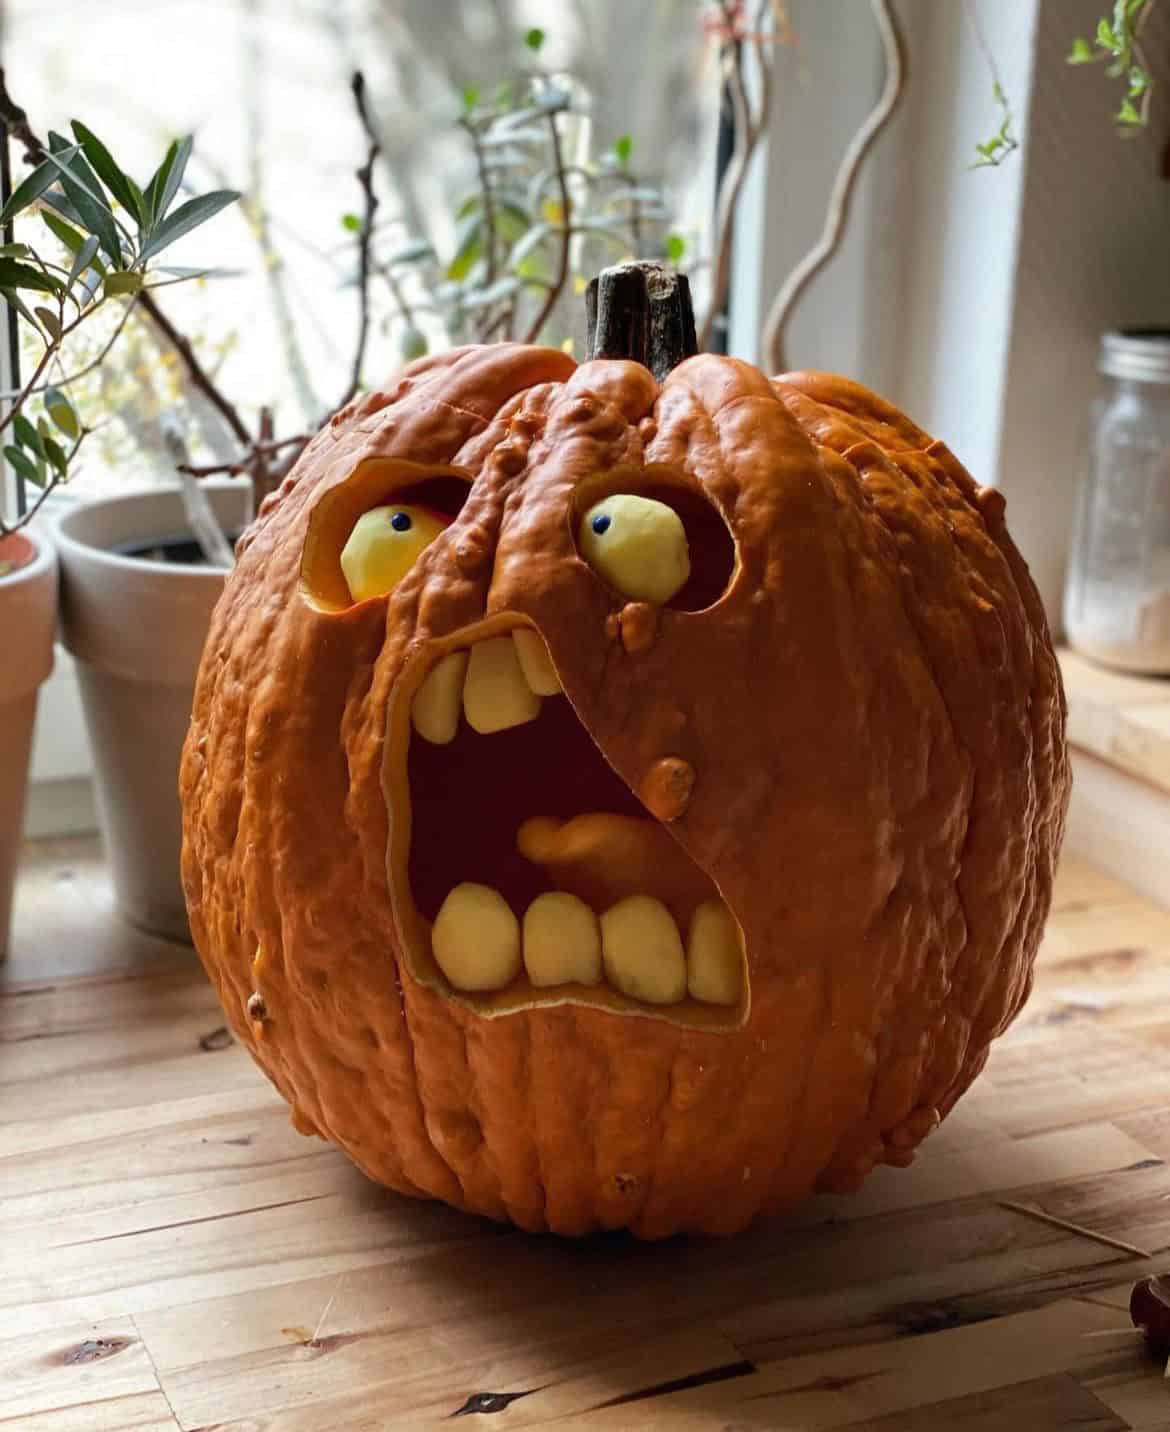
Select a bumpy pumpkin for extra character. Carve large, round eyes and a wide open mouth with jagged edges for a dramatic “scream” effect on your pumpkin face. Use small potatoes for bulging eyes and chunky teeth. Use a piece of your carved pumpkin for the tongue, and place it on your front porch to scare visitors. (via Philipp Kaluza / Pinterest)
29. Pumpkin Face Off.
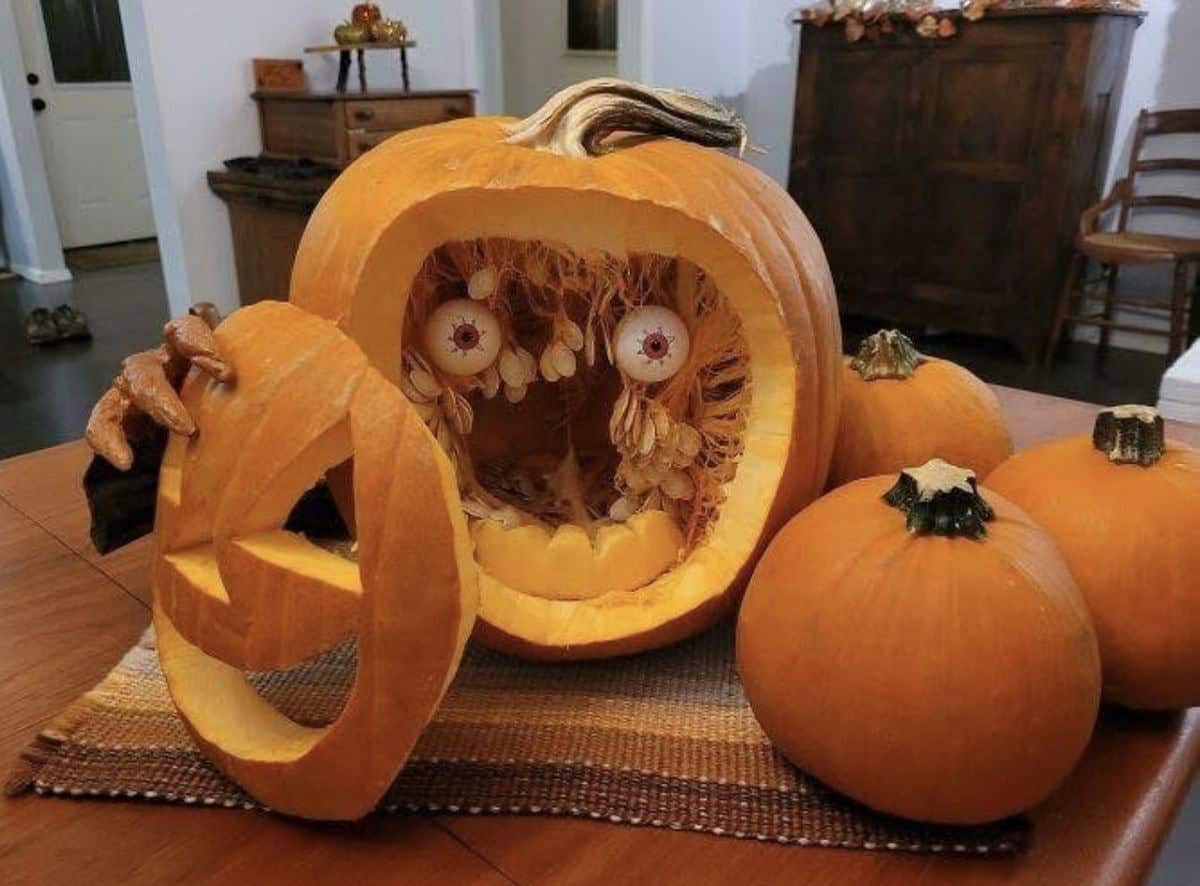
Carve a large pumpkin with a big, hollow mouth and scoop out the inside, leaving the seeds dangling for a spooky effect. Add eyeballs (use ping pong balls and a felt marker to draw the eyes). Cut off a circular “face” from the front and carve a simple jack-o’-lantern expression on it. Reattach the face slightly askew, using a ghoulish hand affixed to the pumpkin so it looks like the pumpkin is holding its own face! Try any party supply store to source the creepy hand. (via RoniandLulus / Pinterest)
30. Shocked Pumpkin Face.
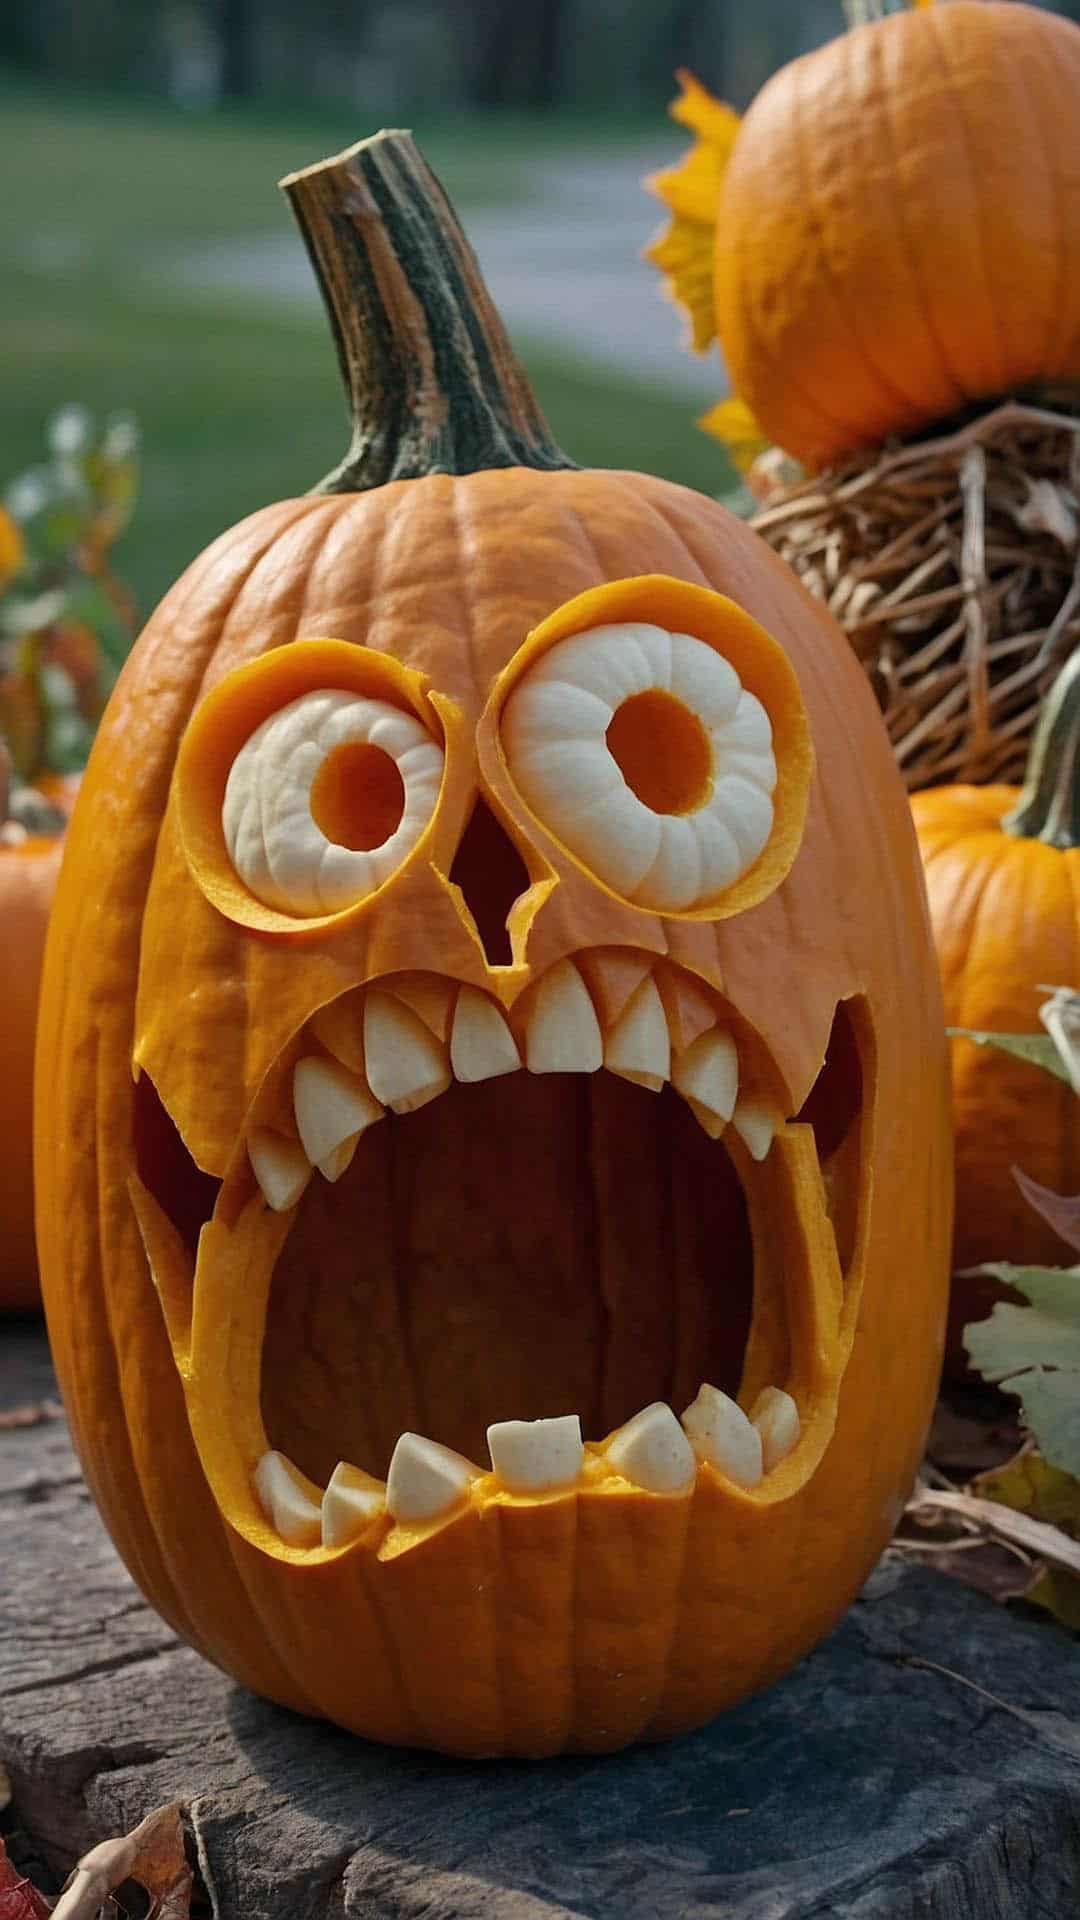
Carve a pumpkin with round eyes and a large gaping mouth, using miniature white pumpkins for the eyeballs and potatoes for the jagged teeth. (via Pinterest)
Pumpkin Carving Tips
- Choose a pumpkin with a sturdy green stem, no soft spots, and a flat bottom so it sits steady.
- Cut the opening in the back or bottom instead of the top. It keeps the stem intact and makes it easy to set the pumpkin over a light. If you do cut a lid, angle the knife inward at 45 degrees so it doesn’t fall in.
- Scrape the inside wall where you’ll carve to about an inch thick. It’s easier to cut, and more light glows through.
- Trace your design with a washable marker, or transfer a stencil with pushpins, before cutting.
- Use battery-operated LED candles. They’re safer, and they won’t cook the pumpkin from the inside.
- To make carved pumpkins last longer, keep them out of direct sun, rub petroleum jelly on the cut edges to slow drying, and move them somewhere cool on warm days.







3 comments